How to fold a paper gift envelope. Envelope from A4 sheet, as well as from notebook leaves: different models without glue. Gift envelope for money
Designer interpretations have extended to literally every little detail. Standard classic items become fashionable ideas and objects for the realization of fantasies. One example is an envelope.
What could be special about it? A sheet of paper folded in a certain order. And how can it be applied, except for a postal letter? There are options! These are decorative “reservoirs” in which gifts are given, memorabilia are stored, and money is transferred, in the end.
It is of great importance in what form a person receives a birthday present or New Year. Even if the envelope contains an inexpensive trinket or a symbolic amount, the hand-made design itself will give a lot of pleasant impressions.
Classic example. It can be done both on regular white paper and on colored paper. It does not stand out in any way and is most often used to create a kind of “money bag”. If you have to pay for the session, then it is better to do it with minimal costs.
What you need:
- paper. Smooth, clean sheet;
- glue. PVA or pencil - whatever you have;
- scissors, ruler, pencil and eraser.
If you have perfect vision and are able to measure distance without additional means, you can abandon the ruler.
But remember, if you don’t keep the proportions and fold it “by eye”, it will turn out crooked, askew and ugly.
Sequencing:
- Cut a sheet of paper to a square shape.
- On the side that will be the inside of the envelope, determine the center. To do this, using a ruler, draw thin, barely noticeable diagonals. The place where they intersect is the center.
- Bend two opposite corners of the square, bringing the ends together in the center. Push the fold line well, fixing the position.
- Fold the third corner. The base of the bottom triangle will be the bottom of the envelope. To avoid gaps, the fold line should be slightly higher than the lower corners of the side triangles. This way the top corner of the bottom triangle will be slightly above the center. Push through the fold lines.
- Open the “envelope” and erase the diagonals with an eraser.
- Assemble the envelope by folding the protruding edge of the bottom triangle inward - it should be flush with the center. Glue along the perimeter of the lower triangle. Advice - it is better to use a glue stick. It will not cause the paper to swell or change shape.
- Fold the “lid” - the corner should reach the bottom of the envelope. Press the fold line well. Ready!

How to make a paper letter envelope with your own hands
If you are planning to send a letter by mail, keep in mind that postal envelopes have certain dimensions and weight, therefore, failure to comply with the standard will lead to the fact that the letter may not reach the addressee. It is better to clarify the details by mail.
The letter envelope has a strict appearance – white and rectangular in shape.
The tools are the same: paper, scissors, glue, ruler, pencil and eraser.
Sequencing:
- Take a sheet of A4 paper. Measure one centimeter from the wide sides and bend. There was a kind of fold along the sheet.
- Measure along the fold line 10 cm from one edge and bend. There was a pocket that was not glued together and a very long tongue.
- Measure 2 cm from the base of the tongue and cut off the excess length. Round the edges.
- Open the “envelope”. Glue the fold of the longer part to the main sheet.
- Apply glue to the outer side of the hem of the short part and glue it to the long part. The envelope is ready.

How to make a large envelope from A4 paper
The simplest and fastest method. For it you will need an A4 sheet of paper, glue, scissors and a ruler. The paper can be white or colored.
- Measure 7.2 cm along the wide side on the bottom right and top left. Draw lines to the corners up and down, respectively.
- Cut off the resulting triangles. We leave the rhombus, throw away the triangles.
- We bend the left and right corners of the diamond inward, leaving a distance of about 7 mm between them.
- Fold the bottom corner so that there are no gaps. Apply glue to the bottom sides of the side triangles and glue to the bottom. Ready.

How to make a money envelope out of paper without glue
The simplest method, which does not require any additional items other than paper, is an envelope with a square. The finished result will be small in size and with an unusual clasp. The A4 format is considered as an example, but other dimensions can be used. You can use both colored and white paper.
- Attach the short side of the sheet to the long one. A triangle is formed. We push the fold line. Cut off the excess part of the sheet - a rectangular single-layer area.
- We turn the triangle with the base towards us. Bend the top corner. The tip should touch the base. We push the fold line.
- We bend the right side inward.
- We bend the left side inward.
- We bend the edge of the left side in the opposite direction. The fold line runs in the middle of the base.
- We open the resulting “tail” into a pocket.
- Fold the pocket into a square.
- Ready. All that's left to do is bend top part and tuck the tip into the square pocket.

A more elaborate and labor-intensive option is to use tape.
Such envelopes, as a rule, are not limited to just colored paper. They are additionally decorated with twisted patterns, beads, and glitter. It is customary to use patterned stencils to cut out the shape. Instead of standard paper, thicker paper is used. For example, thin cardboard.
The scheme is simple:
- a stencil is cut out;
- in the places indicated by black stripes, make slits for the tape;
- the envelope is pressed along the main lines (the perimeter of the inner square) and assembled - the upper and lower parts are internal, and the side parts are external. You can put money;
- The tape is placed under the product and threaded through the slots. It is tied on the front side. Ready!

How to make a beautiful paper envelope
Antique
You will need: a sheet of paper, a wax candle, a wide brush, coffee or tea, a signet.
Sequencing:
- Fold a simple envelope out of paper. Do not glue.
- Unfold it and use a brush to paint it with strong black tea or coffee. Let dry.
- Fold and seal the envelope, leaving the “lid” free. Place a gift/letter.
- Fold the lid, press the fold line well and press the tip to the envelope. Drip wax and squeeze out the seal. Ready!

You can use any type of printing improvised means. For example, cosmetic caps or carved wine corks. Wax candles can be easily replaced with paraffin or gun glue, which comes in various colors.
Inside out
To create it you will need:
- ready-made envelope stencil;
- plain, double-sided colored paper to match the envelope itself;
- colored paper for the back. The reverse side will require significantly less paper. In addition, it should stand out clearly against the background of the main one.
Sequencing:
- Cut out the envelope using the stencil.
- Fold it, pushing through the fold lines, but do not glue it.
- Cut the inside out according to the shape of the envelope.
- Glue it into the inside of the envelope. Assemble it and glue it together.

Envelope-box
Materials:
- thick paper (scrap, cardboard);
- scissors or stationery knife;
- glue;
- round shape (CD/DVD discs are most convenient);
- decor (ribbon).
Sequencing:
- Cut out 4 circles using the discs to trace the outline. Fold each circle in half.
- Apply glue to ¼ of each circle in the same place.
- Glue the circles together according to the principle of closing a cardboard box. Let it dry.
- Place the gift, close the envelope like a cardboard box and decorate it with decorations - tie it with a ribbon.

Simpler, but no less cute envelopes are decorated with decorative animals or flowers. You don’t have to strive to achieve ideal shapes - clumsy penguins cut out of ordinary colored paper look much more charming than the highest quilling technique.
A standard white envelope is decorated with ribbons, lace, designs of various shapes through stencils and turns into a unique package.
A DIY paper envelope is beautiful, simple, unique and touching. Moreover, this gift wrapping option is kid-friendly. The baby will be proud to have made it himself, and mom will be able to be touched and show off to her friends for many months.
Another idea for making a paper envelope is in the next video.
Send a letter - modern youth associates this action only with by email. But sometimes you have to send paper letters, but they require an envelope. In the era of electronics, you won’t find such a small thing in every home, so you have to think about how to make an envelope out of paper with your own hands. It seems like there is little wisdom, but without skill one cannot cope with such a task.
Sometimes you want no stranger to read a greeting card to your loved one, but sometimes you need to put money in the envelope as a gift. Therefore, we suggest you learn how to make an envelope from A4 paper. Watch the videos provided, repeat the steps of the instructor, and you will be able to cope with such a simple task.
First of all, you need to cut out a square from a standard rectangular sheet of writing or colored A4 paper by placing the short side to the long side and cutting off the remaining rectangle. Next we proceed as follows:
- By folding two corners together, we determine the middle of the inflection line.
- Having straightened the sheet, we connect one of its corners to the middle of the marked diagonal.
- In the resulting triangle, the ends are bent slightly further than the marked middle.
- To keep the envelope in place, the tips of the folded corners are inserted into each other.
The letter envelope is ready. If you put something in it, you can close the top triangular flap and, if desired, even seal it with glue. It will withstand even postage without falling apart or coming unglued. This is an extremely simple design that does not require complex cutting out of shapes and gluing individual elements.
A sheet of paper folded in half will not fit into such an envelope; it will have to be folded at least twice.
Video lesson:

If you use a standard A4 sheet of writing paper as the starting material, you will get a small paper envelope with dimensions of 92 x 135 millimeters.
To begin with, the A4 sheet is folded in half along the short side, the fold line is well ironed.
Then one side of the sheet is folded towards the fold line and bent back halfway. Several such bends form a dense multi-layer strip, to which the remaining free corners are folded. The entire envelope structure is bent along the edges of these corners, and the bend lines are carefully ironed.
The resulting bend lines are markings for further bends of the sheet, which already form the envelope itself. At this stage, you need to carefully watch the video instructions so as not to get confused in the sequence of folding the sheet. In some cases, it is necessary to mark the upcoming inflection lines with a pencil.
The corners folded inward keep the envelope from opening.
Video lesson:

From a standard sheet of A4 writing paper you can make a simple envelope for money.
- The sheet is first bent in half along its length, then again, and the midpoints of the sides are marked.
- The corners of the sheet on one side are bent to the center line, the sides are bent so that their edges do not reach the center line a little.
- The structure is folded in half to mark the bend line, the valve with bent triangles is bent inward.
- The structure is bent again, and its rectangular edge is inserted behind the bent corners.
The result is a rectangular envelope with a flap with curved corners that quite accurately matches the dimensions banknotes worth one thousand rubles. The front side remains clean, and you can make any congratulatory inscription or drawing on it. You can put a gift amount of money in an envelope and, without sealing it, hand it to the hero of the occasion.
Video lesson:
Today we want to tell you how to make an origami paper envelope in the shape of a square with your own hands. In our master class we will look at two schemes for assembling envelopes using the Japanese art of origami, and step-by-step descriptions With detailed photos will explain how to do them correctly.
Tools and materials Time: 10-30 minutes Difficulty: 4/10
- patterned colored paper for origami/scrapbooking;
- scissors;
- ruler;
- universal glue;
- pencil or pen;
- decorative adhesive tape or print with sticker.
Step-by-step instructions with photos
To make the envelope, we used sheets of glossy patterned scrapbooking paper that were originally square in shape. Of course, you can use any other paper you have at home, but then your envelopes won't look as colorful!
Congratulate your loved ones for the holidays with gifts packed in miniature paper envelopes made by you yourself! Undoubtedly, they will appreciate such a present!

You can easily involve children in making crafts and it will certainly be a fun and interesting pastime for all of you!

Method 1. Simple origami envelope
Step 1: Cut out a square
Take a beautiful one colored paper and cut a square out of it. If your paper is initially square, skip this step.
Step 2: Fold Diagonally
Take your square and fold it in half diagonally.
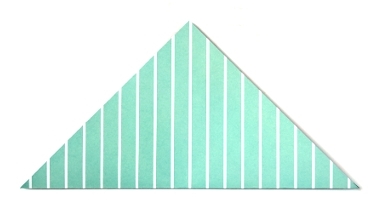
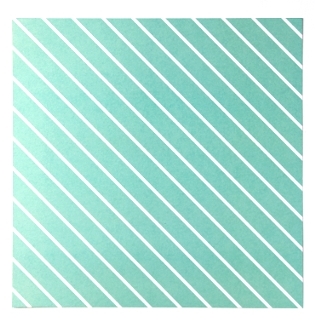
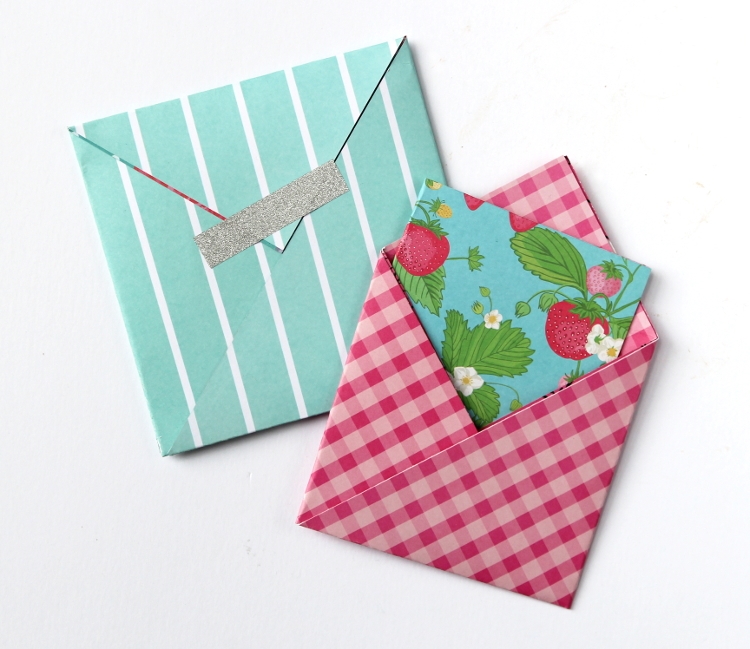
To make the largest origami envelope with sides 14x14 cm, we used a square of white and green striped origami paper measuring 30x30 centimeters. The medium envelope with sides 11.5 x 11.5 cm was made from a piece of thick glossy paper in a red and pink checkered pattern measuring 25x25 cm. And finally, the smallest envelope was made using a piece of colored paper with a strawberry pattern measuring 20x20 cm. Size The finished craft was 9x9 cm.
Step 3: Fold the Corners
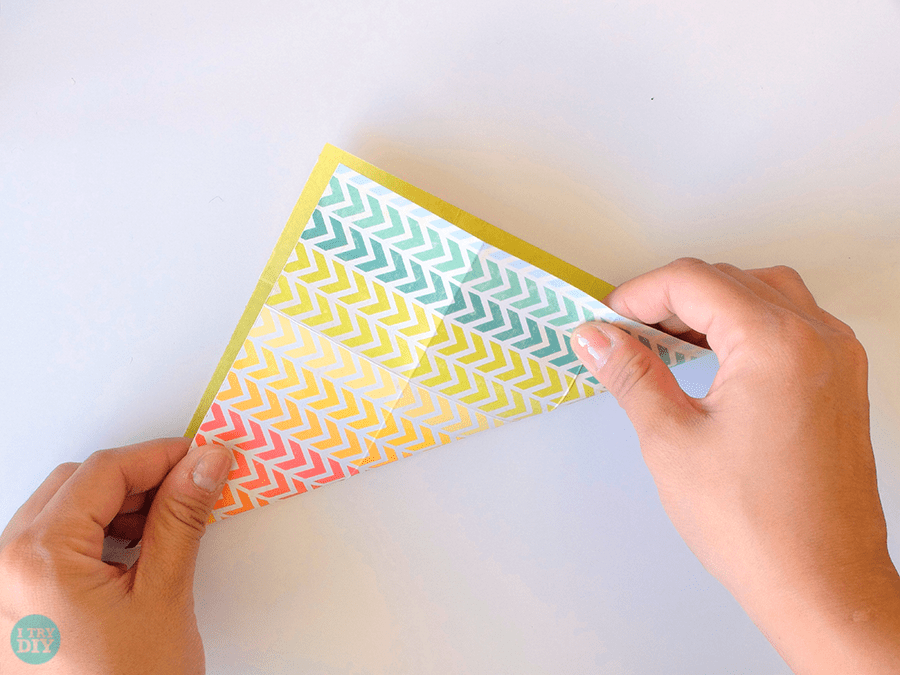
- Place the resulting triangle of paper in front of you, folded diagonally side down.
- Using a ruler and pencil, divide the bottom of the triangle into three equal parts.
- Fold the right corner of the triangle a third of its length forward and fold it down toward the left.

In the same way, wrap the left corner of the triangle by a third of its length towards the right side.

Step 4: Fold the Corners
You now have two open triangle pockets.

Open the triangles back up. Slide the left triangle and place it in the right pocket. Using a ruler or your fingers, carefully press all the folds so that the envelope is as even and flat as possible.

Step 5: Roll the Top
Using a ruler, fold the top of the craft down evenly and form a neat envelope.

A simple DIY origami paper envelope is almost ready! All you have to do is fill it with small gifts, treats or money and seal it with a sticker or a piece of decorative tape.

If desired, write on the envelope the name, address or affectionate nickname, as you are used to calling someone close to you. Don't forget to add sweet words and wishes!
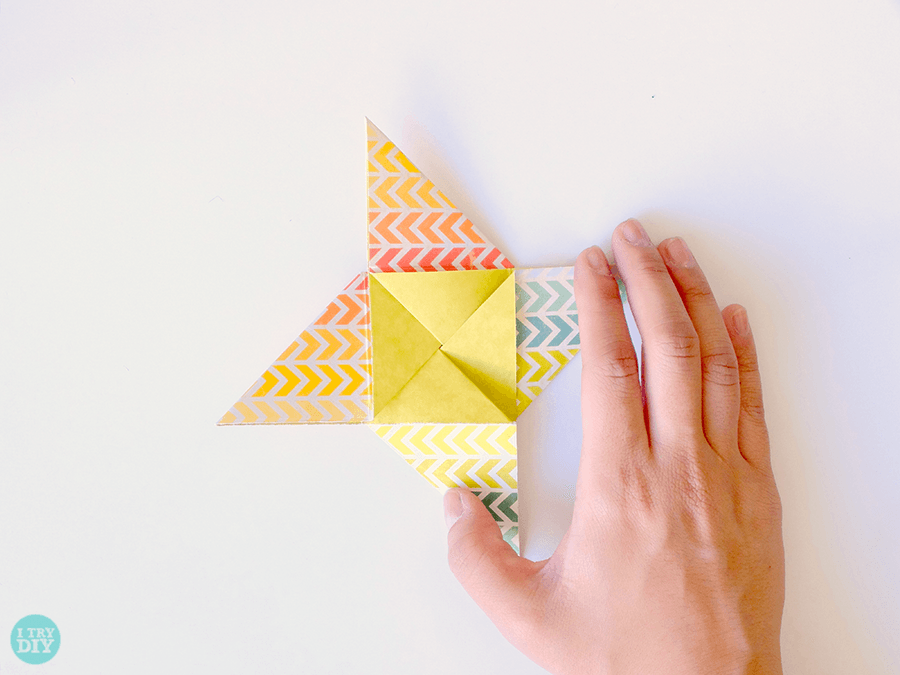
Method 2. Origami envelope from a square
This stunning origami envelope made from square paper has a double bottom. And if you decide to give a gift in such an envelope, you can create a double surprise by packing two different gifts in each bottom!

Step 1: Cut out a square
Cut out a perfect square from colorful origami paper. Keep in mind that the finished envelope will have sides that are 1/3 the length of the original sheet.

Step 2: Fold a Square
Using a ruler and pencil, divide one side of the square into three equal parts.


Make the folds as sharp as possible, which will make the work easier later on. Just don't crumple it too much, otherwise you might ruin the paper!

Repeat the same folds in the other direction.

You should end up with a square with nine identical square sections.

Step 3: Add Folds
Make a diagonal fold.
Repeat the diagonal folds in the other direction.

Take one of the corners and bend it to the point in the middle.

Fold the remaining 3 corners to the point in the middle. You should have the following folds.

Step 4: Make a Pinwheel
If you look carefully, you will see a craft in front of you in the shape of a pinwheel with folds. You need to keep this in mind for the next steps.
Take two opposite corners and pinch them with your thumbs and forefingers.
Holding the corners, slowly twist them clockwise on both sides. You will feel the corners being pulled in opposite directions. Here you should understand how to twist your paper towards the center.

You'll know you did it right when your square looks like a pinwheel with a square in the center.

Smooth the folds well with a ruler.
Step 5: Close the Envelope
Now let's close our square origami envelope! Take the left half and fold it towards the center.

Do the same with the bottom flap.

Close the right valve.
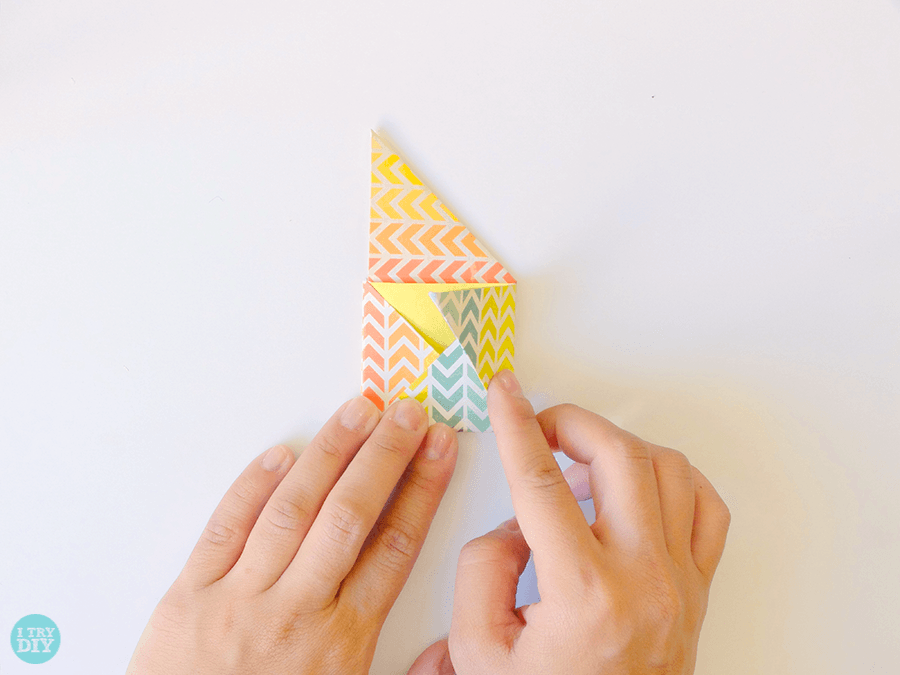
Tuck the remaining top flap into a small pocket under the first/left sinus. This will allow you to maintain the closing area.
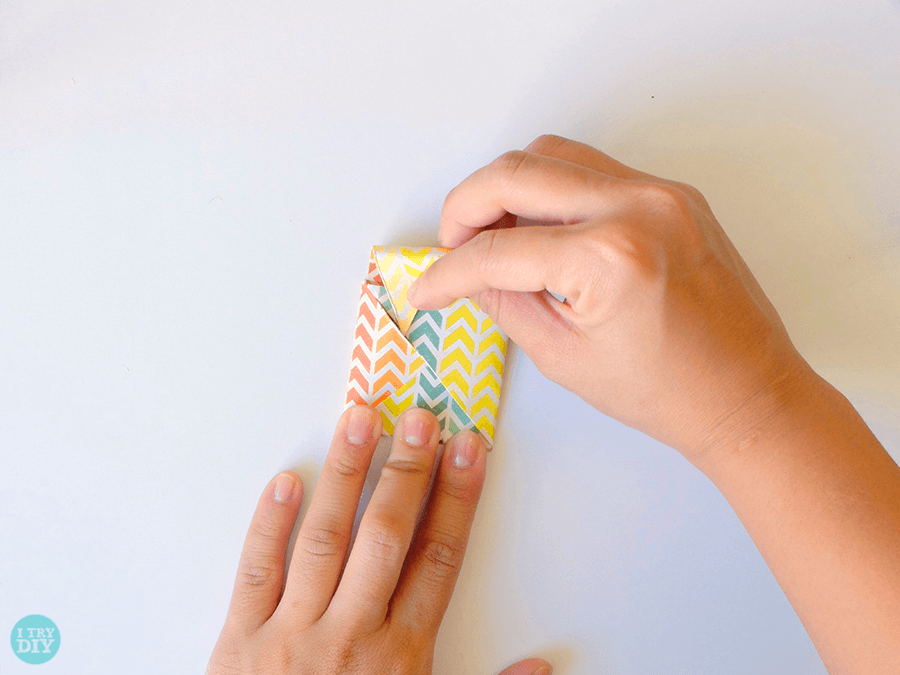
You did everything right!

Here you can see how to place a small sticker in an envelope. Instead of a sticker, you can use any small inscriptions, wishes or money. What would you put in such an envelope?

See how simple it is! We hope you enjoyed our tutorials with diagrams in which we showed how to make an origami envelope, and you will share with us photos of your products. And if you still have questions, watch the video, which clearly shows how to fold an origami envelope from a regular sheet.
How to make an envelope out of paper so that it looks original? Just follow the photo instructions, where each step is described. What is the envelope for? To send letters and other valuable correspondence. This is also an excellent place to store various small items and more. For example, in a bright envelope you can give money for a birthday or jewelry. The stores mostly sell boring white envelopes or colored ones, but with ridiculous inscriptions and drawings. Why waste money and time looking for a suitable envelope when you can make gift wrapping yourself.
Making an envelope out of paper with your own hands
Regular envelope
To create such an envelope you will need a square sheet of paper measuring 20x20 cm (the square can be made of any size, depending on the gift or correspondence that you want to place in it), a simple pencil, a ruler or an old credit card.
- Place a piece of paper in front of you, then fold it diagonally;

- Fold the resulting triangle in half. Do not press the fold line too hard to prevent creases from forming on the paper;

- Expand the triangle, place a point with a pencil at the bend;

- Bend the upper edge of the triangle down so that the corner touches the point marked with a pencil;

- Now fold the second edge so that there is a distance of at least 1 cm between the ends of the triangles;

- Fold the right corner towards the center, smooth the bend line well (you can use an old credit card or ruler);

- Fold the left side in the same way. Please note that the edges protrude slightly beyond the middle of the envelope;

- Bend the left side a little, straighten it and insert the corner of the right triangle into the left one. This will secure the envelope so it doesn't fall apart. If you want to send a letter in it, first secure the edges of the envelope with glue for greater reliability;

- Now you know how to make an envelope for sending mail from paper. The finished version looks like this.

Envelope with a lock
How to make an envelope out of paper so that it is bright and original? It's simple. Experiment with colors and paper weights. It's just as easy to make an envelope from cardboard or wrapping paper as from regular paper. In addition to paper, prepare scissors (it is better to use small or manicure scissors), a pencil, and a black marker.

Envelope made of circles
This method of creating envelopes is even simpler than those described above, since here you do not need to try your hand at the origami technique. This is more like an application, and almost every resident of our country is familiar with this technique. To create such an envelope you will need thick paper or cardboard (it is better to take colored one), stationery scissors, PVA glue and a small piece of tape. How to make an envelope from circles? It's simple, follow the instructions.
Regular envelopes for sending letters are quite simple, they are too formal and do not require decoration. But what about gift envelopes? They must be decorated with ribbons, beads, beads, lace and applique.
The envelope can also be made from several types of paper at once, for example, use thick colored cardboard on the outside, and stick simple colored or gift paper on the inside of the cardboard. How to make an envelope out of paper? Easily! Don't be afraid to experiment.
Envelopes are used not only for letters, but also for money, greeting cards, and storing all kinds of small items. The versatility of a simple product is its advantage. That is why many people begin to think about how to make an envelope out of paper themselves.
Envelopes are used not only for letters, but also for money, greeting cards, and storing all kinds of small items.
It is not at all necessary to go to the post office or store to buy an envelope for letters. After all, you can do it yourself in a matter of minutes. The finished envelope will look no worse than a store-bought one. A homemade envelope boasts several advantages - firstly, individual design and unique decor, and secondly, the sizes required specifically for your needs, because envelopes come in both large and small. For example, girls really like to use mini envelopes for decoration. personal diaries— they put memorable little things dear to their hearts into them. Such a craft will bring a lot of pleasure, and a scan of the required size can always be found on the Internet - all you have to do is download and print.
What is necessary:
- ruler;
- pencil;
- scissors;
- glue;
- paper.
Production in stages:
- Lay the sheet horizontally on the work surface.
- Measure 72 millimeters from the lower left and upper right corners.
- Draw a straight line from the bottom mark directed to the center of the upper left corner, and from the top to the lower one on the right.
- On both sides, cut off the edges strictly along the marked lines.
- Bend the side corners inward so that they only touch, but do not cover each other.
- Smooth out the fold lines.
- Fold the bottom corner so that it slightly covers both side corners.
Apply glue to the edges of the bottom corner and glue it to the other two.
Envelope using origami technique (video)
Beautiful small decorative envelope: how to design and make
A beautiful voluminous envelope in the shape of a heart can be made easily at home. The original design of this design immediately attracts attention. This envelope looks festive and presentable.
What is necessary:
- decorative paper;
- cardboard;
- beads;
- ribbon.

A beautiful voluminous envelope in the shape of a heart can be made easily at home
How to do:
- Draw a heart on cardboard and cut it out.
- Transfer the drawing to the paper, retreating a centimeter from the top edge.
- Draw a straight line horizontally, departing twelve centimeters from the top of the sheet.
- Draw another line at a distance of ten centimeters from the first.
- Additionally, draw a pair of vertical lines in those places where the bottom line intersects with the contour line.
- Cut out the heart and fold it exactly along the lines.
- Attach a ribbon to the workpiece.
Additionally decorate the product with beads.
A4 sheet envelope
A paper envelope made using this method is not quite ordinary. The design, although simple, is very non-standard. Making an envelope turns out to be very exciting and educational.
Progress:
- First of all, fold the sheet in half, but not lengthwise, but crosswise.
- Smooth out the fold well, then unfold the sheet.
- Fold the top right corner, directing it towards the center of the fold.
- Perform exactly the same manipulations with the lower left corner.
- Fold the right edge so that the cut exactly coincides with the edge that was folded in the previous step.
- Using the same principle, bend the left edge.
- Rotate the workpiece ninety degrees and then bend the upper right corner so that its edge coincides with the lower edge of the structure.
- Bend the lower part of the structure and hide the bendable corner under it.
- Perform the same actions with the left corner.

The most simple circuit making an envelope from a sheet of A4 paper
Cardboard envelope: step-by-step instructions
Envelopes made from cardboard are much stronger than regular paper ones. They are often used to store a variety of small parts. If you use not ordinary cardboard, but colored cardboard with a pattern, then you can put a postcard, a small present or money that you plan to give to a loved one into the finished envelope.
Progress:
- Bend the cardboard crosswise.
- Bend the upper edge of the folded part, directing it downwards, while the cut should coincide with the lower edge.
- Fold the lapel in half again and immediately fold it back, noting the fold.
- Fold the bottom edge twice to the fold formed.
- Now fold in the top edge, as well as both bottom corners.
- Fold the side edges to a width corresponding to the width of the triangles that are already folded.
- Mark the folds and turn the corners.
- Bend the sides so that a pair of triangles is formed at the bottom of the workpiece.
- Fold the top edge along the fold.
- Lay out the bottom triangles and fold the side edges.
- Hide the bottom corners inside.
- Mark the folds, then pull the edges of the lapels and hide the upper corners.

Envelopes made from cardboard are much stronger than regular paper ones.
Fold up the top part of the structure and hide the corner.
How to make an envelope for money out of paper and how to decorate it
Naturally, the envelope in which you are supposed to invest money should look very beautiful. You can create such a masterpiece at home. It will take a minimum of materials and time, but the result of the work will be amazing.
What is necessary:
- pastel colored paper;
- paper sheet with a pattern;
- cardboard;
- ribbons;
- rhinestones;
- hole puncher;
- ruler;
- pencil;
- glue;
- scissors.
Progress:
- Draw a template for the future envelope on paper and cut it out.
- Small rectangular elements are slightly beveled towards the center.
- Mark all fold lines and assemble the structure.
- Mark the places where you need to make holes for the tape and pierce them with a hole punch.
- Decorate the workpiece with silk ribbons and rhinestones.
Pass satin ribbon through the holes.

You can decorate the money envelope as you please
How to make an origami paper envelope
A fairly simple way to assemble an envelope - in origami style. For needlewomen who are already familiar with this technique, the work will be incredibly simple. Those who have never created masterpieces in this way will be able to not only master the basics of craftsmanship, but also learn how to make envelopes in this simple way.
Progress:
- Bend the upper corners of the sheet towards the center according to the same principle as making a paper airplane.
- The upper corner, which was formed as a result of addition, must be bent down. In this case, the fold line should be parallel to the bottom, and the pointed end itself should be located slightly higher than the point of contact of the upper corners.
- Rotate the structure one hundred and eighty degrees and perform exactly the same manipulations on the other side.
- Fold the lower and upper structural elements in the very center so that the fold lines touch.
- Turn the workpiece over and unscrew the strips on both sides along the width.
- The result is a rectangle with only one lobar cut. You need to open it and fold the envelope over it.
- Remove a corner from one of the sections. In the future, he will close the paper envelope.
Origami envelope with a heart (video)
In order to make a paper envelope at home, you do not need special skills or a huge amount of materials. The work comes down to the simplest actions that even a child can handle. The finished product can be decorated with all kinds of decorative elements, such as beads, beads, ribbons, lace. In this case, you will no longer get an ordinary envelope for letters, but a real masterpiece into which you can invest money or a postcard. Any gift in this design will be remembered for a long time.