What cannot be attached to an email: sending folders, archives and other files
If you have a question about what cannot be attached to an email, then you've come to the right place. At first glance, the question is quite complicated, but if you properly understand it, everything will fall into place.
Email history
Before we even deal with what cannot be attached to an email, here's a little history. Mail of this kind appeared in 1965. Then the Mail program was first created. Due to the lack of some technologies, the system was somewhat imperfect. Later they created a mail server, to which messages were received.
With the advent of other e-mail systems, the mail gateway began to function. The popular Hotmail service has been used commercially since 1994. Then, in this event, it was heralded as the release from Internet service providers.
Already in 1997, the mail of the Yahoo service started working, Mail.ru began to work behind it, and a year later Yandex began to work. In 2004, Google ended this march of services with its Gmail.
Sending regular files
Can I attach a file to an email? Can. Before sending a report, photographs or audio to a friend or colleague, you should first create such material. You know that you can create text in Notepad or in Microsoft Office Word. Spreadsheet do in Excel. The presentation is created in Power Point.
All major document formats can be easily sent by email. To do this, you need to go to the site, for example, "Yandex", enter your mail, enter your username and password. Press the "Write" button or other similar options. At the very top line, you need to enter the email address to which the future letter will be sent. In the line below, indicate the subject of the message, for example, if you want to send a report, write "Report", if these are photographs, you can designate them. This is done in order to open your email, your friend immediately saw the contents of the letter on the subject of the message. 
So, further in front of you there will be a lot of space to write, say, an explanation for the file, or just introduce yourself. And below there will be a button Click Here, and it will appear. Here you can find your file, which is located on your computer. It is best to transfer material to send to your desktop, so you do not have to scour all folders in search of.
After the file is uploaded to the server, you will see a check mark next to it. Now you can send the letter. To do this, click the "Send" button below. Now let's take a look at what can't be attached to an email.
What about folders?
Few people know, but you can't attach a folder to an email. If you suddenly need to send a colleague a whole bunch of photographs, documents and audio recordings, then you will have to get acquainted with such a concept as an archive. This service will allow you to send several files with one document.
Who is, what is?
An archive is a file that contains all the required data, which in turn is compressed and reduced to its final size. The latter is necessary so that the total volume is suitable for uploading to the mail program server. To open the archive, you will need to click on it, in the dialog box you will find all the necessary files. Each of them can be extracted to the specified folder. 
The process itself is designed so that all unnecessary data in the files is compressed, thereby the total volume becomes smaller. Interesting fact: best compressible text files, they can be reduced by almost 90%. But audio files and various images do not have extra data, so their total volume in the archive remains unchanged.
But this does not mean that if the photos are not compressed, then they do not need to be archived for sending. After all, one file is much easier to send than 20. Besides, it will be easier for the recipient to download just one file from the mail program server.
So, we know that you cannot attach a folder to an email. And so we go into it, select all the files with the mouse and click "Archive". They are collected in one file and are ready to be sent.
Lesson topic: "Working with lists in a text editor."
Lesson type: lesson in explaining new material.
Lesson type: theoretical lesson with elements of a workshop.
The purpose of the lesson:
Educational: the formation of students' knowledge about the purpose and basic capabilities of a text editor Microsoft Word, mastering the ways of text structuring; have an idea of \u200b\u200bvarious types of lists, the purpose of bulleted and numbered lists;
Developing: development of attention, memory, logical thinking, independence;
Educational: education of information culture, discipline, perseverance, self-confidence.
During the classes
Organizing time.
Knowledge update
List the stages of creation text document. (Initially, the document parameters are set: paper size, orientation, margins. Then the document display mode is selected. After typing the text, it is formatted.)
Describe the sequence of actions for setting the size and orientation of the document page, the size of the margins of the document. ( Open a dialog box -File / Page Setup ... On the Paper Size tab, select A4 (210x297 mm) from the drop-down list. Set Paper Orientation -Bookstore (used by default). In the tabFields set field sizes)
How is the font size set? ( On the panelFormatting the field is locatedThe size , which offers a list of valid font values. The choice of a specific value allows you to enter data of the desired size from the cursor position, or change the font size of the selected word or character)
What actions can be taken when editing text? ( Depending on the incorrect execution of the user's actions, various types of editing can be distinguished: insert, replace, drag and drop, copy, etc.)
Describe the sequence of user actions when replacing a piece of text. ( Select a fragment of text and enter data from the keyboard, or paste the previously copied fragment from the clipboard. If an object is replaced by moving a fragment, then after selecting a fragment, it is deleted and the previously selected fragment is moved to its original position.)
Describe the drag -and -drop method (drag-and-drop). ( To move the selected fragment, place the mouse pointer on it and, while holding down the left button, move the mouse; to copy the selected fragment, press the keyCtrl and the fragment is moved to a new location.)
Theoretical lesson material.
To increase the clarity of a text document, it is necessary to structure it accordingly. One of these possibilities is to create Lists... In this editor, you can create bulleted and numbered lists. The former are used when listing and highlighting individual fragments of text, others are used to determine the order of presentation.
A paragraph of text is considered a list item. To create a list, you need to select the paragraphs that should be made elements of the list or place the cursor in the paragraph with which the list will begin. Then call the command Format / Listwhich brings up the dialog List.
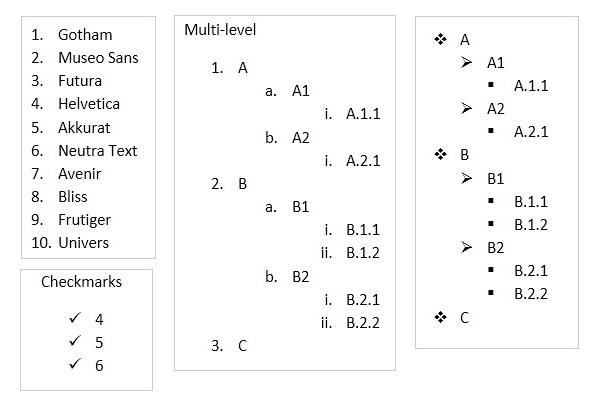
To create a list with symbols (markers), you must select an insert Marked... Each item in the flagged list is highlighted with a small icon to the left of the item itself. Among the proposed options for markings, select the appropriate one (click on it with the mouse) and click the button OK.
To change the type of mark, you can use the button Edit... A window will appear Modifying a bulleted list, which contains additional annotations. When the button is pressed Marker a dialog box appears Symbol, in which you can select any of the symbols as a list mark. In frame Marker position sets the distance from the left edge of the paragraph to the markup. In frame Position of the textdetermines the distance from the left edge of the paragraph to the left edge of the text in the list.
To create lists with numbering, use an insert Numbered dialog box List... Among the proposed list numbering options, select the appropriate one, click OKand the list will be created. When the insertion cursor is in the list, each press Enter creates a new numbered list item. When adding a new item to the list or deleting an item, the number in the list adjusted automatically.
To create your own numbering option, click the button Edit... A window will appear Changing a numbered list... In field Number format the text is specified before and after the number of the list item, for example :) or. In field Numbering - numbering style, and in the field Begin with... indicates the number (or letter) with which the list should begin. To change the font of the list item numbers, use the button Font.
You can quickly create lists with notes and numbers using the buttons and on the toolbar:
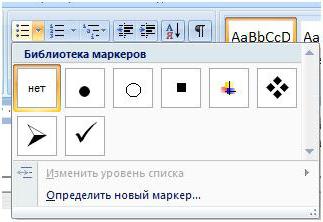
An insert is used to create a list with several levels of nesting. Tiered dialog box List.
The editor automatically keeps track of the numbering order in the lists. When you delete one element (paragraph), the numbers of the next paragraphs decrease, when you insert a new object, the numbers increase.
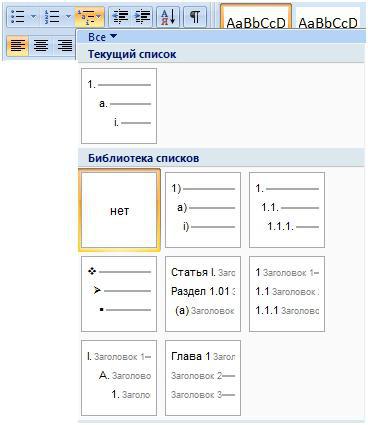
To create lists, you can also use the capabilities of the context menu. To do this, select the necessary paragraphs, set the mouse within the selected fragment and select the command List in the context menu.
Practical assignment.
The first way: setting the parameters of the list while typing.
Sample text with a numbered list
Transfer of information;
Start the text editor Microsoft Word.
Type the first line of a paragraph of text, press.
Click on the toolbar button Numbering, the number 1 appears (when you press the Marker the first marker appears on the line).
Type the text for the first paragraph and press. The insertion point moves to the next line, which is immediately numbered (2,3, etc.), or a new bullet icon appears.
To end the list in the next line, press the button again Numbering (or Marker) to remove the corresponding list item from the string.
Convert the already prepared list from numbered to bulleted. To do this, select all items in the list (as a set of lines) and click the button Marker... Notice how the view of the list changes.
The second way is to overlay the list options after typing.
Type the text according to the sample below.
Enter 3 ... 6 lines (future list items) as separate paragraphs by pressing the key at the end of each line.
Sample text
Elementary operations of the information process include:
Collection, transformation of information, input into a computer;
Transfer of information;
Storage and processing of information;
Providing information to the user.
Additional tasks.
Type lists in MS Word (single-level and multi-level) according to the following samples.
Copy.
Copying text using drag and drop
Determine the text to be copied and its destination.
Select the text and drag it while holding down the mouse button to a new location. Release the mouse button where the fragment to be copied should appear.
In the menu that opens, select Copy.
Copying text using drag and drop
Select the text and drag it while holding down the mouse button to a new location. Release the mouse button where the fragment to be copied should appear.
In the menu that opens, select Copy.
Determine the text to be copied and its destination.
Copying text using drag and drop
Determine the text to be copied and its destination.
Select the text and drag it while holding down the mouse button to a new location. Release the mouse button where the fragment to be copied should appear.
In the menu that opens, select Copy.
Copying text using drag and drop
Select the text and drag it while holding down the mouse button to a new location. Release the mouse button where the fragment to be copied should appear.
In the menu that opens, select Copy.
Determine the text to be copied and its destination.
Copying text using drag and drop
Determine the text to be copied and its destination.
Select the text and drag it while holding down the mouse button to a new location. Release the mouse button where the fragment to be copied should appear.
In the menu that opens, select Copy.
Copying text using drag and drop
Determine the text to be copied and its destination.
Select the text and drag it while holding down the mouse button to a new location. Release the mouse button where the fragment to be copied should appear.
In the menu that opens, select Copy.
Summing up the lesson.
What are Lists used for? ( It is problematic to read large texts if different means of visualization are not used. Lists allow you to structure theoretical material and increase the clarity of text objects).
What kinds of lists do you know? ( There are two types of Lists: numbered and bulleted).
How is a bulleted list different from a numbered list? ( Bulleted lists are used when listing and highlighting individual text passages. A numbered list is used to determine the order of presentation).
Typically, some information is best presented as a list. List views allow you to do this as conveniently as possible. If the user sees solid text, it will be uncomfortable for him to read.
HTML list views
Lists can be numbered and bulleted, which are also called unnumbered.
Numbered lists use Arabic, Roman numerals, letters and everything else, so you can make a listing.
Various markers are used (points, circles, squares, arrows, and so on).
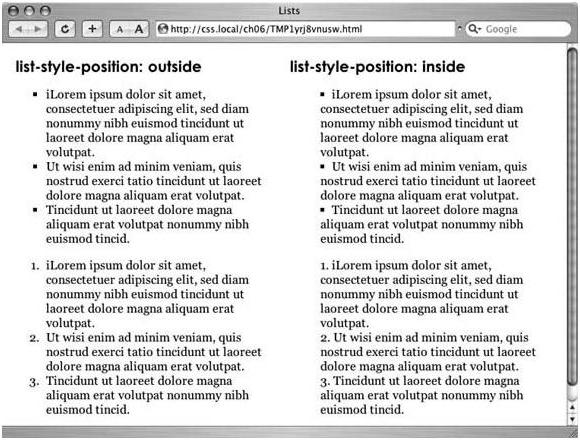
Here are some examples of sorting items in lists.
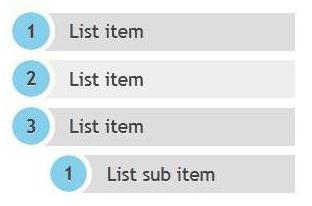
The figure above shows simple single-level lists. But documents can also use multilevel ones. There can be an infinite number of levels.
The figure above shows what multilevel numbered and bulleted lists can be.
Creature
It is very easy to create a list in html. The list views in html markup are very similar. They differ only in start and end tags. The list items themselves are marked with the same tag. You won't get confused here.
Consider an example of creating a numbered list:
This code is enough for a regular list with Arabic numerals. This sorting option is set by default. We will consider the remaining options a little further.
The bulleted list looks like this:
The difference is that an ol tag is used for a numbered enumeration, and ul for an unnumbered enumeration.
List views in Word
In the Word editor, the types of lists are created exactly the same. Moreover, some have the ability to export content from the "Word". These lists are perfectly transferred there and decorated with the appropriate tags.
If you find it difficult to compose yourself from scratch in html, then you can create it first in the Word editor. Then translate it into html markup.
Let's take a look at how to create lists in Microsoft Word. There is a special "List" panel. The list types are divided into groups there.
As soon as you click on a type, sorting options are immediately offered. In the picture above, you are asked to select the type of bullet for the unordered list. The same goes for the rest of the options.

When the multilevel list library opens, you can see the mixed sort there.
List operations
Any list can be converted in Word. The types of lists are selected through the main panel or through the right click. You need to select the text that you want to present in a similar form and press the right mouse button.
You can choose either a numbered or a bulleted list.

In addition, it is possible to set the starting position of the countdown. For example, you need to display items 10 through 12. But by default, the list will be from the 1st item. To do this, you need to set the initial value "10".

As you can see, the editor also allows you to change the indentation.
If you select only the 3rd item and press the right mouse button, it will be possible to start numbering again, from one.
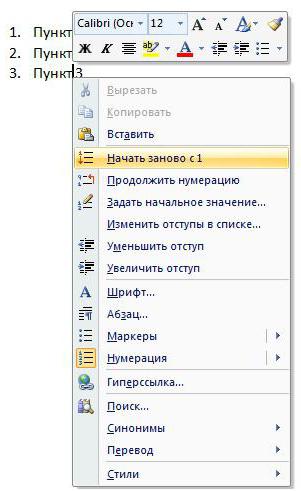
At any time, you can make a multilevel list from a simple list. To do this, you need to go to the item you need and again right-click the mouse. Then go to the menu item "Numbering" and at the very bottom click on "Change the level of the list".

In fact, there is nothing complicated here. All menu items are thoughtfully designed. The context menu (when you press the right key) always changes and depends on what you clicked on (list, link, picture, and so on).
Styling lists in html
You can decorate tags through style classes or individually each time. At the very beginning, a table was shown with various enumeration options. There were options for decimal, disc, circle and so on. This value must be specified in the list-style-type property of the class or style.
For example like this:
list-style-type: disc;
It is enough to specify the class sort to some list, and it will be represented accordingly.
You can set initial values \u200b\u200bin the Word editor. This was discussed above. The same is allowed in html as well.
This is done by the start attribute. An example of displaying items with an initial value of "5":
- Paragraph 1
- Point 2
- Point 3
- decorate with any color;
- set any indents;
- specify any font size;
- specify any font;
- adjust the distance between points;
- set the background color;
- set any markers;
- arrange with shadows;
- remove markers altogether;
- display items horizontally;
- create multilevel liststhat are completely different from the parent item, and more.
As a result, you will see the numbers 5, 6 and 7, not 1, 2 and 3.
In addition, you can specify where the marker will be located: inside or outside. An example is below.
You can also apply all sorts of CSS tricks to lists. That is, you can:
For example, a list can be represented as follows:
When designing your lists, the main thing is not to overdo it. They serve to facilitate the perception of information. There is no need to turn all this into a multi-colored disgrace.