How does the display differ from the touchscreen or how to correctly formulate which part is needed. How to change the touch screen on a tablet. For example, Acer Iconia B1.
Modern phones are equipped with touch screens, which are quite fragile and undoubtedly essential for work. After all, without a working screen, you cannot do absolutely anything. But is it possible to replace the touchscreen without replacing the display? This question worries many users of expensive new products, because repairs very often cost almost as much as a new model.
Before starting to repair the display of your smartphone, you need to delve a little into theoretical knowledge, because a modern smartphone is a device that consists of several functional elements. The main ones here are:
• Matrix - a liquid crystal panel on which an image is formed from pixels. The front side is equipped with glass, and the back side is made of steel. Also here are attached loops that are connected to the board and other small elements.
• Touchscreen - a glass panel that covers the entire front of the smartphone. Sometimes the matrix and the touchscreen are one-piece system, which leads to the replacement of both panels in the event of a breakdown.
• Keys and frames.
• Backlight.
• Several loops.
How to properly replace the touch glass
The touchscreen is always the first to suffer when it falls, and after that the matrix may also break. That is why workshop workers often resort to replacing the touchscreen, which is sometimes more expensive.
The sensor will be replaced in the following order:
• Dismantling the smartphone.
• Removing the module from the case.
• Fixing the screen and warming it up.
• Separation of either a touchscreen, or together with a matrix.
• Cleaning from glue and dust.
• Application to the matrix of glue and irradiation with a drying lamp.
• Installing the touch screen and removing excess adhesive.
• Assembly of the case.
• Assembly of the telephone.
How to replace the touchscreen with your own hands?
If the matrix and the touchscreen do not represent a single whole, then the option of replacing the screen at home is not something that is possible, but even needed. This will help to significantly save financial resources. But if there is an option about the breakdown of the device, then it is still better to seek help from specialists.
In order to replace a part of the sensor you will need:
• Small curly screwdrivers.
• Hair dryer or other heating device.
• Glue or tape.
• Gloves.
• Silicone suction cup.
• A plastic card.
• Scapula.
• Mediator.
Many of these devices come with a new screen.
Instructions for replacing a part of the screen:
1. Many may ask: what is a pick for? There is nothing supernatural here. With it, you can easily replace the phone cover without breaking anything. If everything you need is at your fingertips, then you can get down to business. First, the cover is removed, after which the SIM cards, memory cards and battery are taken out. 
2. Using a screwdriver, unscrew all the bolts and put them in a certain place so as not to lose one of them. It is worth noting that some models have a hidden bolt located under the cover in the upper left corner of the screen. Next, the panel is carefully unscrewed and the bolt is taken out.
3. Next, using a pick, the body is opened around the perimeter of the smartphone. It is necessary to carefully carry out operations with the device so as not to damage the parts inside the device. After the case is separated, you need to check the integrity of the latches.
4. After that, the buttons located on the sides of the smartphone are removed. To do this, you need to slowly pry them with a screwdriver, without touching the trains. Now you need to remove the orange tape from each of them, which is located under the keys. This can be done using tweezers, which are inserted into the loop of the loop.

6. The next step is to test the functionality of the new touchscreen. This can be done by first attaching in place of the old one, attaching the card to the side ribbon and turning on the phone. Once you get started, you just need to slide your finger across the new screen.
7. After the previous step has been taken, you can proceed to the complete removal of the old touchscreen. To do this, turn on the hair dryer and the screen warms up to a temperature of 70 degrees for 5-10 minutes. When the screen gets hot, you can start removing it. But do not forget about caution, because broken glass you can always cut yourself.

8. Do not touch the black screen because the sensor has already been removed. If something accidentally fell on him, then it can be removed with tweezers.
9. The next step is to attach the new touchscreen to the main body of the smartphone. First you need to remove the sticker and then reinstall it. Do not forget about the orange films that need to be glued back. The rest of the assembly is done in the same sequence as disassembly. When all the steps are completed, you can turn on the phone and use the new thing.
Should you resort to replacing your smartphone screen yourself?

After the entire article, only one question remains: is it necessary to do it on your own or is it better to turn to specialists? To give an answer, you need to take into account several nuances:
• If you are going to change the screen, then buying a new one is best through Chinese sites. All repair shops usually purchase parts in bulk and at this price you are unlikely to find anything.
• It is most profitable to change screens on cheaper models in salons, since on new products the cost of replacement will be almost equal to the price of a new device.
• It takes a lot of time to replace the screen at home. Yes, you will win in money, but not in time. Such operations can be performed only when you want to acquire new skills.
What you need to know about replacing the sensor on your phone?
Often, even knowing how, we think that the sensor and the front panel of the mobile device are not connected in any way. If such a panel is broken, we will have to replace the sensor.
If the sensor is broken, but still working, do not think that repairs will not be needed. Sooner or later, he will still fail, and therefore you should not hesitate. Efficiency is also important because in the future, replacing the sensor and screen will most likely not help.
The most advanced models of mobile devices today have a rather complex design. The screen of the device consists of glass, touchscreen (sensor) and display. The peculiarity lies in the fact that the module has an integral structure and all components are connected. This means that the screen will have to be changed along with the sensor. Let's figure out how the sensor is replaced on the phone along with the display using the example of the One V T320e device from HTC.
Instructions for replacing the sensor with Htc one V
So, before us mobile device One V T320e with broken screen... It is worth noting, not at all because of this. On the gadget, you will have to change both the display and the sensor. Today, all of this can be purchased in a set at any online store.
Let's start disassembling the device. On the back panel, we remove two special elements, fixed with latches. This is very easy to do.
Next, take a screwdriver and start unscrewing the bolts. Remove the protective element at the top. We try to do this as carefully as possible so as not to hurt the board. Raise the board (when assembling it, you will most likely have to glue it) and slowly "squeeze" the screen with your fingers. You can also gently pry it off using special tools.
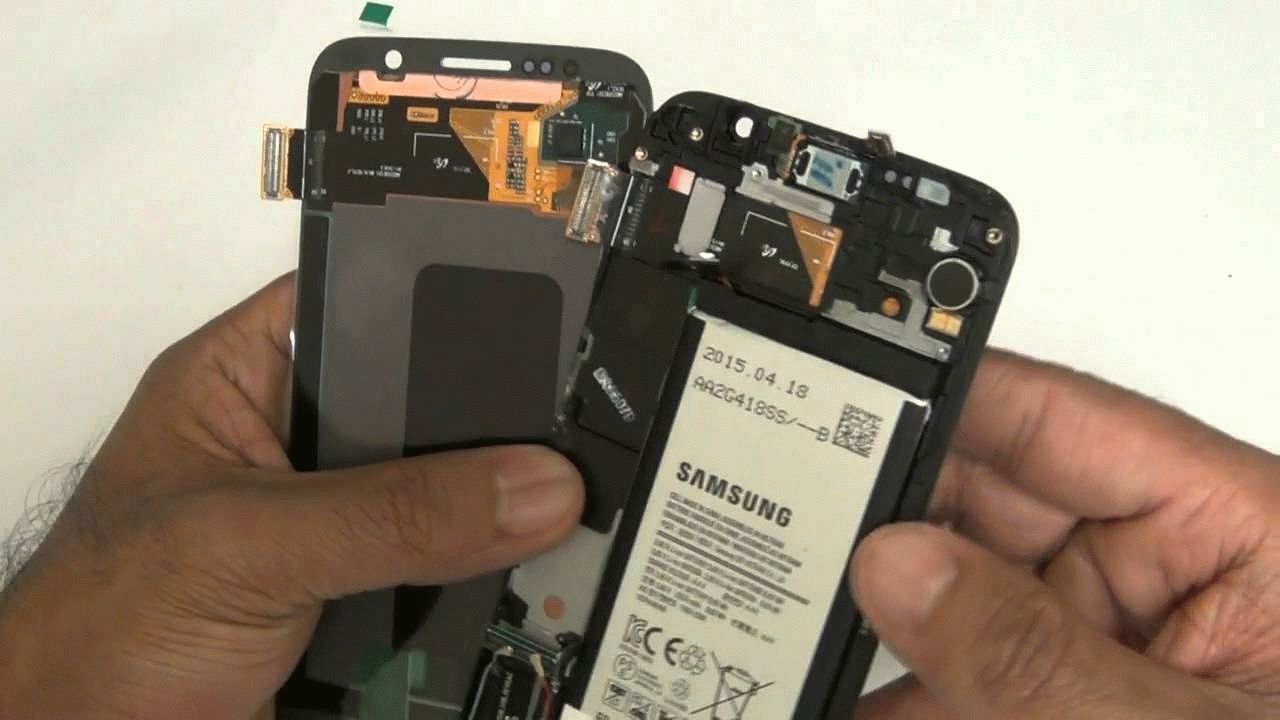
Remove the back panel, snap off the battery connector and remove it. We lift the battery and remove it. We unscrew the bolts on the board, having previously snapped off all the connectors and disconnected the cables. It is recommended to do everything as slowly as possible so as not to damage anything.
After the board is removed, we connect a new screen to it for testing. We connect all the trains and fill them with our fingers. We connect the battery. Also, don't forget about the power button connector. It is necessary to close it slightly, and then start the device in such a half-disassembled form.
We are waiting for the device to load. We check how and how smoothly it works, go to the menu, and so on.
Now you can proceed to the final installation. We warm up our old display to remove it from the frame at 200 ° C. Remove the heated display. The frame must be perfectly cleaned with a scalpel, as there should be no dirt left on it.
After that, we glue the frame with double-sided tape to glue the screen. Do not forget about re-gluing the display guides, otherwise the backlight will not work correctly. We insert our new module into the frame. We also lay the guides correctly. Remove the tape from the train.
We check how everything went and press gently. Now it remains to connect all the cables, put the board in place and assemble the mobile device.
I decided to post a video of how I changed the touchscreen on the tablet and tell you how you can do it easily yourself, and also offer options for removing a faulty touchscreen to replace it with a new one.
The options that I use, at least one of them is mechanical removal, is widely represented on the channels of the same YouTube.
But here is the second method that I will describe in this article, I have not yet met, for those who are afraid to replace the touchscreen with a mechanical method, my other method may be useful.
I use two replacement methods:
1- Mechanical method, this is when, when heated with an ordinary or soldering hair dryer, we heat up the places where the touchscreen is glued to the body with two-sided tape. Then mechanically, using flat screwdrivers or thin plates, we separate the adhesive tape from the glass and the case. This method requires skill and accuracy of work, as you risk damaging the device case. Suitable for devices to which the touchscreen is glued directly to the glass. It is almost impossible to recover at the initial level without skills.
2- The simple method is suitable for devices of phones and tablets, where the touchscreen can be separated from the screen and remain only on the body. That is, it is not fixed to the screen, but to the device body. By the usual separation of the part we need from the electronic one, where we have in our hands only the front part with the patient himself, without electronic components, as in May. It can be made easier. put this case in hot water and wait a while until the tape warms up, then you can easily separate it from the case with your hands.
I personally did the first method:
Replacing the sensor on your phone with your own hands is not a super difficult task. In this article, I will show you how to replace a sensor on a phone, with a minimum of knowledge and a primitive set of tools.
Replacing the sensor on all devices, except for those where the display and sensor are combined into one module, is performed in the same way. Therefore, this manual will help a lot, even in spite of the phone model. There may only be differences in disassembly, but the technology and order will be the same for almost everyone.
They tried to close the door with such a device (it was in my back pocket, and the door was closed with a booty). The door, of course, was closed, but the phone could not stand this violence and happily shone with multiple cracks of the touchscreen
The display worked well, so only the sensor needed to be replaced.
You can, of course, take it to the workshop, but it's not that interesting and will be more expensive than replacing the sensor yourself :) Moreover, it is absolutely not difficult at all.
What you need to replace the sensor on your phone
To replace the sensor, we need a minimum set of tools and materials:
- screwdriver
- plastic card or something similar
- regular scotch
- new sensor
- tweezers
- accuracy)))
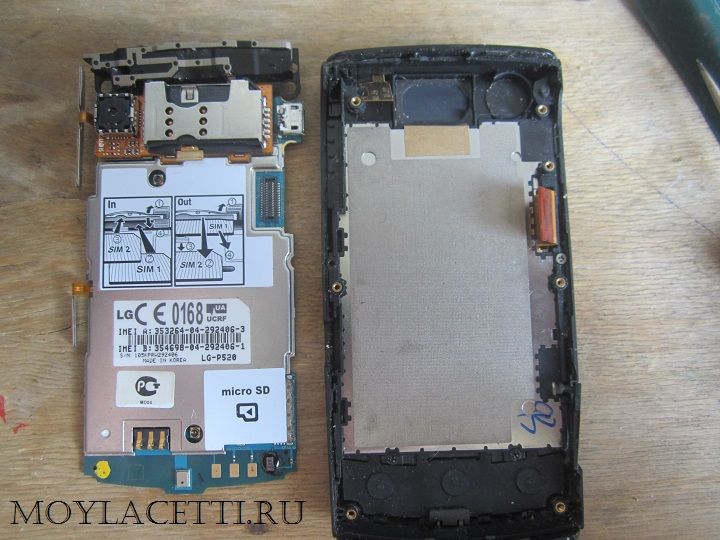
Remove the back cover of the phone and take out battery... We can say half the work is done :)
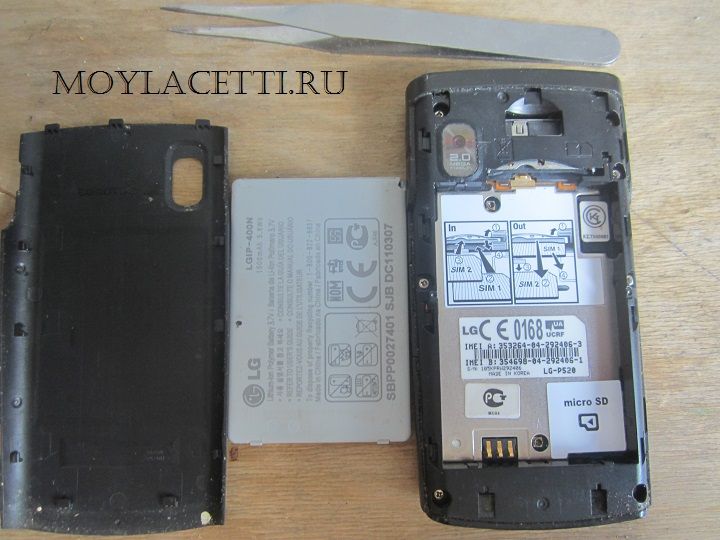
We unscrew all the screws and fix them in a secluded place so that they are not lost.
After that, use a plastic card to separate the halves of the phone case

Snap off all the latches and remove the back of the case

We unfasten all the interfering cables. On this phone, it is only one - from the display

We check that nothing is holding anywhere else and remove the phone board
put it aside
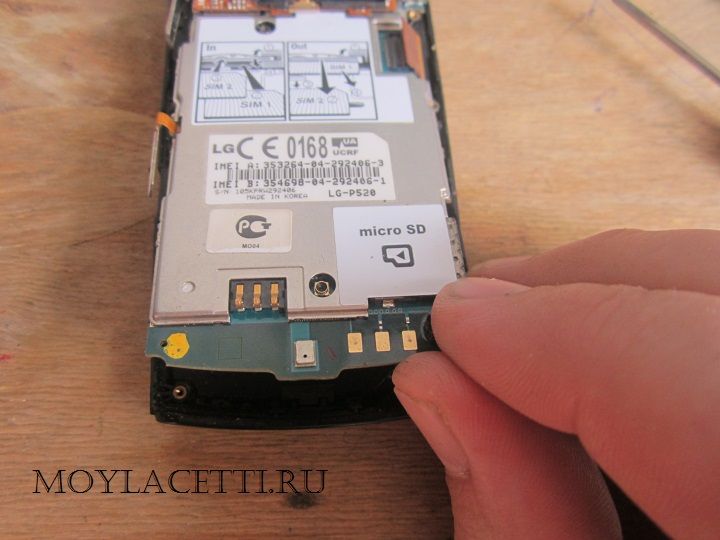
We see the sensor cable. Here it is primitive, so it doesn't even attach itself to the board, but just snuggles. This is a resistive sensor. You can have a capacitive one - it is larger and is usually connected to the board through a connector. How to disable them is described in detail in the article. I highly recommend reading it.
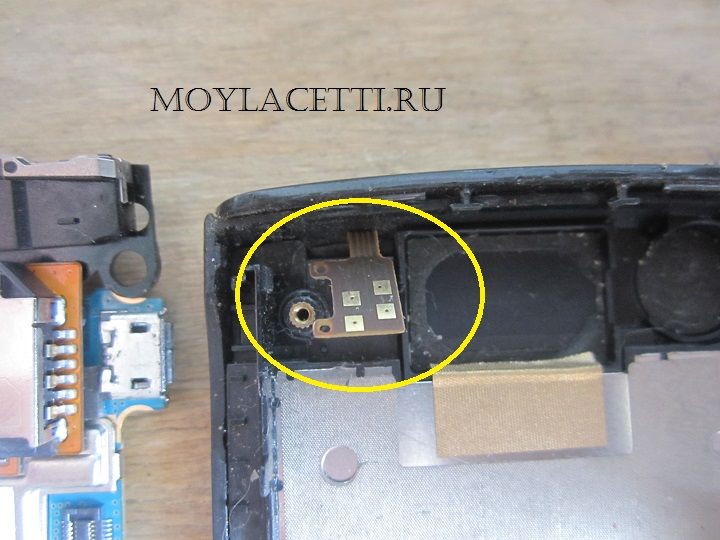
Now we need to remove the sensor from the phone case. To do this, we pry it and use our plastic card to guide it along the perimeter of the sensor

For relief, you can warm up with a hairdryer.
Attention! Be careful when peeling off the sensor and take precautions because this is glass! You can cut yourself, a splinter can fly off into the eyes and the like!
Here's the picture.

Remove the remaining fragments with tweezers and remove the glass from the workplace.
We take a new sensor

It is pasted over with foil on both sides. And without a film, they will not exchange it under warranty, if it suddenly turns out that he is not a worker! Therefore, our task is to connect it for testing, and only then, after removing the protective film, paste it into place.
It looks like this
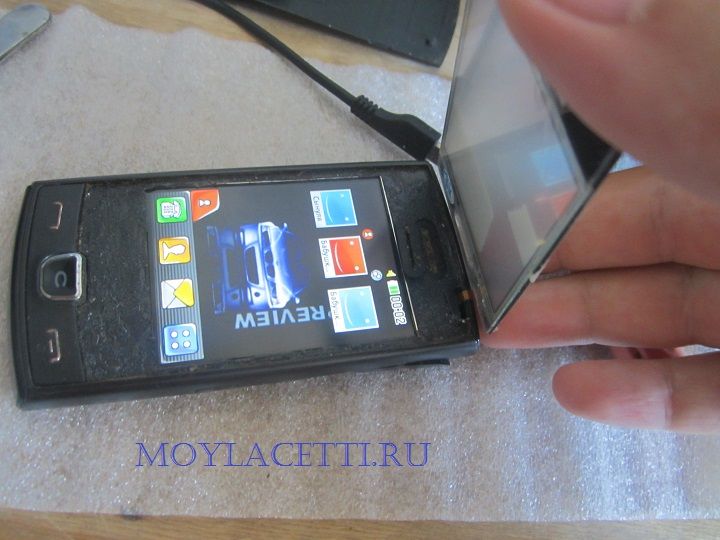
That is, we assemble everything in the reverse order, but we do not glue the sensor. We turn on the phone and, touching the sensor, check its operation over the entire area.
If everything works fine, then remove the film, remove the debris from the display and press the sensor into place.
Here you may reasonably have two questions:
- how and how to clean the display from debris and fingerprints?
- how does the sensor stick?
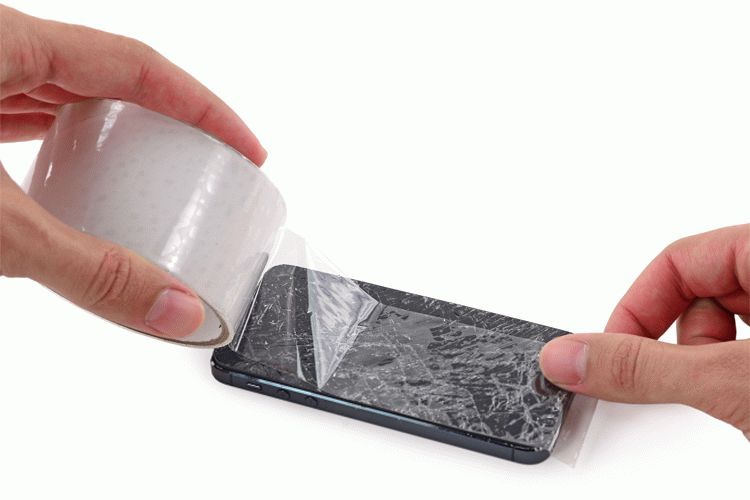
Answer to the first question. Do not try to rub it with anything, this will not achieve anything, but only scratch it. The most the best remedy for me to clean the display is ordinary scotch tape! Just glue and peel it sequentially over the entire display area and all dirt will remain on the tape, and not on the display.
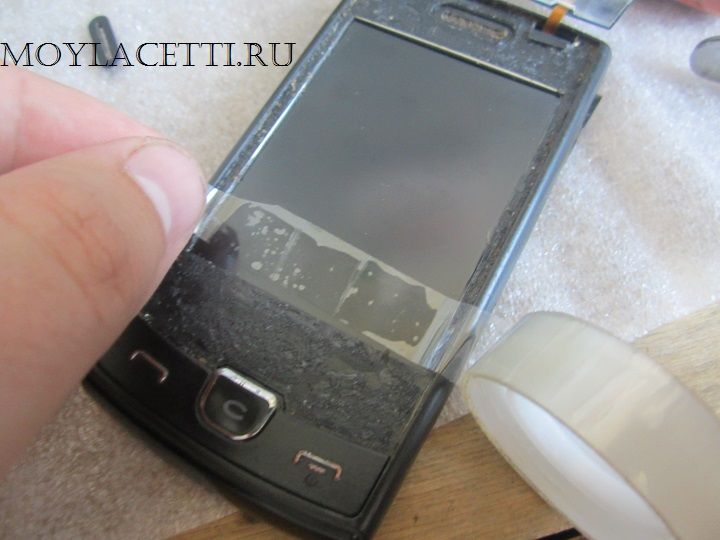
The answer to the second question. In this phone, the adhesive is applied to the device itself and it remains sticky for many years. The main thing is that after disassembly dust and debris does not fall on it. But in most cases, the sensor is glued to double-sided tape, which is glued around the perimeter of the new sensor. You only need to remove the protective film or paper and glue the sensor in its rightful place.
Here, in principle, are all not complicated steps to replace the phone sensor. As you can see, everything is simple and fast.
If you have any questions, ask in the comments.
Peace to your home and strong phones !!!
Details Created on 1/23/2016 15:19
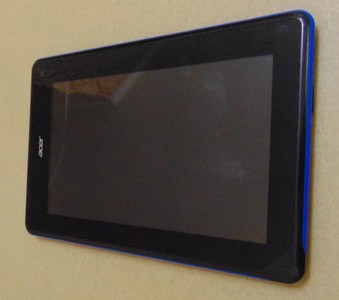
The most common tablet or smartphone breakage is a cracked touchscreen display. Replacing the sensor is more expensive than spare parts. To order a touch screen on Aliexpress will cost several times cheaper than from local suppliers. Although the complexity of this repair is not very great. Replace touch screen with their own hands - almost everyone can. Below you will learn how to do this, using an example acer tablet Iconia B1. The replacement technology is very similar on all tablets of this type.
If you want to change the sensor to a tablet yourself, then you will need:
- crosshead screwdriver,
- plastic card or plectrum,
- double-sided tape,
- straight arms.
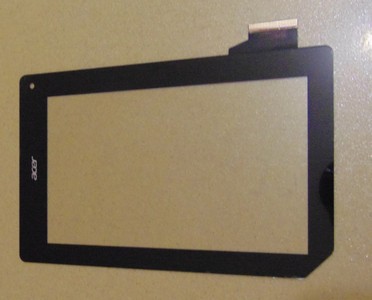
So, we have a tablet Aser Iconia B1 with a broken screen:
Remove the back cover with a pick:

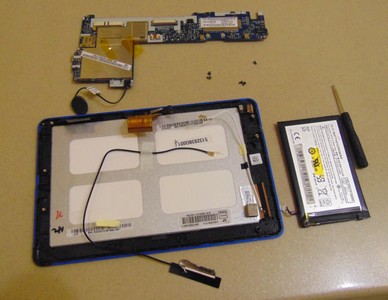
Carefully disconnect all connectors of the display, battery, sensor, microphone and two coaxial cables:
We unscrew the five screws with a Phillips screwdriver, peel off the antennas and the battery. We take out the board:
Now you need to separate the touchscreen with the display from the frame. We use a pick. If it comes off badly, then you need to heat it up. You can use a regular hair dryer or hold it over the gas. Or warm it up in the chamber to 90 degrees. You should not rush here, there is a possibility of damage to the screen:
Now you need to peel off the sensor from the display. It is better to use a plastic card here. If it doesn't go well, then we reheat it. Carefully, do not damage the train:
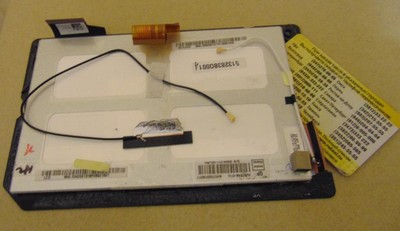
After everything has been peeled off, it is advisable to check if the display is damaged:

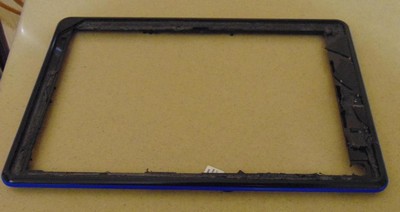
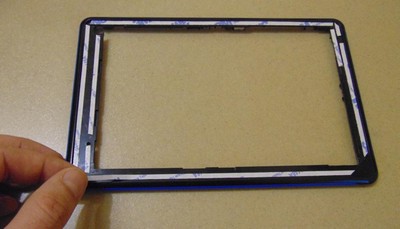
Great, now you need to remove the remaining adhesive tape from the frame and from the display. You can use an alcohol solution, a light solvent or remove mechanically:
Let's take a new sensor:
We came across a sensor without scotch tape, but we also come across on sale already with scotch tape glued on. Then you won't need to stick anything. We'll look at the first option. We glue double-sided tape on the frame:
If there is no special narrow tape, you can use office tape. You just have to cut it to the width. We glue the touchscreen:

Now we repeat the same procedure with the display:

And we glue it to the sensor:

Now we put the board, battery, antennas, microphone and camera in place. We fasten the board with screws, insert all the connectors into place, glue it with tape:

We put on the back cover, turn on the tablet and check the functionality of the touchscreen.