How to display your phone on a computer screen: three easy solutions. Android screen on computer. USB connection.
Almost any IT-shnik, and, in principle, some ordinary tablet owners dream of using it to their advantage - connecting it to the system unit so that information is displayed on the tablet like on a regular monitor. The first thing that comes to mind is to connect a tablet to a video card using HDMI - mini HDMI cable, provided both the tablet and graphics card have these connectors.
After all, using an HDMI cable, a digital signal with multimedia data - video, sound, etc. should be transmitted. But the problem is that in a tablet, the HDMI connector is an output, not an input. Those. it can transmit an image to another device (for example, a monitor or TV), but not receive it.
For a very long time I was looking for a way to make a monitor replacement from a tablet, and believe me, at least as of 2014, technically (at the hardware level) it will not be possible to implement this, unless someone tries to solder the HDMI input to the tablet, which receives a signal from a video card, or tablet manufacturers themselves will think of it, and start making tablets with universal HDMI, capable of both receiving and transmitting a signal.
However, you should not be upset, because there is good news. You can make the main monitor out of the tablet at the software level. A special program will help the computer recognize the tablet as a monitor. There are three options for how you can use such a "tablet monitor":
- Complete replacement for a standard monitor. It can be used in case of emergency, for example, if a conventional monitor is broken.
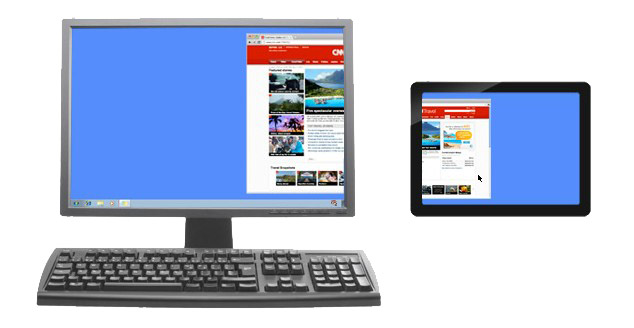
- The tablet can easily turn into an additional monitor to the main monitor. Everything that happens on the monitor can be duplicated on the tablet display.
- The tablet screen can become a "continuation" of the main monitor, ie. for example, on a large screen you can watch a movie, and on a tablet screen you can read correspondence, control any computer program with a mouse and keyboard, read mail, and in general, do absolutely everything that you usually do on a computer.
Installation
We need a USB cable to connect the tablet to a PC (or you can connect via Wi-Fi), install the program on the computer and on the tablet.
- Install iDisplay on your computer - you can download it for your version of the operating system for free from the official website. Be sure to restart the computer, otherwise the connection will fail.
- Install the application on a tablet with Google play... It is paid, and costs 5 bucks (but if you really want to try the application for free, use w3bsit3-dns.com.
- Launch iDisplay on your computer.
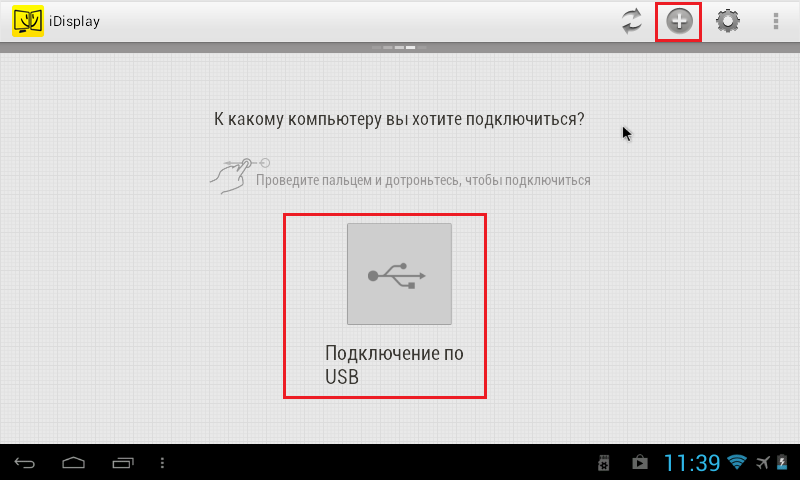
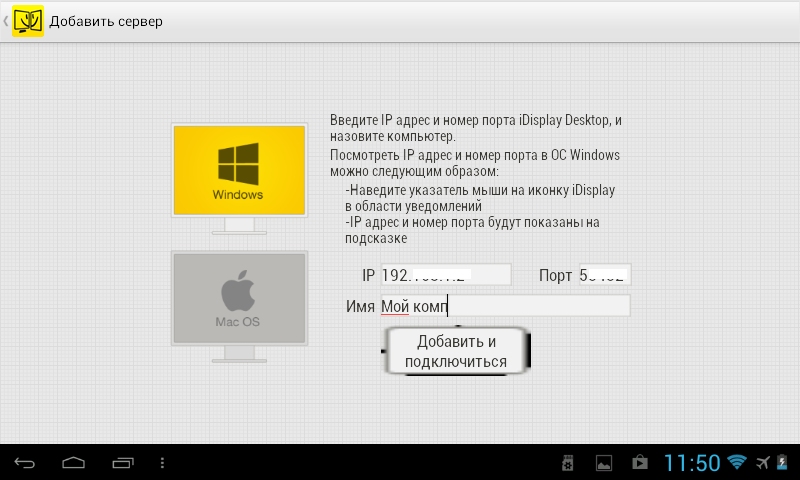
- We launch the iDisplay application on the tablet. Click on the plus sign to add a "server", i.e. your PC data (for Wi-Fi connection). To connect via USB, connect the USB cable to your computer and tablet, and click the “Connect via USB” button.
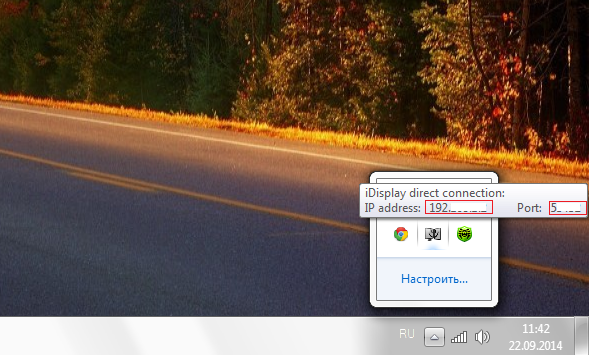
- We are asked to enter IP, port, and name. The IP address and port number can be viewed in the tray by hovering the mouse over the iDisplay. We transfer the data to the tablet. Enter anything for the name.
- When everything is ready, click “Add and Connect”.
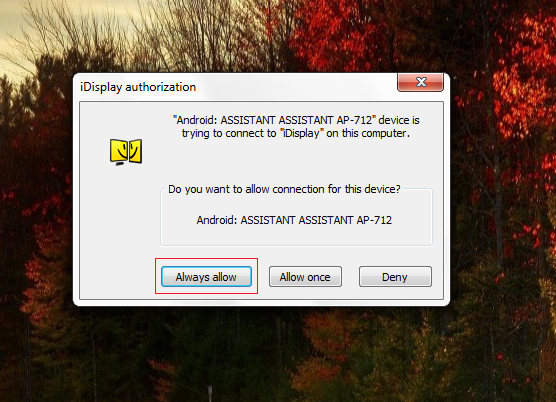
- Further, if the IP and port are entered correctly, an “iDisplay autorization” window will appear on the computer screen asking if you want to reject the tablet connection, connect once, or automatically connect every time you receive a request from the tablet. I recommend clicking “Always allow”, so this question will no longer pop up, and the connection will be automatic.
- The monitor will go out for a couple of seconds, blink a little, and calm down. Then the desktop of the computer OS will appear on the tablet.
Customization
This completes the installation, but we need to choose whether the tablet will be the main, backup or additional monitor. To do this, in Windows, go to the display resolution settings (to open the menu - right-click on the desktop).

Next to the words “Multiple Screens”, click on the small triangle. If “Duplicate Screens” is selected, the tablet will repeat the entire contents of the main monitor, almost like a parrot. The Expand Screens option will enable different information to be displayed on two monitors. They will use the same desktop, but they can work independently, complementing each other.
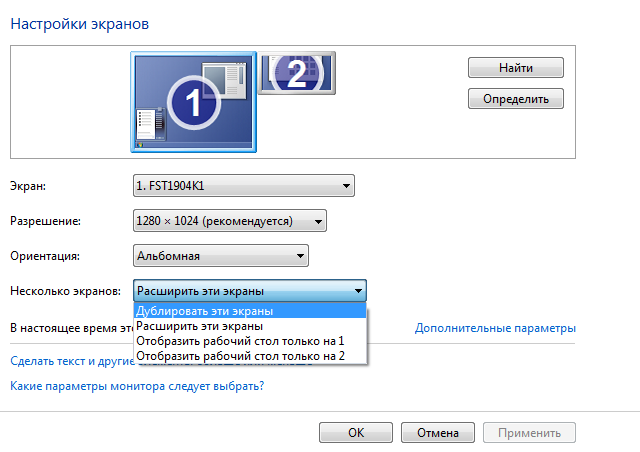
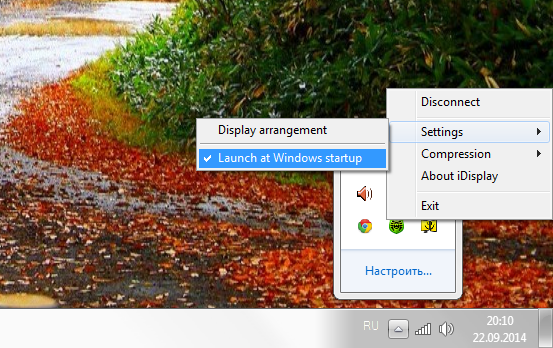
Now comes the fun part. If you would like the tablet to act as the primary monitor, select “Show desktop only 2”, and then click Apply. Then you should open the tray, right-click on the iDisplay icon, select “Settings”, and click on “launch at Windows startup” so that a checkmark appears there.
Now, when you restart your computer and disconnect the normal monitor, when the system boots, the program will automatically start, and you just need to connect to this program via the tablet, and your OS desktop will appear on the screen of your tablet.
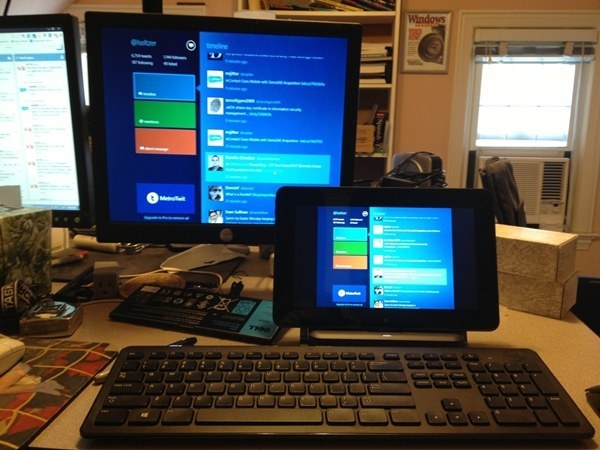
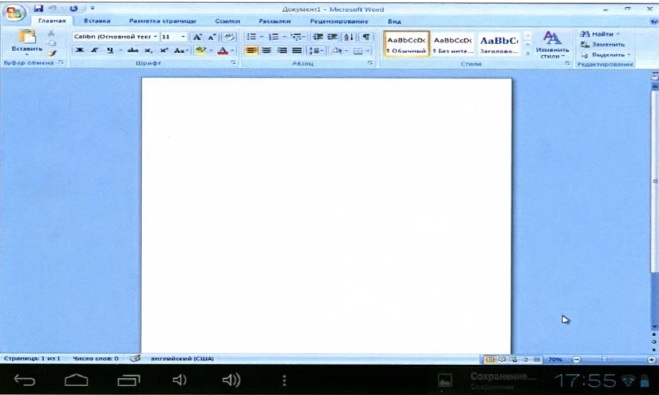
In order not to be unfounded, I conducted an experiment, whether the tablet will work as a monitor when I turn off a normal monitor, and recorded the result on video. I went into a text editor, opened a browser, watched the video via YouTube, and went to the site where you are reading this article. I connected to the tablet via Wi-Fi, plus a program for capturing video from the screen was turned on, so it is possible that slight delays in the video will be visible. If you connect via USB, the connection will be more stable and the picture will be faster. Apologies in advance for the video quality (maximum 480p).
This monitor has a couple of disadvantages.... First, to use the tablet screen as a monitor, you must first install the program, and for this you need to see what you are doing. Those. if the monitor is broken, you need to connect another worker to the computer, install and configure the program, and only then disconnect the monitor and use the tablet screen instead. The second drawback is that when you start the system, you need to manually start the connection with the PC on the tablet each time. And thirdly, the most important thing is that you need a tablet with good resolution and a fairly large display. The tablet in the video is a 7-inch, the cheapest Chinese device on the planet with cracked glass... There is very little comfort from using such a “monitor”, but a 9-10 inch tablet is much better suited for such purposes.
Advantages: the possibility of touch input from the tablet remains; with a “monitor”, you can lie on the sofa, or go to the kitchen, if the Wi-Fi signal is sufficient, and use your computer.
Tablet computers, without exaggeration, can be called the technological werewolves of our day. The same device can serve both e-book, and a navigator, and a computer or telephone. Is a tablet capable of turning into a monitor? Check it out!
For many years now, LCD prices have been falling. If before a 19-inch monitor was a luxury, today there are even 27-inches in the middle price segment. In addition, the working resolution of displays has significantly increased, which is dictated by the popularity of high-definition video and the complexity of software interfaces. New monitors with large diagonal and high resolution allow you to fit more information per unit of screen area. For example, on a model with a resolution of 2560x1440 pixels can be easily stacked on top of each other Word document, PDF book and browser window, allowing you to multitask with all three windows in view. But even such a seemingly large screen area is sometimes not enough. To expand the usable area, you can buy a second monitor and work with two devices at once. You just need to configure them so that the "Desktop" on one of them is a continuation of the other, or use monitors in mirroring mode to perform specific tasks. But, you must admit, buying another monitor is not always economically justified, especially if a huge screen is not required, but a small display would be enough, on which, for example, an email client window could be displayed.
Almost any tablet (and even a smartphone) can perfectly cope with the role of such an auxiliary display. Android or iOS. Special programs allow you to connect the tablet to a desktop computer or laptop via Wi-Fi (sometimes via a USB cable) in this way so that the system identifies it as a second monitor. This is achieved by installing special video drivers and applications.
WHY CONNECT YOUR TABLET TO PC
- For use as a second monitor.
- For touch control of common Win-dows applications.
- For PC remote control.
- For broadcasting video and sound.
Of course, a tablet may not always become a full-fledged replacement for a monitor due to a number of reasons: delays in displaying an image and a small diagonal of the display. But for certain tasks, it is perfect. For example, it is very convenient to display a music player on the tablet, which will allow you to clear the workspace of the main monitor and will allow you to control the player from the touch screen. It may be convenient for programmers to display auxiliary work variables and help information on a separate display, while the main workflow will take place on the main screen. Likewise, you can display individual toolbars in Photoshop music programs and video editors on your tablet.
When working with office suites, you may need to constantly monitor the window with incoming mail, Skype messages, etc. In other words, the possibilities of extraordinary use of the tablet in conjunction with a PC are limited only by your imagination.
SCREENSLIDER: PULL TO TABLET
To work with this program, almost any tablet running Android version 2.2 and higher, with access to the Google Play store, and a computer running Windows will fit. The basic version of ScreenSlider supports all the basic functions of simulating a tablet-based monitor, while the advanced version of ScreenSlider Pro supports touch control of Windows elements and a number of other functions, such as transferring files between devices. In addition, you can use the service voice input text from Android to PC and more.
To get started, you need to download the application with the installation package to the "Desktop". Run the installation file. Answer affirmatively to the installer's requests for permission to run as administrator and make changes to system files. Complete the installation by clicking on the "Finish" button.
Start ScreenSlider by clicking on the new shortcut on the "Desktop"
The successful completion of the installation should be signaled by an information window.
After that, you can proceed to the next stage - installation of the tablet part of the application, which will work in tandem with the desktop one. To install it, scan the QR code with your smartphone

At the first start ScreenSlider will offer to come up with a name for your tablet (under this name it will be detected by the program installed on the PC via Wi-Fi)
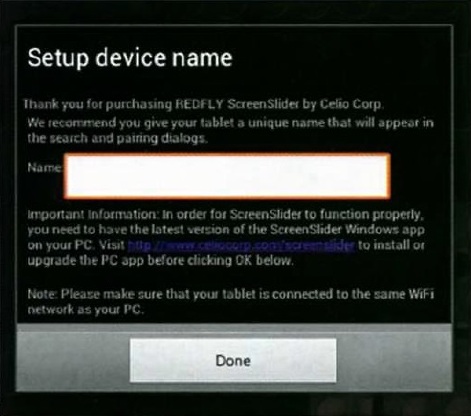
Enter any name you like, after completing the configuration, click on the "OK" button in the appeared information window. Leave the tablet in its current state turned on: with working Wi-Fi and with running application ScreenSlider.
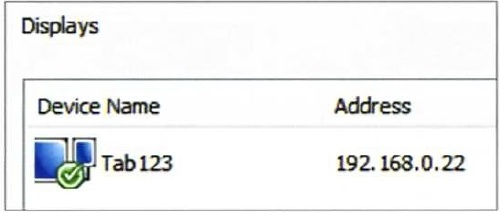
Go to Client PC. In the system tray, right-click on the ScreenSlider icon, and select Find Devises from the menu that opens. After a while, the name of your tablet will appear in the window
Double-click the device name to connect the computer to the tablet. Look at the appeared PIN-code on the tablet screen
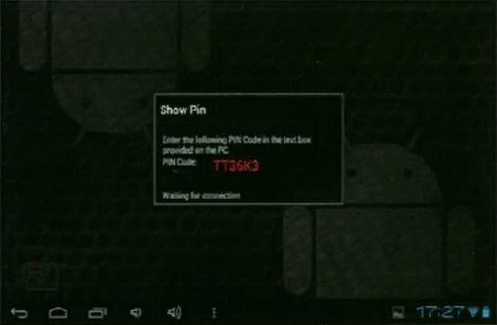
enter it in the ScreenSlider window on your PC and click on "OK". If the connection is successful, a notification will appear in the tray, and the "Desktop" space will be scaled to the tablet screen.
With the default settings, the tablet's screen real estate becomes a functional space that complements the main desktop. In other words, you can drag application windows onto the tablet screen just as if you had a second monitor connected to your computer.
IDISPLAY: THE SMARTEST MONITOR
IDisplay is compatible with Android, iOS, Mac OS and Windows.
In most scenarios of use, it perfectly copes with transforming a tablet into an additional monitor, and most importantly, iDisplay allows you to connect up to 36 (!) Mobile devices to one computer. Another advantage is the ability to dock the tablet and monitor not only via Wi-Fi, but also via USB. Download the program, install and run it. Then install iDisplay on your mobile device by scanning the QR code.
The iDisplay working window will display the name of your computer (provided that the program is running on the desktop and Wi-Fi is enabled)
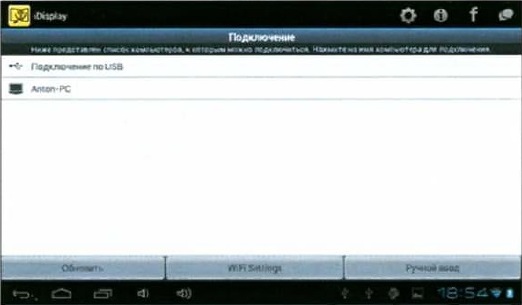
Double click on the name of the desktop to establish a connection. When connecting via USB, select USB connection.
On a PC in a window
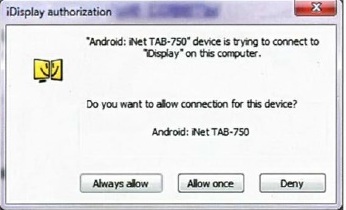
click on Always Allow to sync both devices. If the connection is successful, a window will appear on the tablet with a message about the readiness of the bundle to work
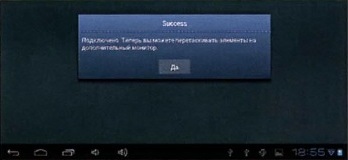
Now the screen area of the tablet computer has been added to the "Desktop" of the main monitor.
The basic version of iDisplay supports touch control - that is, any Windows application transferred to the tablet screen can be controlled by touch. To change the scale, you can call up an additional menu by tapping the screen with two fingers at once. To simulate a right mouse click, just hold your finger on the screen for a while. Some applications can be scrolled with two fingers. In addition, iDisplay allows you to optimize the promptness of updating the picture on the tablet. If your Wi-Fi connection is slow and your tablet slows down, you may slightly lower the quality of the transmitted image. To do this, right-click on the program icon in the system tray and open the list of settings. Default In submenu Compression automatic selection of picture quality is set depending on the type of content and the average exchange rate between devices Auto ... Options Stfeaming and Fast will significantly increase the speed of updating the image on the tablet and reduce the delay in the movement of the cursor at the cost of reducing the overall quality of the picture. Option Normal maintains a balance between speed and quality. To broadcast images in maximum quality (lossless) use the option Lossless .
As in other similar programs, in the section Setting , on the menu Display Arrangement you can set the position of the additional monitor relative to the main
DUPLICATION
To enable mirroring mode, right-click on the application icon in the system tray and in the menu that opens, select the item Mirror Desktop ... Thus, the resolution on the main monitor will be reduced to the working resolution of the tablet (to equalize the proportions and image area of the large display and the tablet screen), and the picture on the tablet will duplicate the “Desktop-main display. In the same settings window (if you abandon the mirroring mode and use the main mode of complementary displays), you can set the position of the tablet relative to the main monitor
MORE THAN JUST A MONITOR
Most applications that allow you to use the tablet as a second monitor support touch interaction with active interface elements. But for full-fledged PC control, this is not enough. If you want to remotely control the main computer using a tablet, we recommend that you pay attention to specialized software that allows you not only to broadcast a picture from the desktop to the tablet screen, but also to send all the basic control commands.
The Remotix app for Android and iOS allows you not only to see the contents of the main monitor, but also to remotely control your computer via the Internet using a secure channel. The application must be installed on a tablet and desktop. After that, you can establish a remote connection with support for multitouch gestures, an extended keyboard (with keys that are missing in the basic Android keyboard) and optional scaling to solve the problem of different screen resolutions. The uniqueness of the application lies in the fact that it supports popular modifier keys, right-click mode and many other commands that provide comfortable remote desktop control from anywhere in the world.
VNC Viewer
VNC Viewer performs almost the same tasks as Remotix, but has some special features. In addition to broadcasting an image from a desktop PC monitor to the screen of a portable device, the program provides advanced administration functions. By using remote connection you can set PC settings from the tablet, change the screen resolution up to 5120x2400 pixels, transfer text from smartphone applications to desktop applications, and much more. With Personal and Enterprise licenses, the service allows you to use 256-bit AES encryption, which provides increased data security and reduces the risk of unauthorized access to your computer.
TeamViewer
The well-known TeamViewer program for remote computer control is also available in the Android version. After installing the host application on the desktop and the client utility on the tablet or smartphone, the user gets a rich set of tools at their disposal. The program not only knows how to broadcast an image from a desktop to a handheld screen and provides tools for remote control of a PC, but also allows you to transfer files from a computer to a mobile device and vice versa. Another highlight of the utility is the ability to hold conferences and remote presentations.
NOT ONLY ANDROID AND IOS
In addition to applications for working with Android and iOS devices, there are specialized programs focused exclusively on working with the iPad.
MaxiVista
The MaxiVista app is specially designed for using iPad as an additional monitor in the Windows environment. Unlike many competing programs, this product uses Virtual VGA technology, which, according to the developer, provides faster data exchange than a Wi-Fi channel. In addition, MaxiVista supports work not only with new versions of the OS, but also with Windows XP and Vista, which can be important for a corporate user. The program is optimized to dynamically display additional Photoshop panels, Skype message windows, office utilities (for example, a calculator), a terminal window, and many other tools on the iPad display that are convenient to work with on a small screen.
XDisplay
XDisplay is optimized only for iPad and, unlike other similar programs, not only allows you to remotely transfer an image from the main computer to the screen of a portable device, but also successfully broadcasts sound and even HD video (if you have a fast network connection). The program requires the Splashtop Streamer package, Windows and Mac OS distributions of which are available on the developer's page.
Android Mirror
J5 Create demonstrated an unusual device that allows you to display a picture from a smartphone display on a computer screen. The JUC610 Android Mirror is equipped with two USB ports: one plugs into the computer and the other plugs in a data cable that connects to a smartphone. In the era of wireless technologies and the above methods of connecting devices, the prospects for such a solution are very vague. It can be used only for quick text input and visual "drag and drop" of files.
Hello Dear Reader!
... If our resource has become useful to you, we will be grateful for any of your contributions (Webmoney Z667342162966, R290774558293). All collected funds will be spent on paying for the content manager.
The site team does everything to convey to its readers the most reliable information about tablets. But if you are already using it, we will be very grateful if you write your own review, because it is the opinion of users that is more valuable than any review and test!
Thank you in advance!
This guide describes how to install and configure free tools that allow you to transfer the screen of your Android device to your computer via a USB cable. There are many programs for solving this problem, but most of them, besides being paid, also require root in the Android device. Another advantage is that the tool described below does not need to install additional software on android device... The instructions are primarily written for the Windows operating system, but everything described below is also true for other operating systems (MacOS, Linux), since the software mentioned in the article is cross-platform.
Step-by-step instruction
You will need the following software:
- Latest Java version;
- Droid at Screen applet.
Step 1
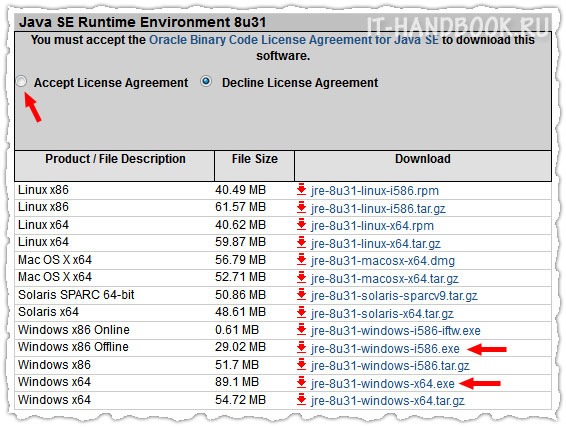
Download and install "Java" on your computer. For the "Droid at Screen" application to work, just download the "JRE" package.
Before downloading the installer, set the switch to the "Accept License Agreement" position. Be sure to download the file that contains the bitness of your Windows system in the name.
Step 2
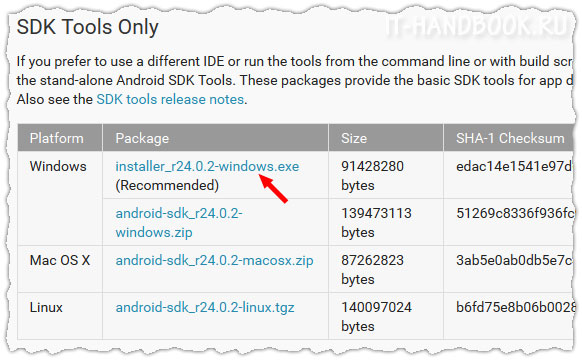
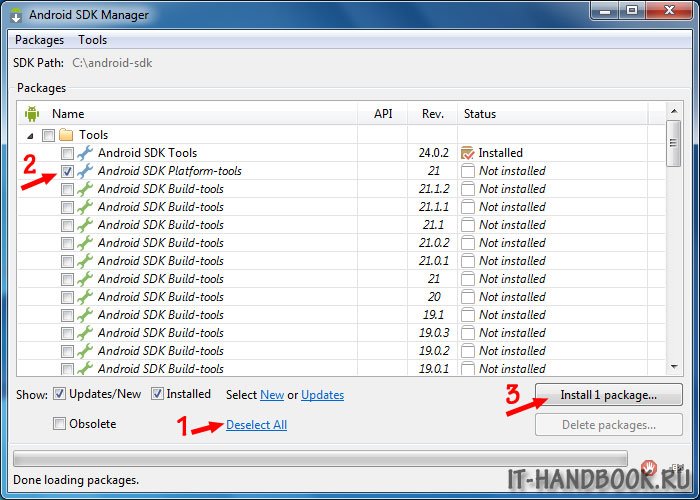
Find the "SDK Tools only" section on the "Android SDK Tools" download page and click download as shown in the picture.
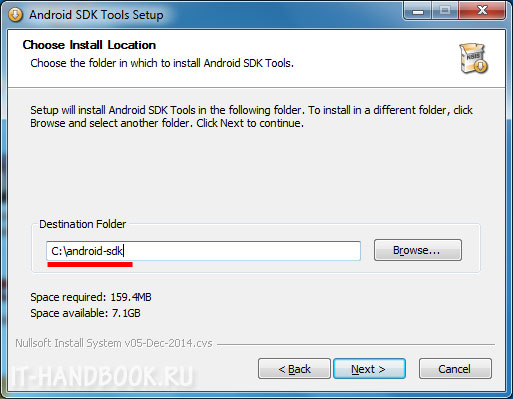
After installation, the "Android SDK Manager" should start automatically. Click "Deselect All", check the box "Android SDK Platform-tools" and click on the button "Install 1 package…".
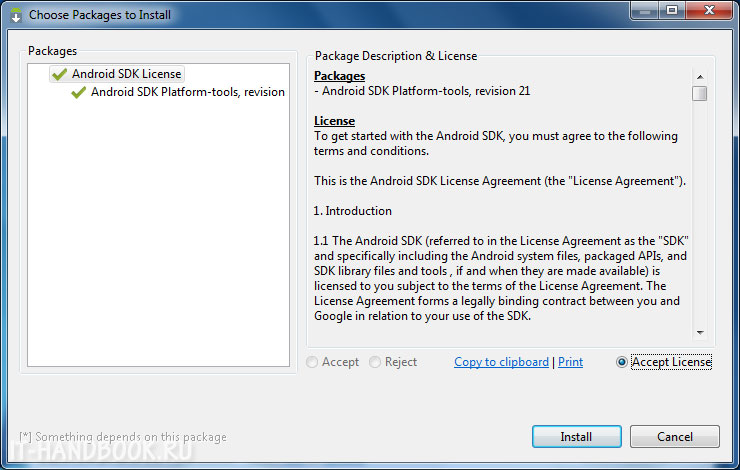
Set the radio button to "Accept License" and click on the "Install" button. Wait for the installation to complete.
Step 3
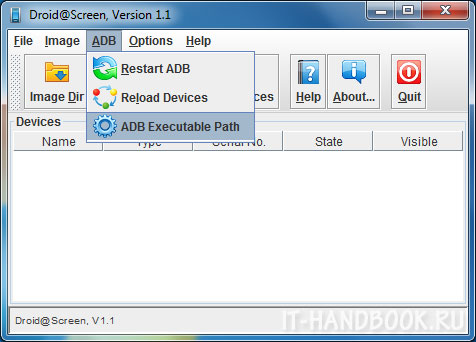
Unpack and run the "Droid at Screen" applet. Select the command "ADB> ADB Executable Path" in the main menu of the program.
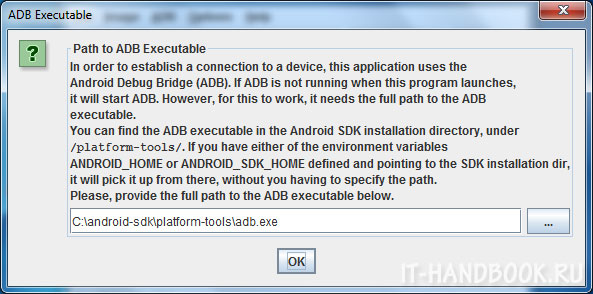
Specify the path to the ADB drivers installed at step 2: enter the folder with "Android SDK Tools", subfolder "platform-tools", select the file "adb.exe" and click "OK".
Step 4
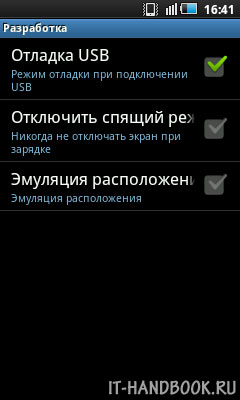
Take your Android device, go to:
(for Android 2+)"Settings> Applications> Development" and enable the "USB debugging" option.
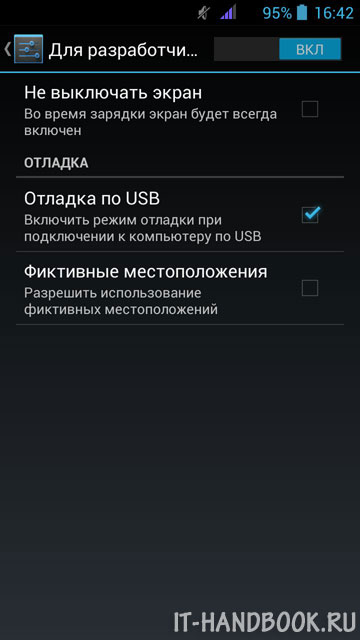
(for Android 4+)"Settings> For Developers> ON (top right)" and enable the "USB Debugging" option.
Step 6
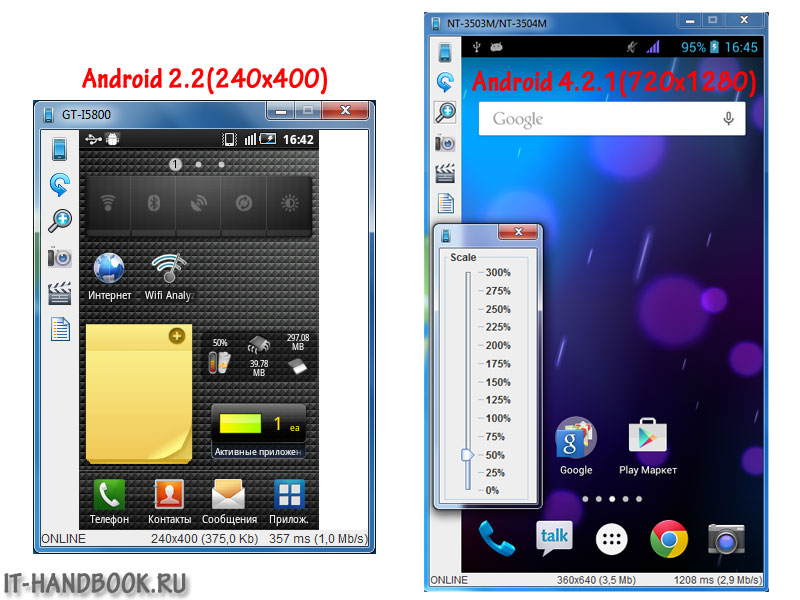
Connect your Android device to your computer with a USB cable. If the USB drivers are already present in the Windows system, a window should appear with the screen of your gadget. The panel on the left contains useful buttons for rotating and scaling the screen of a connected device on your computer.
If Windows does not detect your device, you need to download and install USB drivers (usually you can download it from your device manufacturer's website in the "Support" section).
Many owners of modern mobile devices would like, for the convenience of work, when connecting the device to a computer or laptop, to carry out all control operations from a PC, but so that the gadget screen is displayed on the terminal. Next, we will discuss how to display the phone screen on a computer. Do this in most cases without using special programs impossible. The only exceptions are stationary Windows 10 systems paired with Android devices or devices with Windows Mobile.
How to bring your phone to the screen of your Windows 10 computer?
Most programs for controlling smartphones or tablets like Samsung Kies, HTC Sync and the like have one drawback - they only work with devices from one specific manufacturer. And many people need a universal solution, because you will not install software for each model?
There is such a solution for Android smartphones and tablets of the latest generations. Almost all of them support Miracast technology. How to display the phone on the computer screen using it? As easy as pie. With the Anniversary Update installed for Windows 10, use the Connect function, where the menu will search for available devices.
On the phone, you need to find the image transfer point, which is most often found in the display settings, although, depending on the manufacturer, access can be made from another menu. It remains only to activate both devices and set the search, after which the function of connecting to the wireless screen is applied.
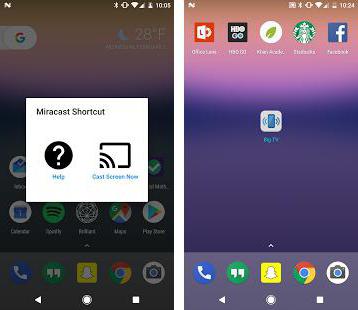
If all else fails, you can install a small applet Miracast Widget & Shortcut on Android.
With devices based on Windows Mobile, the question of how to display the phone on the computer screen is even easier to solve. Stationary computer and mobile operating system synchronized without problems. All devices must be connected to the Internet, for example, via Wi-Fi.
How to display a phone screen on a computer monitor using MyPhoneExplorer?
One of the universal solutions will be the installation of the MyPhoneExplorer program and the corresponding client on a smartphone or tablet on a PC.
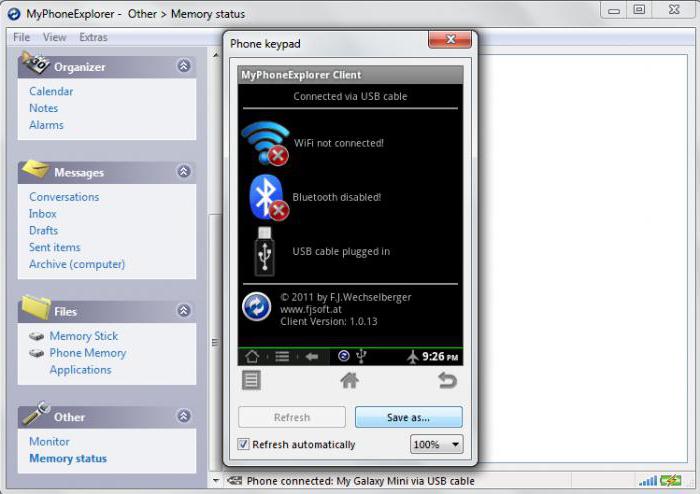
On the mobile device, you need to enable developer mode and allow In the program on the computer through the file menu and the settings section, you need to get to the setting of the connection type (USB, Wi-Fi, Bluetooth) and select the one you want. After establishing connection on the PC, you need to use the "Miscellaneous" menu, where you select the item on the phone keyboard and download a screenshot. If there is no phone screen, check the box for automatic update.
The program has an interesting function - displaying the mouse cursor on the smartphone screen. It is not clear, however, why this is needed, but it looks rather unusual.
Using a MyMobiler connection
Let's look at one more option that allows us to solve the problem of how to display the phone on the computer screen. In this case, we use the MyMobiler client for the PC, and for mobile device- WiFi Keyboard + Screen Capture.

We launch both clients, and on the PC we click on the program icon in the system tray, after which, on the smartphone, we first press the Device Setup button, and then Display. In the options, once again select the Display button, and in the new window - Other. The computer will instantly display the screen of the mobile device.
Conclusion
These, of course, are not all methods and programs that allow you to synchronize mobile devices with computer systems for this type of synchronization. Nevertheless, these three methods are considered by many to be the simplest, and the programs are available for download and installation for free. Mobile clients, by the way, can even be found on Google Play. Setting up is fairly straightforward and only takes a couple of minutes.