How to print a table in excel
Most often today, tables are created, stored and distributed in the format of a spreadsheet editor. Microsoft Office Excel. A little less often, Microsoft Office Word is used for these purposes. Both applications allow you to easily print spreadsheet, having previously selected the best option for its placement on the sheet.
You will need
- - spreadsheet editor Microsoft Office Excel 2007 or 2010;
- - Word processor Microsoft Office Word 2007 or 2010.
Instruction
Work with the Microsoft program excel
Printing only the selected part of an Excel spreadsheet
To print only part of a table, it is not necessary to filter it or hide rows and columns. You can simply specify the range of those cells that should be printed. Note that on the second sheet there is a large gap between the column headings and the table numbers. Let's eliminate it by excluding empty lines 7-9 from the print range.
1. Highlight lines 1 to 6.
2. Press the Ctrl key and drag the pointer over the buttons on lines 10-14 to add them to the existing selection, as shown in Figure 2. 12.13.
3. Choose a team File > Print Area > Set. Now only the selected lines will be printed. Check it out in preview mode.

Rice. 12.13. Setting the print range
Note If, after completing step 3, you expand the Sheet tab of the Page Setup dialog box, you will see in the field Print range link 1:6;10:14, which corresponds to the lines selected in steps 1 and 2. That is, the print range can also be set using this field of the Page Setup dialog box. To reset the set print range, just select the command File > Print Area > Clear.
The completed operations complete the setting of the print options for the Formula sheet. But in addition to the table, you need to print a chart that presents the data in graphical form. In the next exercise, you will set up the Chart sheet and print it along with the source data table.
by the most in a simple way to print the table is to use the button Seal Database(database). To print a table in this way, you must:
- Select a table in the database window.
- Push button Seal(Print) on the toolbar Database(database).
This prints the entire table. To display the entire table, you can also right-click on the table icon in the database window and select the command from the context menu Seal(Print).
In order to be able to change the print settings, you must use the printing options from the Tables mode (Fig. 2.52).
For this you need:
Comment
Button Seal(Print) in table mode will also print the entire table.
To be able to customize the location of information on the sheet, you need to:
Comment
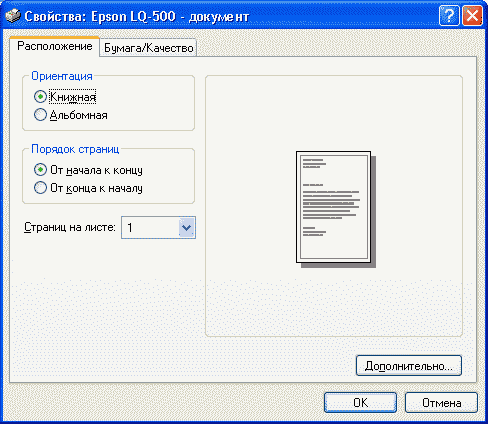
Depending on your printer type, the tab Page(Page) may be missing. In this case, instead of following steps 5, 6 and 7, you should click on the button Properties(Properties) in the window Seal(Print) and select the desired paper size, paper orientation, etc. from the settings of the printer itself (see the manual for your printer).
To be able to see the location of the data on the pages before they are sent to print, you can use the preview function. You can enter the Preview mode both from the database window and from the Table mode. To view a table in Preview mode from the database window, select the table in the list of tables in the database window, and then do one of the following:
- press the button Preview Database(database);
- choose from menu File(File) command Preview(Print Preview);
- right-click on the table icon and select the command from the context menu Preview(Print Preview).
To enter the preview window from Tables mode, press the button Preview(Print Preview) on the toolbar Table view(Table Datasheet) or select a command Preview(Print Preview) from the menu File(File).
After switching to the Preview mode, a preview window and a toolbar appear on the screen. Preview(Print Preview) (Fig. 2.52). At the bottom of the window there are a number of page navigation buttons, similar to the record navigation buttons in the Table view. There is also a page number field, which displays the current page number and in which you can manually enter the page number and go to this page.
Rice. 2.52.
To enlarge the page for a detailed view, just place the mouse pointer on the page image (it takes the form of a magnifying glass with a plus sign (+)) and click the left mouse button. To view the entire sheet, place the mouse pointer on the page (magnifying glass with a minus sign (-)) and press the left mouse button. When viewing a page in magnified mode, scroll bars appear in the window, allowing you to move up and down and right and left on the sheet.
Actions that can be taken using the toolbar buttons Preview(Print Preview), are given in Table. 2.16.
| Name of button or list | Menu Command | Description |
| View | View, View Designer, Table View View, PivotTable View, PivotChart | Used to switch to Table view, Design view, pivot table to PivotChart mode |
| File, Print | Used to print a table | |
| Zoom | Allows you to change the scale of the page display | |
| One Page | Type, Number of pages | Allows you to view one page (default mode) |
| Two pages (Two Page) | Type, Number of pages | Allows you to view two pages at the same time |
| Multiple Pages | Type, Number of pages | Allows you to select the number of pages displayed at the same time |
| Zoom combo box | View, Scale | Allows you to enter the display scale as a percentage or select it from the list |
| Close | File, Close | Allows you to exit View Mode and return to Datasheet View or Database View |
| Setup | File, Page Setup | Allows you to change the page settings directly from the Preview mode (see Fig. 2.53) |
| Links to Office (Office Links) | Allows you to export data from a table to other Microsoft Office documents | |
| Database Window | Activates the database window | |
| New Object | Allows you to create a new table, query, form, report, page, macro, module based on this or any other tables |
Table 2.16. Description of toolbar buttons Preview
As can be seen from the table, many of the actions performed by pressing the buttons on the toolbar are duplicated by the corresponding menu commands. These steps are standard and used in other Microsoft Office applications. A characteristic of Access is the button Links to Office. If you click the arrow to the right of this button, a list of three commands appears:
- Merge with MS Word(Merge It with MS Word) - provides data merging from an Access table with a Microsoft Word document;
- Publishing to MS Word(Publish It with MS Word) - converts an Access table to Microsoft document word;
- Analysis in MS Excel(Analyze It with MS Excel) - converts an Access table into a working Microsoft sheet Excel.