How to make portrait orientation. Portrait and landscape paper orientations.
Not always Word document should be exactly the same. In particular, a different font, size, etc. can be set on different pages of it, in addition, it is possible to use both landscape and book pages in one document. In one of the previously written materials, I already talked about how to make one page of a book in this text editor. As you can imagine, now it's the turn to talk about the exact opposite process: how to make one page landscape in word. In principle, these actions are very similar to each other, but still there are some differences.
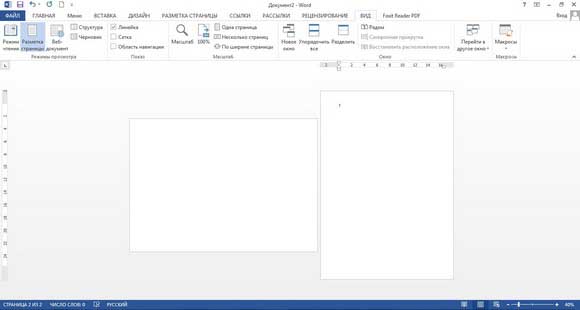
If the document contains one page
It is very easy to make one page landscape, when the document contains no other pages besides it. In this case, you only need to perform a few clicks. The first is to go to the Page Layout section. From there go to the "Page Settings" block, where there is an "Orientation" button. After clicking on it, two lines with the words "Book" and "Landscape" appear in front of you. It is clear that you select the second line, and the page takes a horizontal view.
If there are many pages in the document
If the document contains many pages, and you only need to make one or a few landscape pages, the above method will not work for you. The fact is that, using it, you will make all the pages of the document landscape, and you do not need this. What to do? Follow my recommendations:
If your document contains more than two pages, follow the same steps. That is, first you make the entire document horizontal, then the pages that should be in portrait orientation, manually return them to their original form.
I admit, it sounds a little confusing, but, in fact, the whole process does not take much time, all actions are performed quickly and easily. - one of the simpler office programs. Try to work in it!
Editor Microsoft Word allows you to create and process texts on sheets of different formats and orientations (the location of the page in which its width exceeds its length is called landscape orientation).
The design of wide tables, as well as the placement of drawings and photographs, often requires changing the page orientation from portrait to landscape. This can be done using the menu command "Page Layout" -> "Orientation" -> "Landscape". This command will change the layout of the sheets for the entire document.
However, it is possible to make one page in the Word landscape, while the rest will remain in the usual format. This is done in several ways.
Fast navigation through the article
Change page settings
By default, pages in the Word are in portrait orientation. In Word 2007 and above, you can make one sheet landscape in any place in the document. This will require:
- Place the cursor on the page located in front of the one whose orientation you want to change;
- Select the "Page Layout" command in the menu bar;
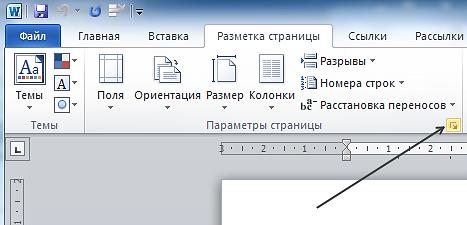
- In the "Page settings" group, click on the arrow in the lower right corner;
- In the window that opens, on the "Margins" tab, select "Orientation" -> "Landscape" and apply the selected settings to the end of the document;
- Place the cursor on the next page;
- Repeat the sequence of actions, choosing instead of landscape portrait orientation (using the command to the end of the document will leave only one landscape - the previous page);
- If necessary, make several landscape pages in different parts of the document (the above sequence of actions must be performed starting from the top page).
Creating sections in text
A Word document can be composed of separate sections, each of which must be formatted independently of the others. A section can start on a new or current page. In order to create a section in a document, you need:
- Place the cursor at the beginning of the page, the orientation of which should change to landscape;
- Run the command "Page Layout" -> "Breaks" -> "Section Breaks" -> "Next Page" (a similar result will be obtained when choosing a break location on the current page, not on the next page);
- Repeat these actions by placing the cursor at the end of this page (as a result, three new sections will be created, each of which will be subjected to separate formatting);
- Select on this sheet"Orientation" -> "Landscape" (all other pages will remain in portrait orientation).
Working with a text editor Word, users are often faced with the need to do landscape page... Sometimes the entire document needs to be translated into landscape format, and sometimes only one page needs to be translated into landscape format, while the rest of the document pages must remain in portrait orientation. In this article, we will look at both of these cases and show you how to make a landscape page in Word.
In order to make a landscape page in Word, you need to open a document and go to the "Page Layout" tab. Here you need to click on the "Orientation" button and select "Landscape" in the drop-down menu.
This method converts the entire document to landscape orientation. But, quite often there are situations when you need to make only one album page in the Word. In this case, simply clicking on the "Orientation" button will not be enough. Next, we will consider two ways to solve this problem at once.
Method number 1. How to make one landscape page in Word through the "Page settings".
Method number 2. How to make one landscape page in the Word through the "Section breaks".
If you have questions about how to make an album page in the Word, ask them in the comments under this article.
When building charts, tables or flowcharts, it is more convenient to display them in landscape format. This type of document is also suitable for positioning images, or in the case when it becomes necessary to place information on one page, but in portrait orientation it simply does not fit. Then it makes sense to change the page orientation to landscape. In the Word, by default, all pages of the document are displayed in portrait orientation. You can easily change this in MS Word.
The article will show an example of transforming a sheet into landscape in MS Word 2016. Although there is no particular difference with previous versions of MS Word.
What you need to make a landscape sheet in a Word
In order to change the location of a document in a Word from portrait to landscape, you need:
- create new document... To do this, right-click on the desktop or a specially created folder;
- in the menu that appears, select "Create", in the drop-down submenu, select " Microsoft Document Word ";
- open it;
- in the opened document go to the "Layout" or "Page Layout" tab in older versions of the Word;
- on the tab open the menu "orientation" and select "landscape".
That's it, the document page is ready.
If we are talking about a previously created document, then you just need to open it and perform the same manipulations as with a new document.
It is important to remember to save your changes to the file.
How to make a landscape sheet in a Word of only one page of a document
If the document has more than one page, and you only need to make one landscape:
- Place the blinking cursor on the desired page.
- Go to the Layout or Page Layout tab.
- Click on the little arrow located in the lower right corner of the first section of the Layout menu.
- At the bottom of the window, select "Apply to the current section", and at the top, select the required orientation of the document.
- Click OK.

When you need to make not one, but several pages in the document landscape, then we do this procedure for all the necessary pages.
MS Word is a great tool for working with documents, it is very easy to change the page orientation form from portrait to landscape. This can be done in just two clicks. Go to the "Layout" tab and select the desired orientation.
Setting the sheet orientation to landscape is one of the most common tasks that users face when working with a text editor Word. In some cases, you need to change the orientation of the sheets for the entire document, and in some only for one or several pages. If you are also faced with a similar task, then this article will be useful to you. Here you can find out how to album sheet in Word 2003, 2007, 2010, 2013 and 2016. You will also talk about how to make a landscape sheet only on one page of the document.
How to make a landscape sheet in Word 2003
If you want to make a landscape sheet in Word 2003, then for this you need to open the "File" menu and select the "Page Setup" item there.
This will open the Page Setup window. Here you need to select the orientation of the sheet "Landscape" and click on the "Ok" button.

This way you will be able to make album sheets throughout your Word 2003 document.
How to make a landscape sheet in Word 2007, 2010, 2013 and 2016
Word 2007, and more recent versions of this text editor, use what is known as the ribbon interface. This is an interface in which all the tools are divided into several tabs.
Therefore, if you are using a modern version of the Word text editor, namely Word 2007, 2010, 2013 and 2016, then in order to make a landscape sheet you need to perform slightly different operations. First you need to go to the Page Layout tab. All the main tools for managing appearance pages. Among other things, there is a button "Orientation", by clicking on which you can choose one of two options: "Portrait" or "Landscape".

Choosing the "Landscape" option will convert all sheets of your Word 2007 (or 2010, 2013, 2016) document to landscape orientation.
How to make a landscape sheet in Word just one page
If you want, it will be a little more difficult than making the entire document landscape. After all, this requires dividing the document into sections. Below we will demonstrate how this is done using the example of the ribbon interface in Word 2007, 2010, 2013 and 2016. But, this instruction will be useful even if you have Word 2003, because it uses the same principle.
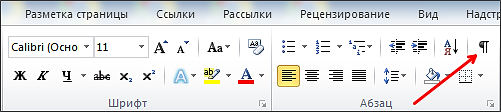
So, first you need to enable the display of non-printable characters. This makes it much easier to work with partitions.
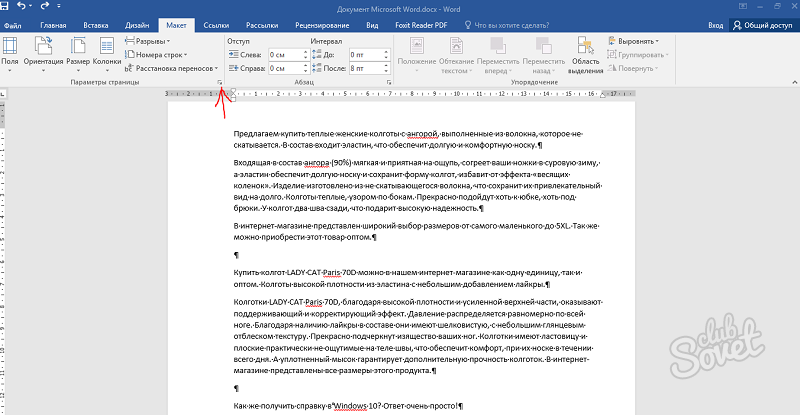
The next step is to place the section breaks. In order to make a landscape sheet in the Word only on one page, you must insert the so-called "Section break" before this album page and after the album page. " To do this, place the cursor on the page that comes before the landscape page, go to the "Page Layout" tab, click on the "Breaks" button and select the "Next Page" item. Next, place the cursor at the end of the page you want to make landscape, and again in the same way set the section break after the next page.

After that, place the cursor on the page you want to make landscape and change its orientation to landscape.
If you did everything correctly, then you will receive a landscape sheet of only one page, and not for the entire Word document. After that, you can turn off the display of non-printable characters and continue to work with the document as usual.