Lesson equipment: multimedia projector, testing system, MS Word. Lesson topic: “Information technology for working with text. Document Editing "
Outline plan
informatics lesson
« Information Technology
work with text.
Document Editing "
Compiled by: Chudutova Elena Burchievna,
teacher of informatics MBOU "Elista Lyceum"
Elista, 2015
Lesson topic: “Information technologies for working with text. Document Editing ".
Lesson type: learning new material.
The purpose of the lesson:
Educational:
formation of students' knowledge about the purpose and basic capabilities of a text editorMicrosoft Word, familiarization with the structure of the MS Word window, familiarization with text editing operations;
Developing:
development of attention, memory, logical thinking, independence;
Educational:
education of information culture, discipline, perseverance, self-confidence.
Requirements for the knowledge and skills of students:
Students should
know:
purpose and basic features of a text editorMS Word, MS Word window structure.
Students should be able to:
run the programMS Word, shut down, save the created document, use text editing operations.
Educational and methodological support and lesson software:
"Informatics. Basic course. Grade 8 "Semakin IG - Moscow, Laboratory of Basic Knowledge, 2008;
Methodological guide for teachers Semakin I.G. "Teaching basic course informatics in high school ", M .: BINOM. Knowledge laboratory, 2006;
Informatics and ICT. Workshop problem book: in 2 volumes. Vol. 2 / L.А. Pledge, etc .; ed. I.G. Semakin, E.K. Henner. M .: BINOM. Knowledge laboratory, 2011
Lesson equipment: multimedia projector, testing system,MSWord.
Lesson plan:
Org. moment (3 min)
Setting the goals of the lesson. Knowledge update (4 min)
Learning new material (13 min)
Fixing new material (10 min)
Reflection (7 min)
Lesson summary and homework (3 min)
Technological map of the lesson.
Lesson steps
Teacher activity
Techniques and methods
Student activities
Formation of UUD
Organizational moment (3 min)
Greeting students, checking the readiness of students for the lesson, announcing the topic of the lesson,
declaring lesson stages
Verbal
Visual demonstration
Write down the date and topic of the lesson
Personal: creation of a comfortable health-preserving environment, creation of conditions for obtaining knowledge and skills.
Setting the goals of the lesson.
Knowledge update (4 min)
Declaring the objectives of the lesson.
Consolidation of the studied material
(Attachment 1)
Verbal
Visual demonstration
Listen to the teacher
Answer questions
Communicative: mastery of the forms of oral speech
Learning new material (13 min)
Explanation of the new material
(Appendix 2)
Verbal
Visual demonstration
Listen to the teacher
Work with a text editor
Personal: creating conditions for self-knowledge
Regulatory: the ability to formulate your own learning goals
Cognitive: ability to work with instructions
Communicative: understanding the principles of building an interface, working with dialog boxes, mastering style techniques for text design
Securing new material (10 min)
Announcement of exercise numbers to practice editing skills
(Appendix 3)
Problem-search
Exercises in a text editor
Personal:creating conditions for self-realization, the ability to organize your working time
Regulatory:
Cognitive:the ability to plan, analyze, reflect, self-assess their activities, the ability to evaluate the initial data and the planned result, the ability to formalize the results of their activities
Communicative: possession of stylistic techniques for text design
Reflection. (7 minutes)
Organization of work with the test system
(Appendix 4)
Problem-search
Answer questions
Personal: creating conditions for self-realization, creating conditions for acquiring knowledge and skills that go beyond the scope of the taught topic
Regulatory: ability to make decisions, take responsibility
Cognitive: the ability to self-assess their activities, possession of the skills to use technology
Communicative: conducting a dialogue "person" - "technical system", possession of telecommunications to organize communication with remote interlocutors, the ability to work in a group, tolerance, the ability to build communication with representatives of other views
Summing up the lesson. Homework (3 min)
Analysis of students' activities, summing up the lesson, commenting on homework
(Appendix 5)
Verbal
Listening to teachers, asking questions, writing down homework
Regulatory:the ability to set personal goals, understand and realize the meaning of their activities
Cognitive: creating a holistic picture of the world based on our own experience
Attachment 1
How is the text stored on external media? (Text on external media is saved as files)
How many bytes of memory does the binary code of each character take in computer text? (The binary code of each character in computer text takes up 1 byte of memory)
How is each character encoded in the text? (Each character in the text is encoded in an eight-bit binary)
How powerful is the alphabet used to represent texts in a computer? (A 256-character alphabet is used to represent texts in a computer)
What is called an encoding table? (The table in which all the characters of the computer alphabet are assigned serial numbers is called the encoding table).
What is the international standard code? (The international standard is ASCII - American Standard Code for Information Interchange)
What is the rule for the encoding table? (Principle of sequential coding of alphabets)
What is this principle? (Latin letters (lowercase and uppercase) are in alphabetical order, and the arrangement of numbers is in ascending order)
Appendix 2
Teacher: Let's talk about a time when there were no printed books. Is that possible? - you will be surprised. Maybe!
Long ago, books were written by hand. The ancient chronicler sat over books for a very long time, drawing intricate letters. It is incredibly difficult to write an entire book by hand, which is why in ancient times books were considered the greatest value. Sometimes the chronicler worked for many months and years.
Why did the ancient people work for a long time on the creation of the book?
Pupil: written by hand
Teacher: Later people started printing books. In Russia, the pioneer of the printing business was Ivan Fedorov. On April 19, 1563, Fedorov opened in Moscow the first "printing house" in Russia, that is, a printing house. The first book was published for almost a year. Tell me, if Ivan Fyodorov lived in our time, what would help him create a book faster?
Pupil: Of course the computer.
Teacher: Yes, the computer is the main tool for preparing texts.
What types of information does the book contain?
Pupil : text, graphic, numeric.
Teacher: Text editor - an application program that allows you to create text documents, edit them, view the contents of the document, print the document, change the format, etc.
A text document is a file created with a text editor. It consists only of character encoding table codes. The text document must have a certain structure. It should be divided into lines, paragraphs, pages, sections. Each line ends with special "carriage return" control codes (codeASCII - 13) and "New line" (codeASCII - ten). Often in names text files use the extension.txt - text. There are simple text editors like Notepad and powerful word processors likeMSWORD.
Students sit down at computers. Follow the instructions of the teacher.
In order to start MS Word, you need to do the following:
Start - All Programs -MicrosoftOffice - MS Word or launch MS Word shortcut on your desktop.
Let's take a look at the word processor window. It looks like this:

After starting, the main window of the MS Word editor opens. Let's get acquainted with its elements. On the screen you see the main program window.
The main window can be divided into five main areas:
Title bar
Main menu bar
Toolbar
Workspace
Status bar
Title bar
The title of the window contains the name of the program (Microsoft Word) and the name of the document (by default, Document 1). After the document is saved, the file name appears in the title bar. Files created in word program, the extension .doc or.docx... On the right side of the title bar are the usual window control buttons (Minimize, Maximize, Close). On the left side of the line, there is a quick access panel, where you can add frequently used tools.
Main menu bar
As with other Windows applications, the Word menu bar is a control that provides access to all the functionality of a program. Each menu item has its own toolbar.
Toolbar
In MS Word 2010, the toolbar opens when you select a specific item in the main menu. The toolbar of each menu item is divided into sections.
Status bar
The status bar is located at the bottom of the main window. The left side of the status bar displays information about the current document:
In addition, the status bar contains operation mode indicators that inform you in which mode you are currently working. The black color of the indicator corresponds to the on state, gray - off. Also on the right side is the Scale tool.
Workspace
The working area of \u200b\u200bthe Word window is the field of the document. In an empty work area, the text cursor representing the character input position is positioned at the first position of the first line. The size of the text on the screen depends on the selected scale. You can set the desired scale using the menu (View -\u003e Scale) or the Scale button in the status bar. In the drop-down list of the Scale buttons select the required value. If the desired scale is not in the list (for example, 90%), the value is entered directly into the text field (the "%" sign can be omitted, it is enough to enter numbers) and press the Enter key.
Rulers
The rulers (horizontal and vertical) allow you to visually estimate the current position of the cursor in the text. However, in MS Word, rulers perform additional, possibly more important functions.
Horizontal ruler allows you to visually change:
Indent paragraphs
Fields per page
Width of columns and columns of tables
Set with mouse tab stops
As you move the cursor, the indentation and tab stops on the horizontal ruler reflect the settings for the paragraph the cursor is in.
Vertical ruler is displayed along the left margin of the page.
With it, you can quickly adjust the top and bottom margins of the page, as well as the height of the rows in the table.
You can display the rulers on the screen as you like, or remove them to free up more space for your document.
Quit MS Word
After completing the current session, you need to exit MS Word. To do this, you can use one of the following methods (slide 14):
Select the File menu -\u003e Exit.
Select the Close item in the system menu of the main MS Word window.
Place the mouse pointer on the system menu icon in the main MS Word window and double-click the left mouse button.
Click the Close button in the title bar of the main window.
Press Alt + F4 on your keyboard.
If any of the open windows contains unsaved information, MS Word will offer to choose what to do with it. To do this, a dialog box similar to the following will appear on the screen.

To continue the operation, select one of the options
Yes - Saves the document and exits MS Word.
If the file has not yet been named, MS Word will open the Save Document dialog box
No - Exits MS Word without saving the document
Cancel - Closes the current dialog box and returns to MS Word
Working with text editors. Editing.
The skills of entering and editing text are necessary for the user not only to work with a text editor. These skills are basic when working with any type softwarewhere interactive mode is used. With any variant of symbolic input, the user is given the opportunity to correct errors, that is, edit the text. There is a concept of a basic editing standard. It is a set of operations that perform the same for all types of character input.
Basic Editing Standard Techniques:
Appendix 3
Performing exercises No. 1, 6, 7, 9, 10 pp. 9 - 10, p. 5.1 Work with the text from v.2 of the practical book.
Appendix 4
Text Editor test created on a test systemSmartNotebook
Appendix 5
Homework: §14 - 15, questions at the end of paragraphs, exercise. 2, 3, 11, 12
Pavlodar teacher training college them. B. Akhmetova
I approve
Deputy Director for SD
_________ E.A. Poberezhnikova
"___" __________ 20__
Public lesson
on the topic: " Work with theMS Excel»
thing: Computer technology
group: DV-22
teacher: Saganaeva R.S.
The date: 02/14/2015
Lesson topic: Working with MS Excel
Lesson objectives:
educational - acquaint with spreadsheets in the application environment Microsoft Excel; form the initial skill of entering text, numbers, formulas into a cell; give an idea of \u200b\u200bbuilt-in functions; practical application of the studied material; consolidation of knowledge general principles the work of the MS EXCEL spreadsheet processor and the ability to draw up a table for solving a specific problem; Formation of an understanding of calculations in spreadsheets as an important, useful and widely used structure in practice.
developing - to promote the development of logical thinking, memory, attention, creative imagination, the development of the ability to apply educational information in non-standard situations, the development of cognitive interest; development of skills for individual and group practical work; development of skills to apply knowledge to solve problems of various kinds using spreadsheets.
educational - fostering a creative approach to work, a desire to experiment; development of cognitive interest, education of information culture; vocational guidance and preparation for further self-education for future work activities; education of communicative qualities for rational and productive work.
Lesson type:combined.
Lesson form:conversation, group work, individual work.
Interdisciplinary connections:computer science and mathematics.
Equipmentlesson:
personal computers from operating system Windows 7;
multimedia projector, screen;
microsoft Excel program;
the electronic version of the lesson is a PowerPoint presentation;
handouts (for each student) - workbook, laboratory work.
During the classes:
Organizational stage.
Hello! As you can see, we have many guests today. I want to tell you that I am very worried. I think you are also a little worried. Therefore, I extend my hand to you and ask you to extend your hand to me. Hope you can help me today.
Look at the screen and try to formulate the topic of our lesson.
Slide 1-5. Variety of tables.
Slide 6... The topic of our today's lesson is "Working with Microsoft Excel." Today in the lesson we will get acquainted with the Microsoft Excel application environment and learn how to enter text, formulas and numbers into a cell, perform simple arithmetic calculations.
Look at your desk. Each of you received such a sheet. (Demonworkbook is being stripped).This is a page in a workbook. Here we will take notes throughout the lesson. At the end of the lesson, I will give you marks. Sign your workbooks.
2. Learning new material.
Terms and concepts. Slide 7

Spreadsheet is a program for processing and storing numerical data.
The most common among users is the Microsoft Excel spreadsheet. The document created in the spreadsheet is called working book ... Each book consists of worksheets ... Each sheet consists of 65,536 rows and 256 columns. Rows are numbered with integers, and columns are numbered with letters of the Latin alphabet. At the intersection of a column and a row is - cell .
A cell is the smallest worksheet object at the intersection of a column and a row. Cell name Is the column name and row number. Range Are adjacent cells in a row, column, or rectangular area.
Complete in workbook # 1.
Window structureMicrosoftExcel. Slide number 9

Complete in notebook number 3
Slide number 10.
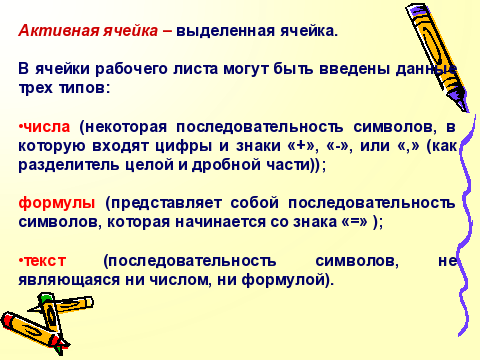
Active cell -highlighted cell.
Three types of data can be entered into the cells of the worksheet:
numbers (some sequence of characters, which includes numbers and signs "+", "-", or "," (as a separator of integer and fractional parts));
formulas (is a sequence of symbols that starts with the "\u003d" sign);
text (a sequence of characters that is neither a number nor a formula).
Complete in workbook # 5B.
Creation of formulas.Slide number 11
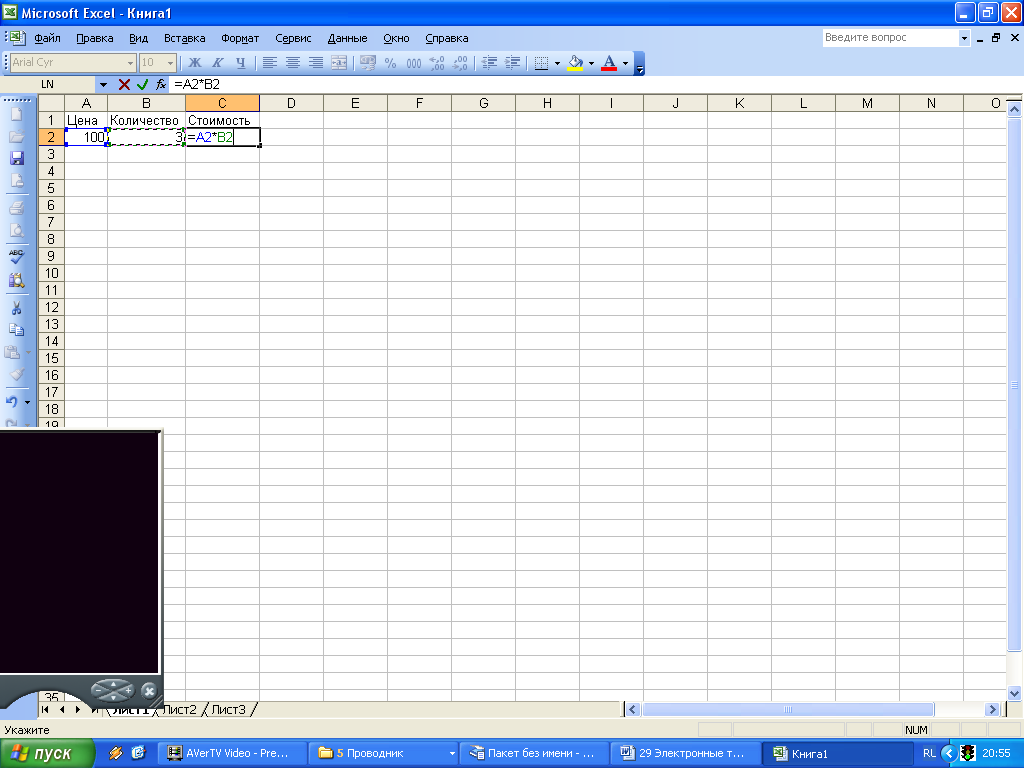
To determine the cost of goods in cell C2, you should go to this cell,
Enter the "\u003d" sign,
Click on the address of cell A2
Put the multiplication sign (*).
Click on the address of cell B2
Entering the formula is completed by pressing the key, after which the result