How to make a dark background in Word. How to make a page background in different ways in Word
It means not only its own set, but also related actions. For example, changing the font size or type, line spacing, or margins. Sometimes it happens that simple black symbols on a white background do not meet the task before you. It is also possible to change the color of the letters; for this, the corresponding window in the word processor interface is used. As for the sheet itself, on which the symbols are located, it can also be changed. In the program, this area is defined by the "Background" parameter. It is considered the space of the printable area on the sheet - either completely or limited by some kind of frame, for example, a cell in a table. So, the background of this area can be changed as if you were printing on colored paper or directly on a photograph.
Change background
The structured settings menu displayed in the upper part of the working window of the program, the so-called Ribbon, contains options, changing which, you can control the appearance and design of text in the document. In this case, before making the background in Word, we will need to find the "Page Layout" tab in this menu. Among other items, there will be a group of three elements that allow you to control the background of the document. To set the background to a simple color, click on the "Page Color" button and click on the desired shade in the palette that appears on the screen. The entire document will now be colored in the selected tone. If in the standard palette you have not found anything suitable for you, below it there will be a selection dialog "Other colors". In it, using a selection from the gradient, you can manually set the desired color.
However, solid fill also does not always meet the user's requirements. In the same menu, you can choose additional effects that diversify appearance document. Patterns or textures will be applied right on top of the color, so that by combining them you can achieve almost any desired look. To adjust, click on the corresponding color and click on the patterns. Changes will be displayed in the main window in real time so that you do not have to close the settings window and, if suddenly the result does not suit you, open it again. This kind of preview helps a lot when you are looking for something specific, and not just picking a good background.
In addition, you can use a picture as a background, as if you were placing text on top of a photo. To do this, select "Other ways of filling" and there find the item "Image". In the same window there is a setting for transparency and color, so that you can choose exactly the appearance that you think is necessary for your document. Keep in mind that too bright colors can make the text unreadable, and they do not look very pleasant to the eye. You also need to remember that the color reproduction of the monitor has limits and distortions, so when you print on a color printer, you may end up getting something different from what you expected and what you saw on your display.
Remove background
When the background becomes unnecessary, or if your experiments to find the optimal colors have failed, you can remove it from the document with one click. In the same menu, on the Page Layout tab, click on Page Color and select the item with no color. This is a method for removing the background in Word, it removes all the fill settings and patterns that you selected earlier. After that, you can choose a new background or leave it unchanged. Just remember that if your document has several areas with a customized background, then the one on which the cursor is positioned at the time of pressing the button will be cleared, since it is this area that is considered active. If you want to undo an action, say, by accidentally highlighting and clearing the wrong area, you can use the menu item of the same name or the keyboard shortcut Ctrl + Z.
Usually text documents are typed on a white background. But, in some cases, it becomes necessary to make the background of a different color. For example, such a need may arise when creating a booklet or brochure. Fortunately, the Word text editor allows you to do this. In this article, we will explain how to make a page background in Word 2003, 2007, 20010, 2013, or 2016, as well as how to remove it.
How to make a background in Word 2003
If you are using a text editor Word 2003, then in order to make the background of the page a different color you you need to open the "Format" menu and go to the "Background" menu.
In the "Background" menu, you can choose one of the proposed colors or click on the "Other colors" button, after which you can choose any color at all as the page background.
How to make a background in Word 2007, 20010, 2013, or 2016
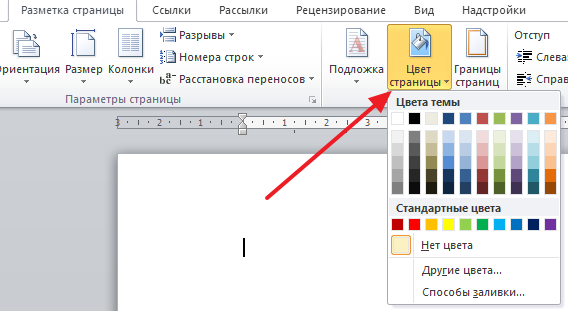
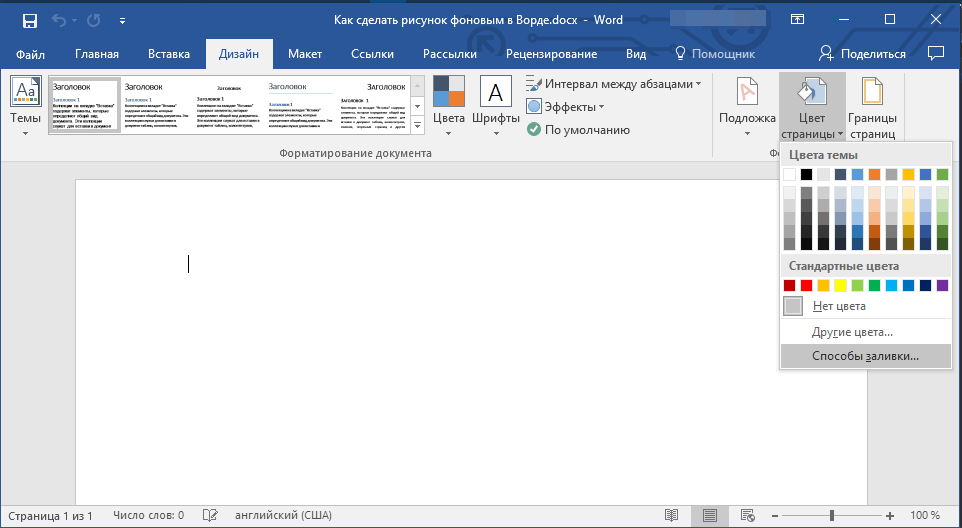
In Word 2007 and newer versions of Word, changing the page background color is done a little differently. Here, in order to make the background of the page not white, but, for example, red, you need to go to the "Page Layout" tab and click on the "Page Color" button... After clicking on this button, a small menu will open with a list of standard colors for the background of the page.
If none of the suggested colors suits you, then you can choose the "Other colors" option.

This will open the "Colors" window. Two tabs will be available here. On the General tab, you can choose a page background color from a larger list of colors.

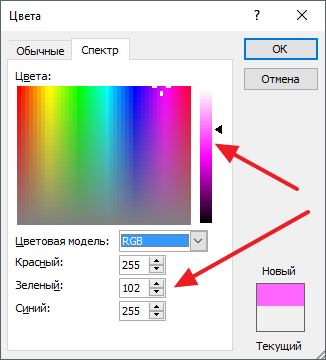
And if you go to the "Spectrum" tab, you can choose any of the RGB colors.
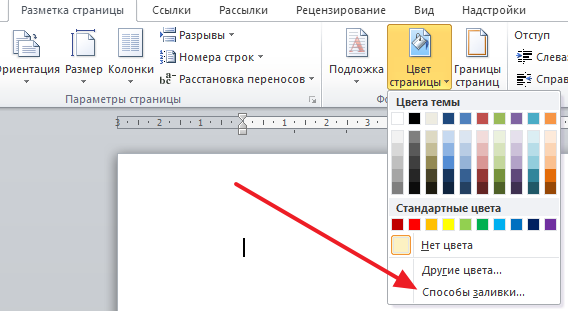
In addition, after clicking the "Page Color" button, you can select the "Fill Methods" option.
This will open a window with a lot of settings. Here you can make the background of the page one, two or three colors, as well as adjust the gradient.
You can fill the background of the page with a texture if necessary. To do this, go to the "Texture" tab. Here you can choose one of the proposed textures or upload your own.

You can also add a pattern ("Pattern" tab) or a picture ("Picture" tab) to the background of the page.


As you can see in Word, there are more than enough settings to control the background of the page. Using these settings, you can make almost any page background.
How to remove the background in Word
If you go to remove the background in Word, then it's even easier. In Word 2007, 20010, 2013 or 2016, to do this, go to the Page Layout tab, click on the Page Color button and select the No Color option. After that, you will get a pure white page background, regardless of which page background settings were used (fill with color, picture or texture).

And in Word 2003 you will need to open the "Format - Background" menu and then select the "No color" option in the same way.
If you have worked with word documents, you most likely paid attention to highlighting in the text, which is designed to draw attention to a specific object in the text. It can be as a single letter, word, sentence, or even a cell in a table that is inserted as an object. It is even possible to highlight the entire sheet as a background, or the entire document. But over-emphasis can not only fail to fulfill its purpose, but can also be annoying when viewing and reading a document. I think that you are not carried away by such extremes (although I have seen this often), and if you come across such a document for reading or familiarization, after reading you will know how to remove the background after the text in the Word, how to remove the background in the Word when copying and how to make the background. Let's go in order.
How to remove the background behind the text in Word
As I said above, the background behind the text can be present in different elements. These include a letter, word, paragraph, all text or element in a table (cell, column, or row).
Remove page background
To remove the page background, do the following:
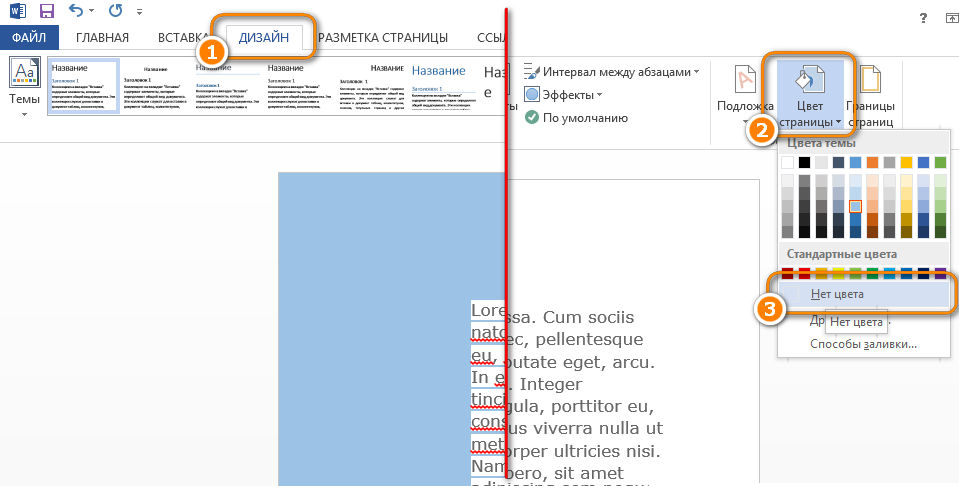
- For Word 2007-2010 open document at the top of the Word select the "Page Layout" section, for Word 2013 you need to select the "Design" section. I am using Word 2013 and the images are for this version.
- In the section find the "Page Background" panel in which you need to click on the "Page Color" button
- In the drop-down menu click on the link "No color"
Remove the background of the text
In addition to setting the background for the entire page, it is possible to select a separate text as a background. To remove this selection:
- With the cursor, select all the text, the background of which you want to remove or change
- Click the Home tab at the top of the document
- Find the paint bucket icon and click on it
- Select no color from the dropdown list. The background of the text you selected disappears.
- Another tool to remove background text is a marker. With it, you can selectively mark the desired words, as well as selectively remove the background. You just select this tool, choose a highlight color (if you need to highlight) or the item "No color" (if you want to remove the background color and just interactively select selective text. You can also select all text.

Removing the background of an entire table
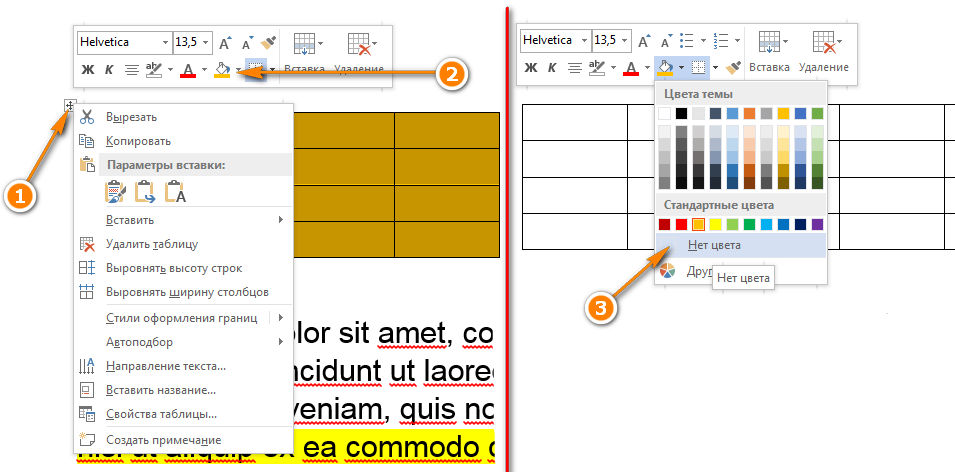
It's not uncommon to see brightly highlighted cells or even the entire table. Many financial documents look like schoolchildren's holiday cards. To get rid of this, do the following:
- Move the cursor over the table (a cross should appear in the upper left corner of the table) and click on the cross with the right mouse button. A context menu appears
- Click on the fill bucket.
- Select "No color" from the drop-down list.
Background individual cells changing or removing is no more difficult than the background of the entire table. For this:
- Select several cells with the right mouse button (without releasing it), after selection a pop-up menu should appear. If it doesn't appear, right-click on the selected cells. For one cell, right-click on it right away.
- Click on the bucket icon.
- In the drop-down list select "No color"

Very often, when working with text, you have to select and copy the text found on the Internet. At the same time, when you insert text into the Word, it retains all the attributes and formatting that was indicated on the Internet page and the background text is far from everything that you transfer to the document. This can be font, size, color, and more. In order to get rid of the background and all formatting in general, you need to do the following:
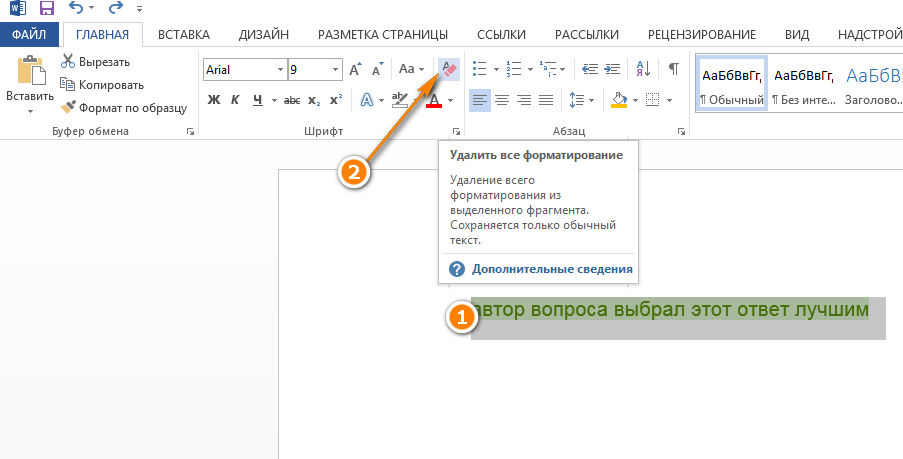
- Select the text you have pasted.
- Go to the "Home" tab, find the "Remove all formatting" icon with an eraser image and a letter on its background. Click on it and Word will remove all formatting and the background of the text as well. Another option not to "Enter" unnecessary formatting into the document is to use notepad before inserting it into the Word (included in the standard windows package). Notepad does not accept formatting. You paste text into notepad, then copy this text from notepad into Word.
How to make a background in Word
There is no need to describe how to make a background for all elements, because you can do all of the above for building the background. Just choose the color you want instead of choosing No Color.
Page background
Do you know such a proverb - "there are no comrades for the taste and color"? There is still no clear preference for the background color of the page. Some people like standard white, while others prefer silver, light blue or even emerald green. In this case, Microsoft Office Word 2010 provides a wonderful option to select a background color. Before making changes, please note that changing the page background is only possible in the "Page Layout" and "Web Document" modes.
- Select either Page Layout or Web Document mode (View tab - first group on the left, Document View Modes).
- Click the Page Layout tab and find the Page Background group.
- Click the Page Color button and select the color you are interested in in the pop-up window.
- Choose a color for the background of the page.
Figure 1. The Page Color pop-up window.
You can also use standard colors. If you change your mind about changing the background color of the page, but have already applied a different one, you need to do one of the following:
- Press the key combination Ctrl + Z.
- On the Quick Access Toolbar, click the Undo Input command button.
- In the pop-up window of the Page Color button, click on No Color, or in the theme colors select White, Background 1.
The Page Color pop-up has a number of other options, which we'll cover below.
"Other Colors" item of the "Page Color" pop-up window
Clicking on "More Colors" opens the "Colors" window with two tabs: "Normal" and "Spectrum".
The General tab provides the ability to choose a color from an extensive palette of color swatches. By clicking on the hexagon of the color you want, you select the background color that the page will accept. Decide on the color that suits you and click "OK".
Figure 2. The "Colors" and "Spectrum" tabs of the "Other colors" item of the "Page Color" pop-up window.
The "Spectrum" tab allows you to select a color model from the drop-down list for choosing color models (RGB, HSL) and manually adjust the color.
Manual color adjustment:
- Visual choice of color. The principle of operation is the same as on the tab "Regular" - you need to click on the selected color (in this case, the shape representing the color is square, like the color selection window itself);
- Adjust the color gamut. Using the slider to the right of the color selection window, you can change the saturation of the color gamut by moving the slider;
- Color meanings. In the lines of the color selection forms by category (red - red, blue - blue, green - green), you can use the arrows to select the value of a certain color. You can also enter the desired numbers corresponding to the value of a particular color (very convenient for professionals working in the field of web design).
Notice that the selected color appears at the top of the square in the lower right corner of the Colors window. This part of the box is called "New" and shows the new color swatch, and "Current" is the one currently present.
If you want to change the color of the page again, then by opening the "Page Color" window, you will see that there is a new item - "Last Colors". Accordingly, these are the colors you previously used.
Item "Fill Methods" of the "Page Color" pop-up window
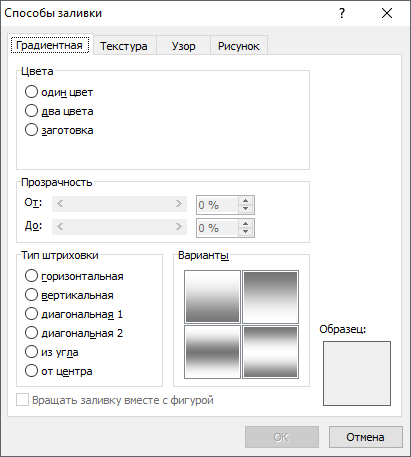
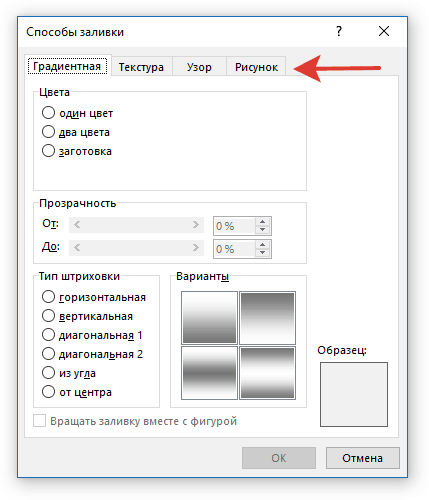
Clicking on the item "Fill Methods", you go to a window with four tabs: "Gradient", "Texture", "Pattern" and "Picture". Let's consider them in order.
Gradient tab
The Gradient tab has a number of options for adjusting the color, transparency, and hatch type of a gradient fill.
Colors area
There are three positions in the Colors area: one color, two colors, and a preset.
"One color" - when the position is activated, a form for choosing a color with the name "Color 1" appears on the right. After clicking on it, a color selection window appears, identical to the one discussed above, with the only difference that the color will be applied to the gradient fill of the page. The choice of color there is carried out in the same order as described above. The selected color is displayed in the Variants and Swatch areas.
Also under the field "One color" there is a field for choosing the brightness of the color, which can be changed by clicking on the buttons "Darker" and "Lighter". You can also change the brightness using the slider.

Figure 3. The Fill Methods window on the Gradient tab.
"Two colors" - when this position is activated, it becomes possible to select two colors ("Color 1" and "Color 2"). Only the ability to change the brightness "on the fly" is no longer provided. The thing is that the gradient fill is formed from only two colors (in this case). In the “one color” variant, the second is set according to the principle of increasing the saturation of the first and is actually a multiplied version of the first. When you drag the brightness slider, the saturation and brightness value of the fill color changes (the first and second - more precisely, the light and dark parts). In the variant with two colors, one color is the “light side” of the fill, and the other is the dark one, ie. customization is somewhat more difficult and requires more experience in color matching. But at the same time it allows you to create a custom fill color scheme. In any case, you can change the brightness and saturation of each of the two colors (separately). For this:
- On the Page Layout tab, click the Page Color button;
- In the window that opens, click the "Fill Methods" item;
- The Fill Methods window opens to the Gradient tab (default). In the column "Colors" activate the item "two colors". The "Color 1" and "Color 2" forms will open. Click on any of them - a color selection pop-up window will open;
- Click on the item "Other colors" - the window "Colors" will open;
- Click on the "Spectrum" item, select the desired color in the color selection box, or enter color values \u200b\u200bin the color channel values \u200b\u200bsetting forms.
- Use the slider to change the brightness;
- Click "OK" or press the "Enter" key;
- Notice how the gradient fill swatch has changed in the Fill Methods window. Do the same for the other color. Adjust the colors until you find the combination that works for you.
Figure 4. Setting two colors of the "Gradient" tab.
"Blank" - when this position is activated, the "Blank name" area appears, in the field of which you can select one fill pattern from 24 existing ones. The fill patterns are designed to speed up your work as they are prepared in advance. The fact that there are more than twenty of them allows almost any user to find something suitable.
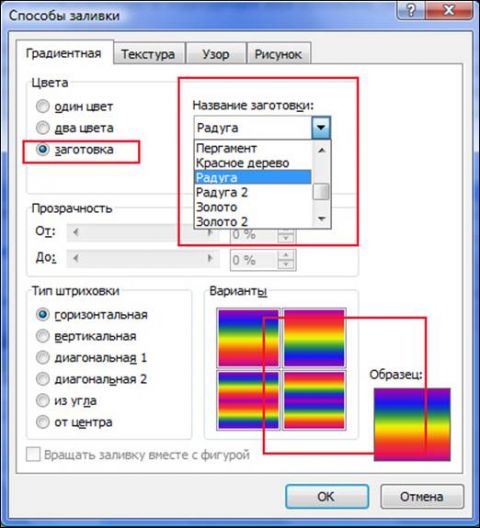
Figure 5. Setting up a preset for the "Gradient" tab.
Transparency area
Allows you to change the transparency of the fill using the sliders.
Area "Hatch Type"
Has six options:
- horizontal;
- vertical;
- diagonal 1;
- diagonal 2;
- from the corner;
- from the center.
Allows you to change the direction of the hatch (color distribution vector). With this tool, you can further customize the appearance of the fill. From the name of the hatch option, you can understand how the appearance of the fill will change.
Figure 6. Selecting the type of hatching.
Texture tab
Allows you to choose a texture from 24 ready-made options as the background of the page, or upload your own. To do this, click on the "Other texture" button and find the one you need. Click on the file with the texture, then on the "Insert" button of the "Select texture" window. Click "OK" - the selected texture will be applied as the background of the document.
Figure 7. Selecting an arbitrary texture.
Figure 8. Applying an arbitrary texture.
Pattern tab
The Pattern tab lets you set the page background to a patterned look. There are 48 such “blanks” in the pattern selection window. You can choose the shading color of the pattern and the color of its background. To do this, use the color selection fields of the same name. The selection principle is identical to what we performed above.
Figure 9: Choosing the colors of the pattern.
Picture Tab
If you want the background of your document page to have a specific thematic color, use a picture.
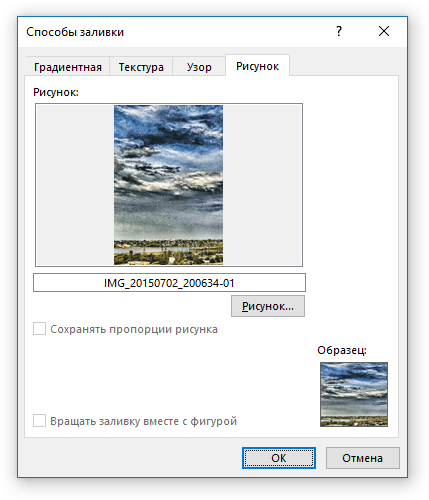
To select a picture, click on the "Picture" button of the tab of the same name. Find the image you need, click on it, and then on the "Insert" button of the "Select Image" window.
After that, the selected picture will appear in the preview window (and on the sample) of the image in the Picture tab of the Fill Methods window. If the picture suits you, apply it to the document by pressing the Enter key or clicking the OK button.
The picture you have selected is now the background of the document. Keep in mind that a well-chosen graphic can dramatically improve the appearance of a document, and vice versa.
Figure 10. Image preview window of the "Picture" tab before selecting an image.
Figure 11. Applying a picture as a page background.
Conclusion
After reading the article and a little practice, you can create the background for the pages of your documents, depending on your goals or desire. You can use patterns, solid colors, gradient fills, or a specific drawing. And as you gain experience, create more and more complex, and, accordingly, more beautiful options.
In the next parts of the article, we will talk about adding a watermark and non-printing characters.
If you are used to formatting text documents created in Microsoft Word, not only correctly, but also beautifully, for sure, you will be interested in learning about how to make a drawing as a background. Thanks to this possibility, you can make any photo or image as the background of the page.
Text written against such a background will surely attract attention, and the background image itself will look much more attractive than a standard watermark or watermark, not to mention a regular white page with black text.
We have already written about how to insert a picture in Word, how to make it transparent, how to change the background of a page, or how to change the background behind the text. You can find out how to do this on our website. Actually, making any picture or photograph as a background is just as easy, so let's move on from words to deeds.
1. Open the Word document in which you want to use the picture as the background of the page. Go to the tab "Design".

Note: In versions of Word before 2012, you need to go to the tab "Page layout".
2. In the tool group "Page background" press the button "Page color" and select the item from its menu Fill Methods.
3. Go to the tab "Drawing" in the window that opens.
4. Press the button "Drawing", and then, in the window that opens opposite the item "From a file (Browse files on a computer)", click the button "Overview".

Note: You can also add an image from OneDrive cloud storage, Bing search, and social network Facebook.
5. In the explorer window that appears on the screen, specify the path to the file that you want to use as a background file, click the button "Paste".

6.Press the button "OK" in the window Fill Methods.
Note: If the picture is not proportioned to the standard page size (A4), it will be cropped. Also, it can be scaled up, which can negatively affect the image quality.
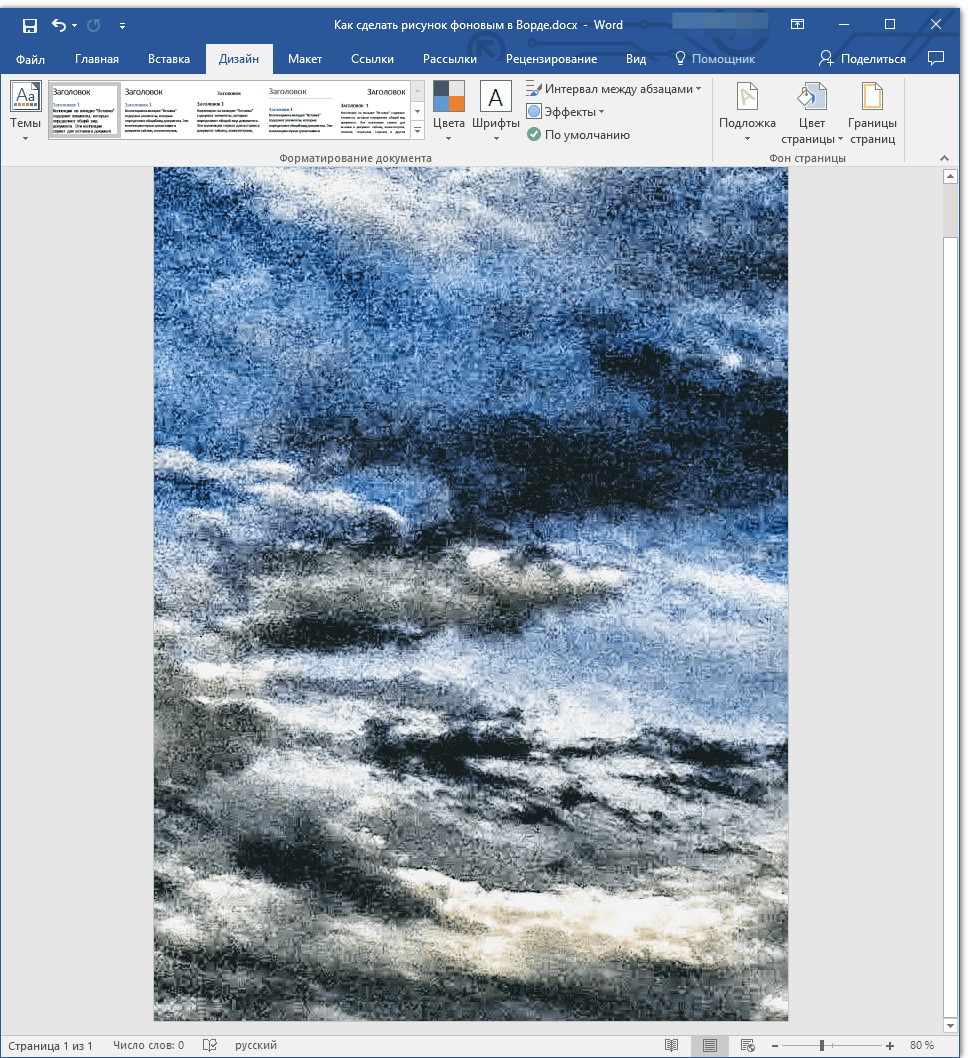
The image you selected will be added to the page as a background. Unfortunately, Word does not allow editing it, as well as changing the transparency level. So, when choosing a picture, think carefully about how the text that you need to type will look like against such a background. Actually, nothing prevents you from changing the size and color of the font to make the text more noticeable against the background of the image you have chosen.