How to solder a micro usb connector on a smartphone. Remedy for poor contact of the USB connector of the tablet computer with peripheral devices
Hello dear readers of the site. After a while, the USB cable or plug charger begin to dangle freely in the connector Micro-USB, and in order to put a tablet computer on charge or connect it, for example, to a laptop, for downloading files, you have to be sophisticated in different ways.
The reason for poor contact in Micro-USB connector is its design and materialfrom which it is made. Perhaps, if you follow the manufacturing technology and materials, then you wouldn't have to complain about the connector design, but our Chinese brothers have learned to make metal alloys from anything, but not from metal. This is what we suffer from.
Look at the part of the charger plug that goes into the USB connector - it is movable, that is, it goes up and down.
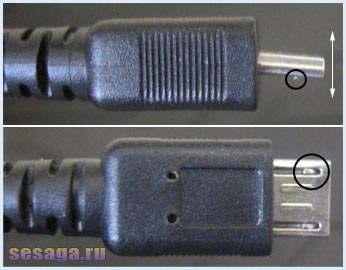
It has special latches (circled) that fix the plug in the USB connector of the tablet computer. In the initial state, the latches are inside, and when the plug is inserted into the connector, they protrude and, clinging to the grooves made in the USB connector, hold the plug stationary. When you take out the plug, then, as I understand it, its back must be lifted up, the latches will go inward, and the plug can be pulled out.
All this is good, but the "metal" from which all this is made is soft. Here it turns out that the input part of the Micro-USB connector expands, the latches stop holding and the plug starts to dangle, from which there is no reliable contact. Moreover, the contacts of the connector itself are located on a thin dielectric area into which the plug enters, and due to its miniaturization, the distance between the contacts is minimal.
![]()
So it turns out that as soon as the plug is moved to either side, there is a loss of contact, or a short circuit between the contacts. And on a working tablet, at the time of charging, a closure between the contacts led it to reboot.
A malfunction of this nature can be easily eliminated, but not final... To completely get rid of this disease Micro-USB connector - it must be replaced with a high-quality analogue. And since it is expensive, and it is not a fact that you will not run into a fake again, you can eliminate the malfunction without resorting to the help of repair services. Here we only need to squeeze the outer edges of the connector, that is, put them in place. It turns out that such a malfunction occurred as a result of mechanical action, which means that we will eliminate it mechanically. Again, if the tablet is still on warranty, then naturally, we contact the service center.
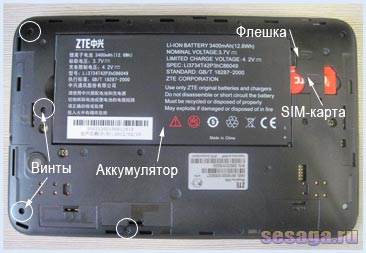
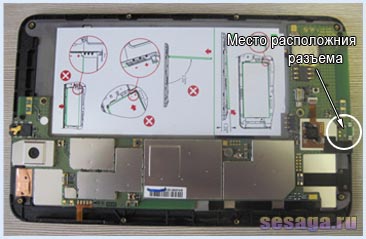
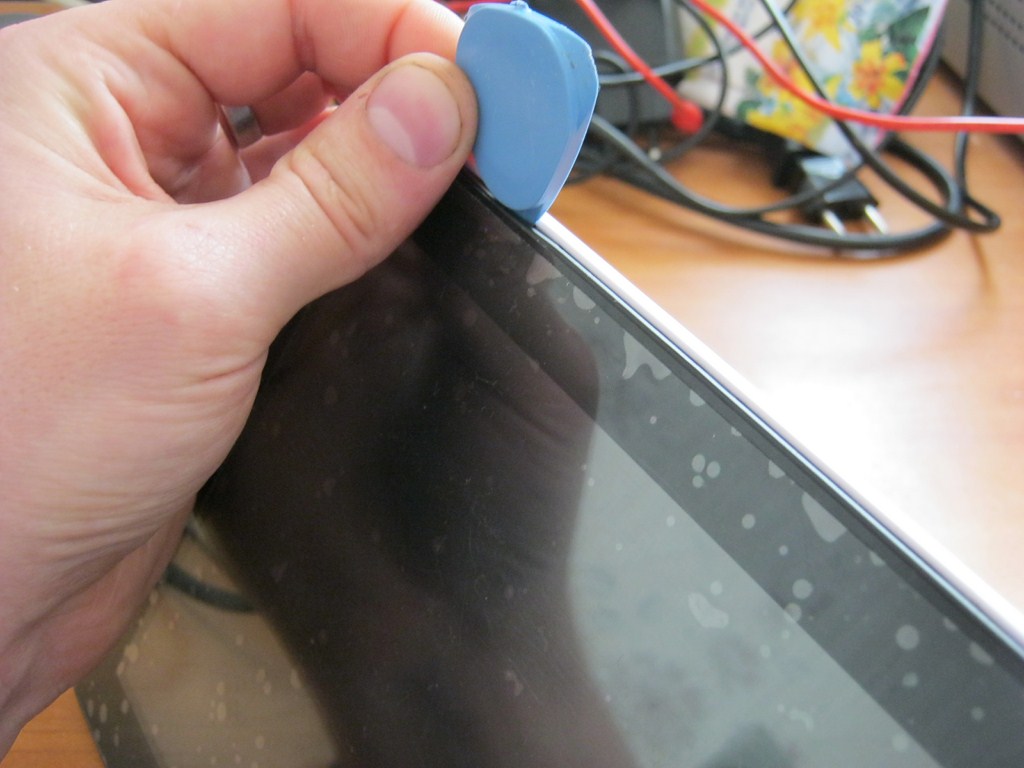
We disassemble the tablet computer.
Remove the back cover, take out the battery, SIM card, USB flash drive and unscrew the fastening screws. There were 11 screws in my ZTE tablet model.
Now carefully remove the common housing cover that covers the board with radio components. Here, as in the remote control, the main thing is to find and snap off the first latch. But unlike the remote control, the plastic of which the body is made is soft, and it is easy to separate the touch panel. As a rule, the touch panel fits into the general case cover, and therefore the tablet should be opened from the side of the touch panel.
In the place where the panel enters into the common case cover, insert a thin screwdriver and, leading along the case, unlatch the latches.

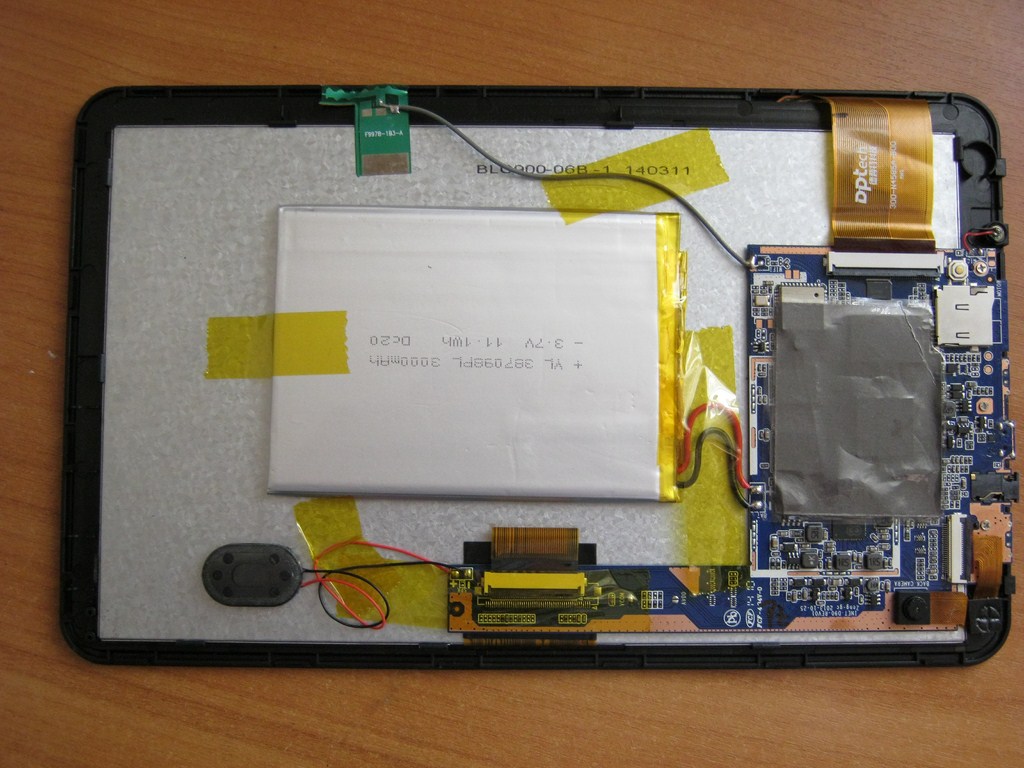
When you remove the common cover, the electronic filling of the tablet computer will open in front of you.
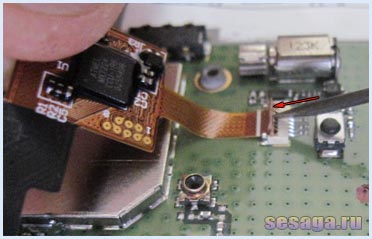
Disconnect the flexible cable.
To get to the USB connector, you will have to disconnect the flex cable that connects to the touchpad.
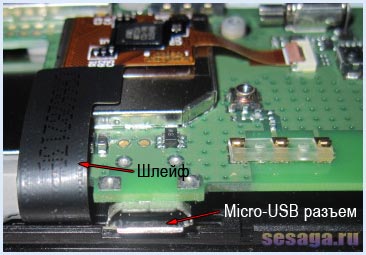
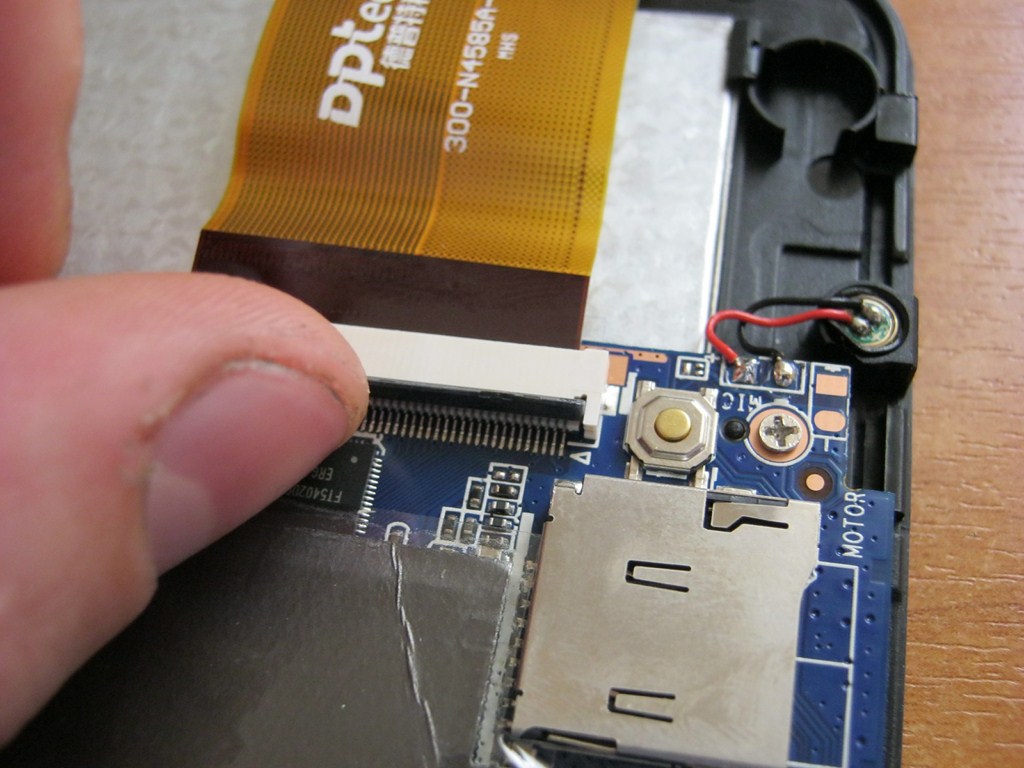
There is nothing complicated here. Use the tip of a screwdriver to pry the latch and lift it up. She should stand upright. There is no need to make any effort.

Most likely, part of the flexible cable will be glued to the metal shield. Gently lift the ribbon cable and lift it off the screen. When you put everything back together, simply press down on the train with your finger, and it will stick in place.
Now pull the ribbon out of the connector towards you, and it will come out quietly.
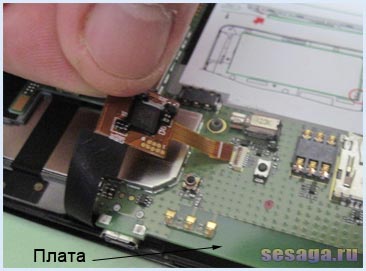
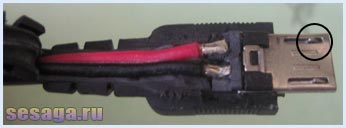
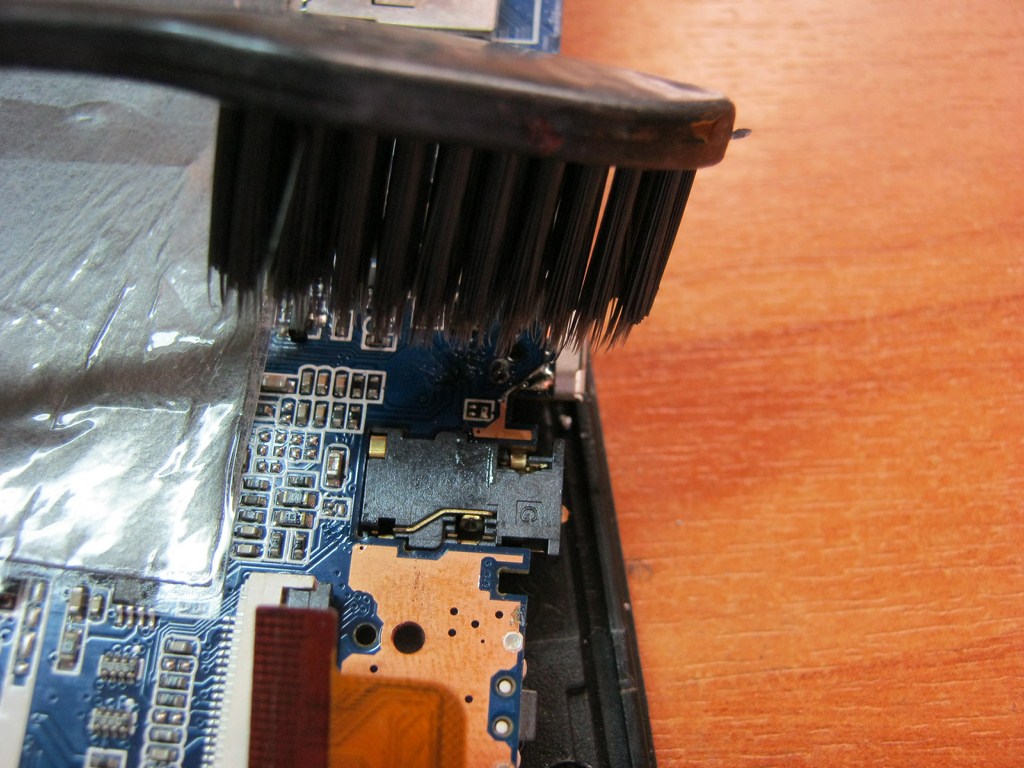
We fix the problem in the USB connector.
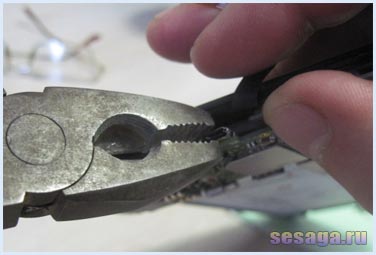
Lift the board up so you can reach the USB with pliers. Here our task is to squeeze the outer edges of the USB connector so that they fit into place.
Why pliers? I tried it with tweezers, but the force that needs to be created to squeeze the connector has to be applied too much - and this is dangerous because at the moment of compression we do not control our strength and can squeeze the edges. Then you will have to bend them, and this is already fraught with the fact that you can finally bend and break the USB connector or tear it off the board.
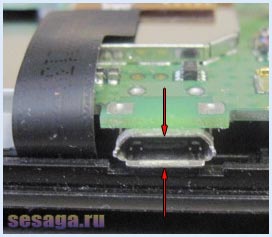
It is not necessary to compress the entire surface, namely, its middle... If we squeeze over the entire surface, then we will simply flatten the USB connector, and we do not need this. Therefore, the process will be like this:
with the corner part of the jaws of the pliers, lightly squeeze both surfaces, and then check with the plug from the charging or from the cord. If the plug dangles, squeeze a little more and check again.
The main thing here do not overdoso that you do not have to bend everything back, so it is better to do the whole process in several stages.
The next photo is probably a little scary, but there were no small pliers, so I squeezed as they were.
It is not necessary to do very tight either... Take your phone and check how hard the plug from the charger or USB cable is inserted into it.
When you're done, collect everything in reverse order. You may have difficulty attaching the flex cord back. Everything is simple here. Insert the cable into the connector until it stops and press the tip of a screwdriver on upper part latches.
In addition, you can also press in the middle of the plug.
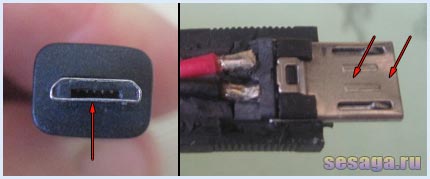
The usual, most common microUSB connectors for soldering for repair.
In the store, they are sold at retail for 30-50 rubles, and in repair shops for 200-300 rubles.
Sent in a bag exactly 50 pieces 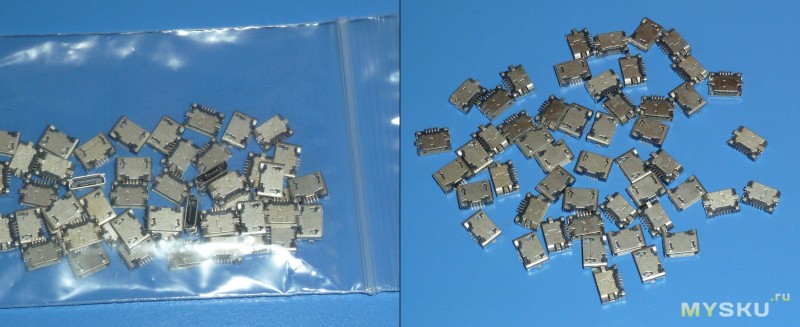
Their size is known to everyone, on the hand they look scanty 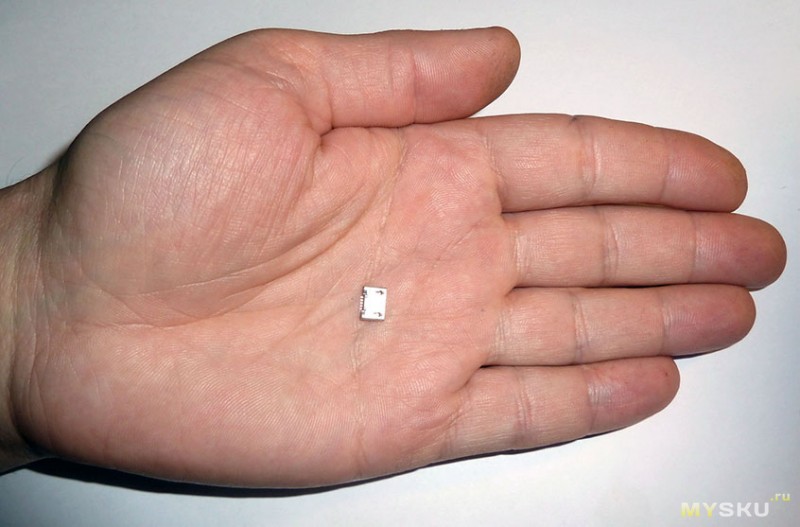
B / W from all sides 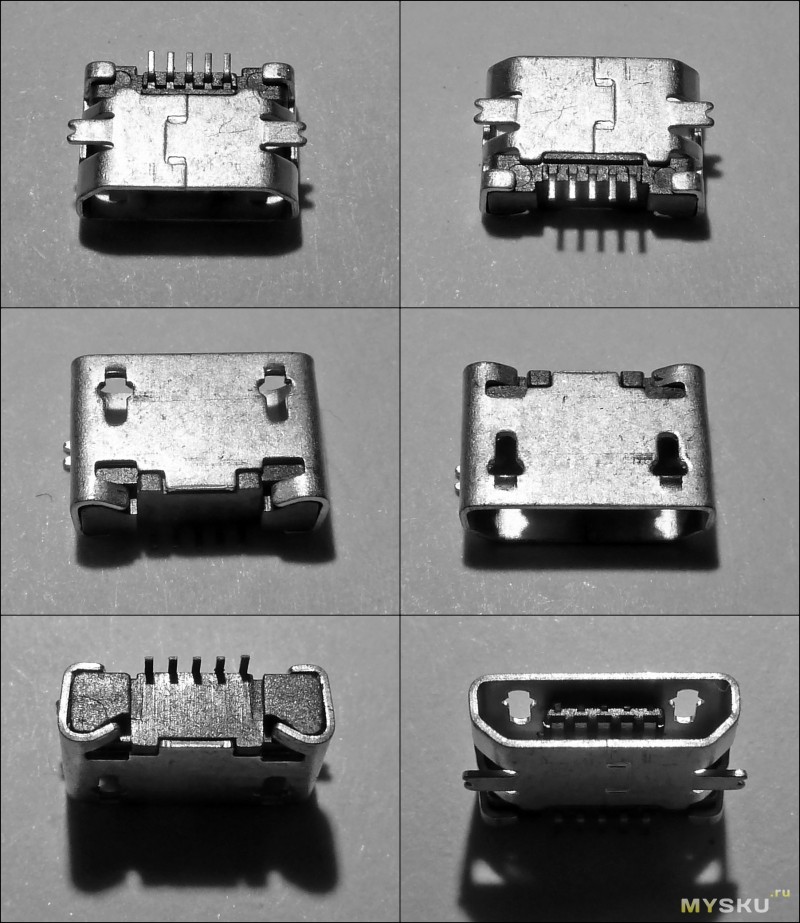
There is actually nothing to write about them, usually the reason for the failure is the careless insertion of the plug.
For illustrative example, I will show their real application.
A patient - lenovo tablet IdeaTab A7600 with a detached microUSB connector. In the workshop, they broke 2500r for repairs, after which he came to me :)
The process of disassembling the tablet was not photographed, but if someone is interested in this, write and I will describe the disassembly of the next piece of iron in more detail.
Seat after removing the remnants of the connector. 
It is noteworthy that they ripped it out "with meat" along with printed foil and connection paths. The sad result - there will be no more data transfer via USB - normal full recovery is too time consuming. If you have a good microscope and a steady hand, you can try to reconnect, otherwise the connector can only be used to charge the tablet.
If the connector is soldered only by the ears, it will be pulled out after a maximum of a month of operation, so in this case it is necessary to strengthen the fastening.
Gluing the connector will not provide the necessary strength of the connection and, moreover, the glue may leak inside.
Another option is to make a clamp and press the connector to the board with it.
I chose the third option - solid side soldering of the connector, reinforced by the solder itself.
The technology is as follows:
- remove excess solder from the board 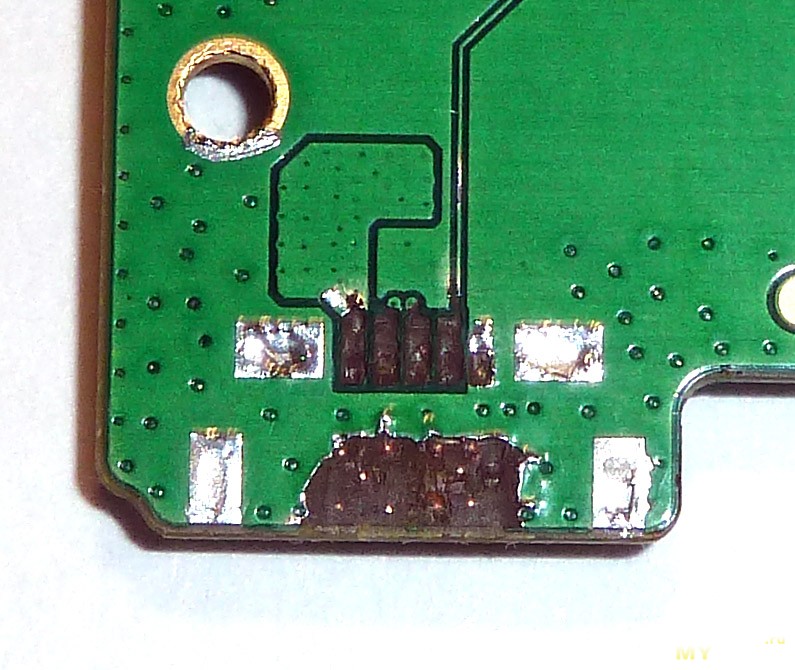
- we remove the mask with a scalpel in the right places 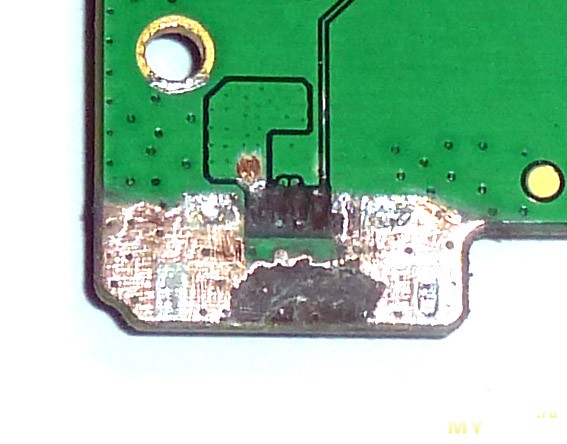
- wondering if this will be enough 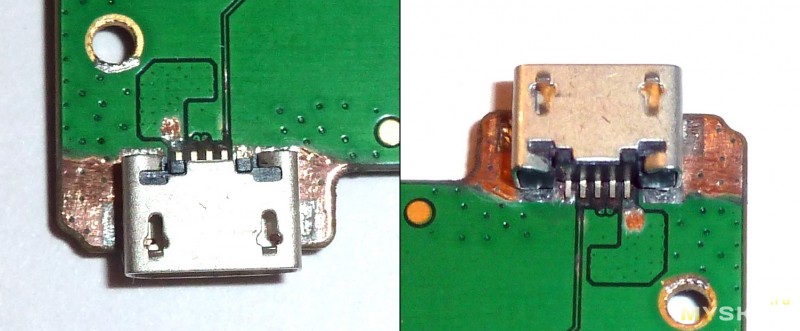
- tin foil, remove excess solder 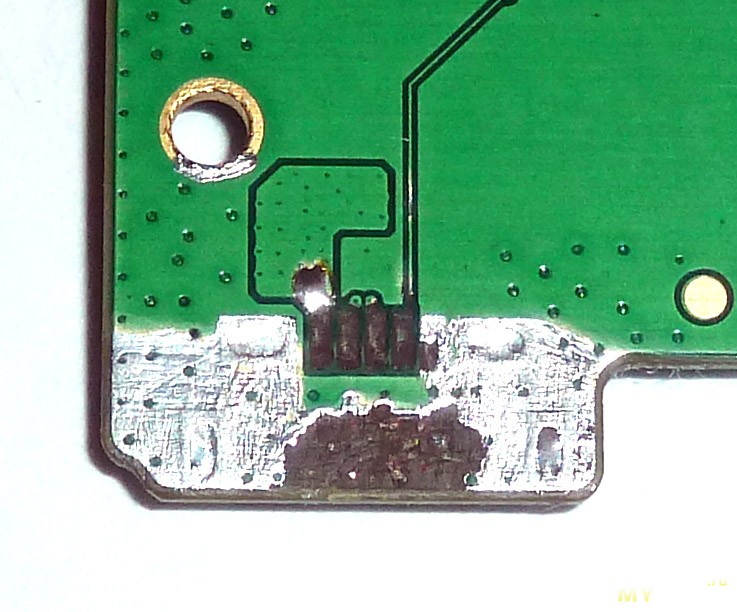
- we grab the connector in the area of \u200b\u200bthe ears 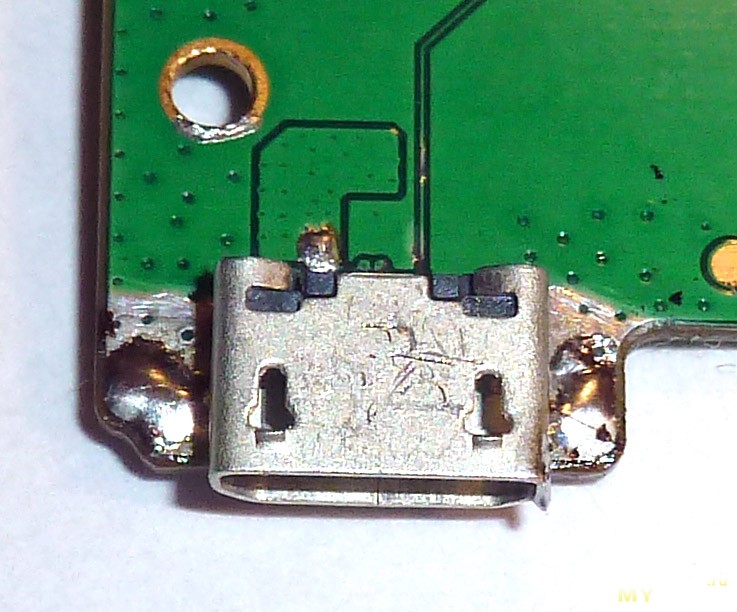
- insert an unnecessary microUSB plug into the connector 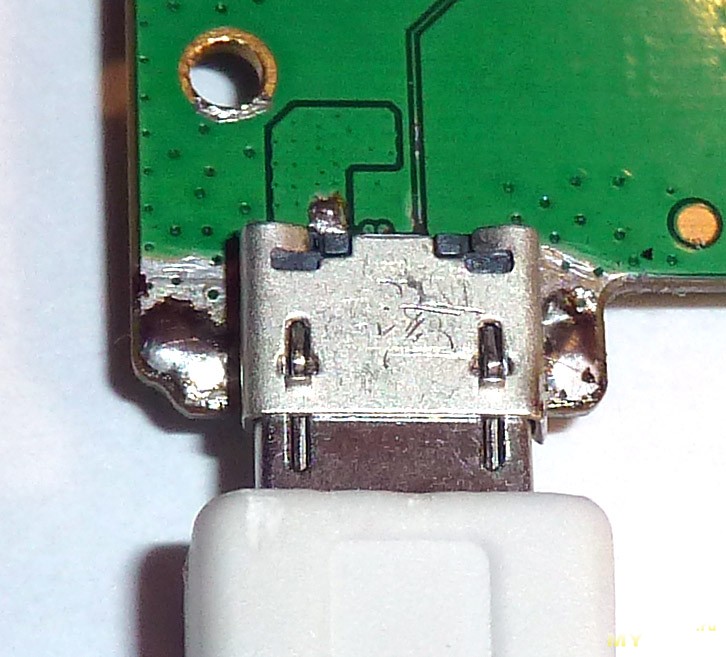
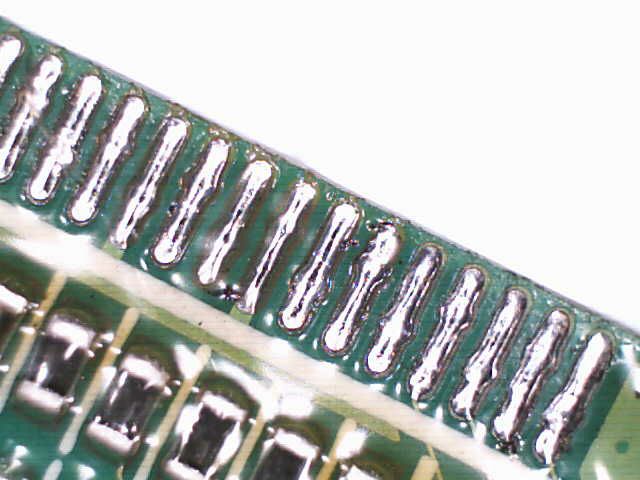
- tilt the board, solder the connector and completely fill the sides with solder.
- we solder the extreme power contacts 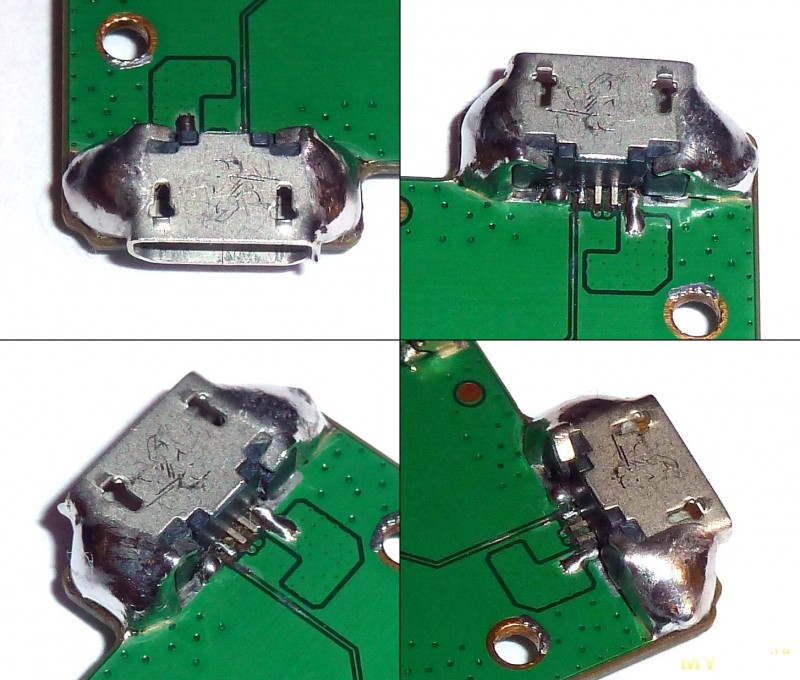
It is necessary to insert the plug for this. to reduce the likelihood of solder flowing into the socket (after which it will only have to be thrown out).
When soldering, do not use liquid flux, because it gets inside the connector and, moreover, facilitates the flow of solder there.
The result looks ugly, but reliable 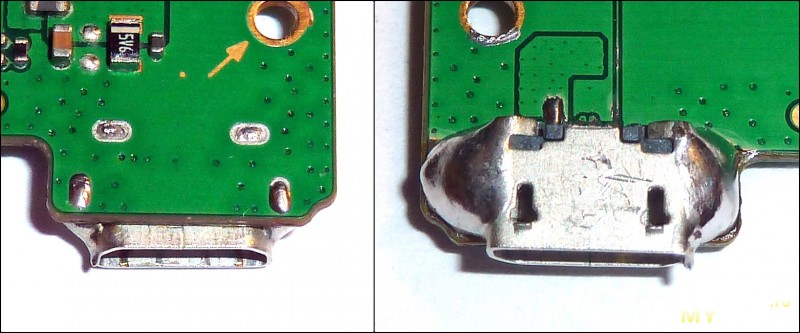
Surprisingly, they manage to tear out the connector soldered even in this way :)
If everything is left as it is, the tablet will be charged with a current of no more than 0.5A. it does not define a jumper between DATA + and DATA- in the network adapter, so it is advisable to put the jumper on the board itself. To perform this operation, you need a microscope and a steady hand. There are no problems with hands yet, but there is no good microscope, so it was rather difficult to carry out this work.
It is necessary to remove the protective mask from the DATA + and DATA- dimes with a scalpel and solder them together with a drop of solder, the arrow showed this place. 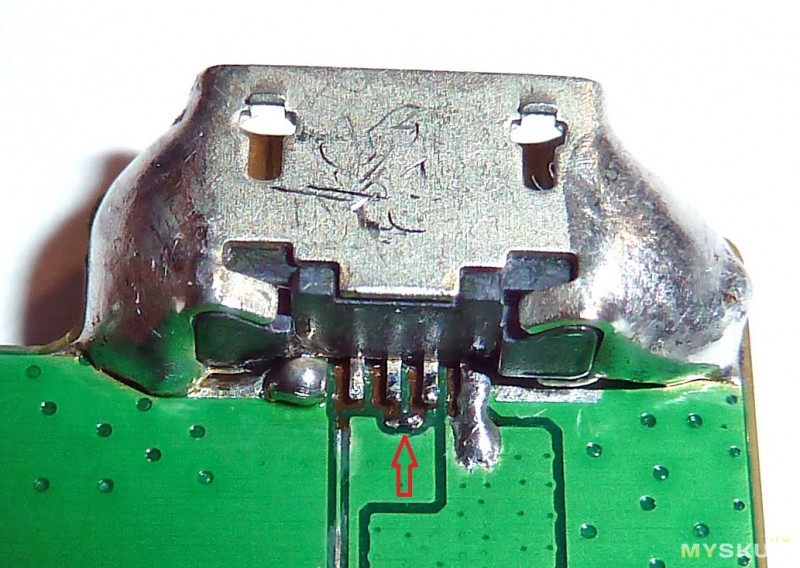
After the alteration, the tablet can be connected to a USB port for charging, which is capable of delivering the full charge current (in this case, 1.5A)
Now you need to file the case with a dremel or scalpel so that the solder rises do not interfere with putting the board in place. 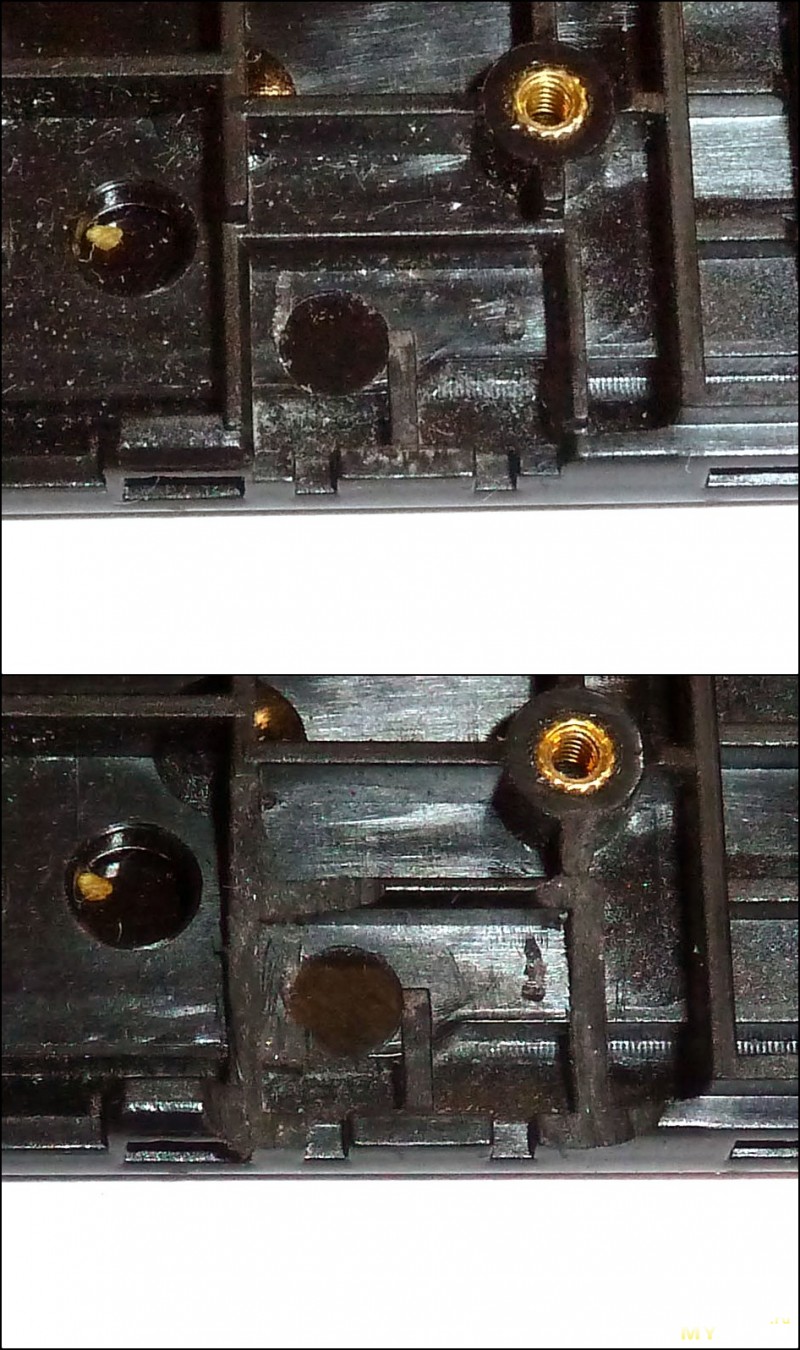
Installed fee 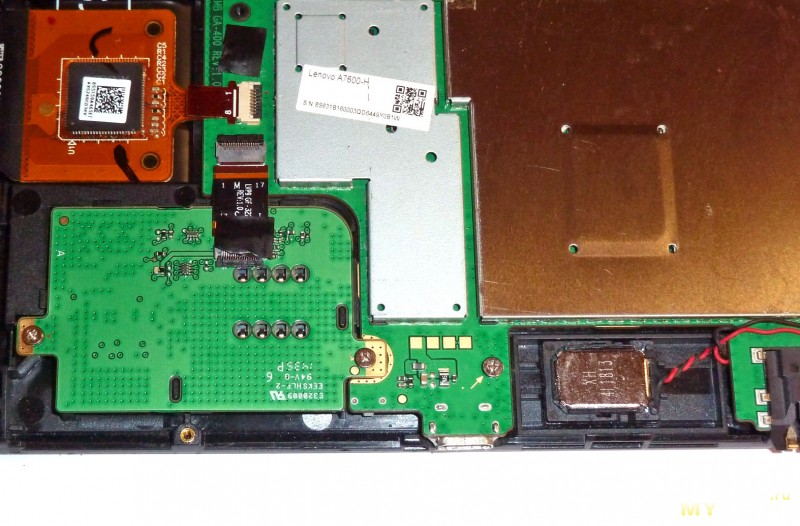
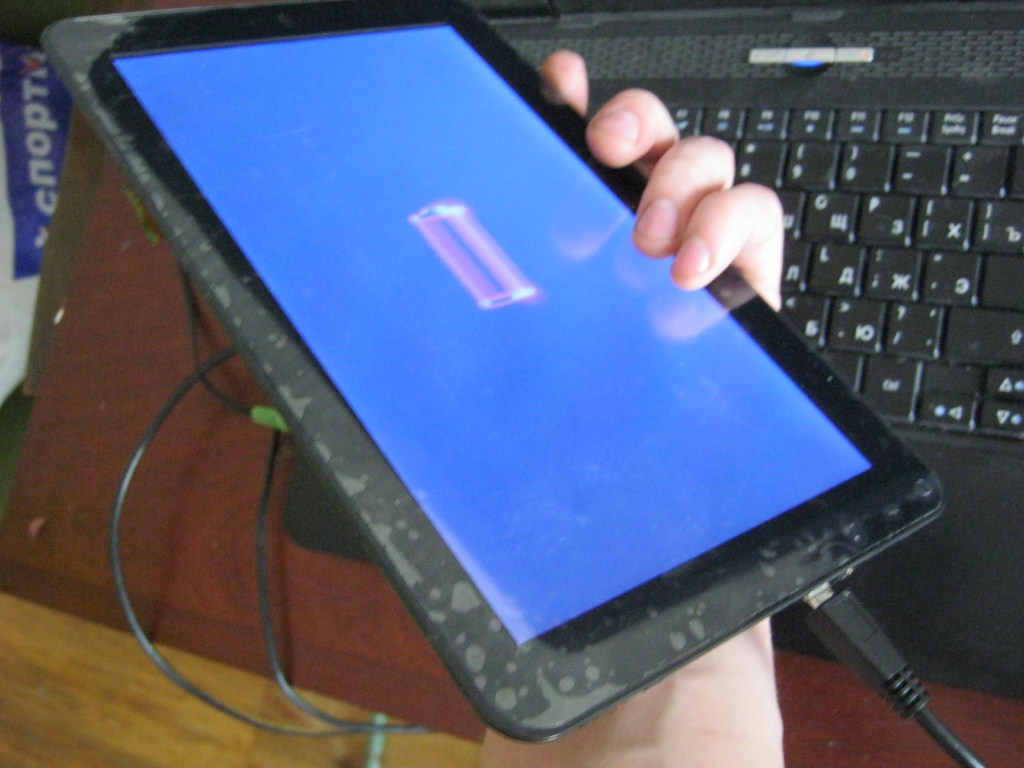
The tablet is assembled, the charge is current 1.45A 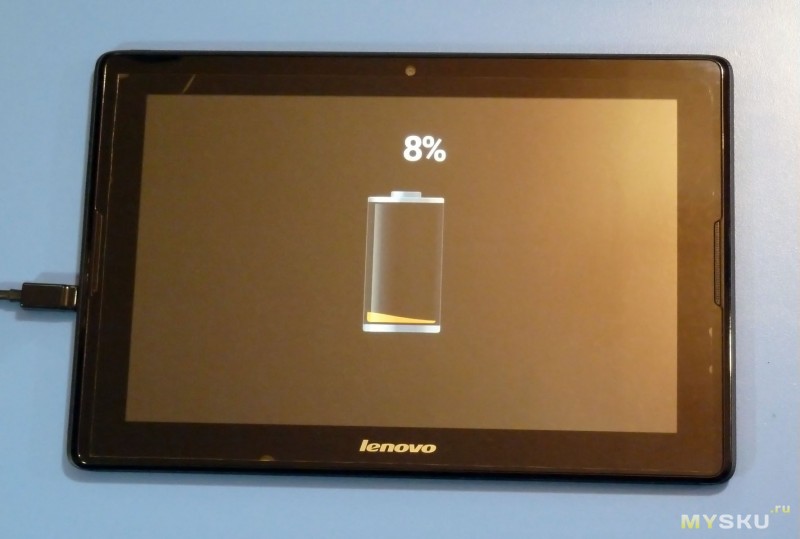
Conclusion: take care of yourself, time and gadgets :)
I plan to buy +77 Add to favorites Review liked +109 +216Now in devices you can often find usb connectors (u-es-bi, English Universal Serial Bus - "universal serial bus "). Due to accidental mechanical damage, for example, while the device is in charging mode, such a malfunction is often encountered - such as a break micro usb connector. You will learn how to solder the micro usb connector yourself in the article below.
If you love tinkering and know how to handle a soldering iron, then it will not be difficult for you to rewire the micro usb connector on the tablet yourself. To do this, we need tools: a 25 watt soldering iron, solder, easy fusible tin, tweezers, a small curly screwdriver, a scalpel or a knife with a thin blade, a magnifying glass.
How to disassemble a tablet (phone, laptop)?
The most important thing is that we do everything carefully and accurately!
For disassembly, we need:
- Screwdriwer set;
- Tweezers;
- Scalpel or knife;
- Soldering iron.
Procedure.
Step 1. Unscrew all the fastening screws on the tablet or phone, remove the back cover by gently prying it off with a knife or scalpel, thereby freeing the case latches from the grooves, tilting the blade towards the screen.
Step 2. After removing the cover on the tablet (phone), you need to ground the soldering iron, solder the wire to the common body (minus) and then the other end of the wire to the body of the soldering iron itself. This must be done in order to protect the tablet from accidental static electricity, which can damage its electronic components. You should also make an antistatic wrist strap and also ground it.
Step 4. After that, unscrew all the mounting screws on the board and turn it over, thereby we get directly to the micro usb connector itself.
List of USB connector faults
1. Micro usb connector has failed.
If the connector has become unusable and further repair is impossible, then it should be replaced. To do this, we need to find a knowingly working one, you can use an unnecessary or faulty one cell phone and unsolder the micro usb connector from the phone. To do this, take a scalpel and push it between the board and the connector, heating the mounting tabs of the micro usb connector, gradually lifting one side, then the other. Further, after the fastening tabs are soldered from the board, you need to take tweezers, since the connector heats up quickly, you should not overheat, because the plastic parts of the micro usb connector can melt and deform. After that, we unsolder the connector pins, they should be heated all at the same time. Pay attention to the installation, smd parts can be near the connector and if soldering is not accurate, they can be soldered or burned, be careful and therefore the soldering iron tip must be thin. The sequence for unsoldering the connector is the same and dismantling the micro usb connector on the tablet should be done in a similar way.
2.Micro usb connector is functional, but disconnected from the main board.
In this case, it is worth paying attention to the integrity of the tracks themselves, for this we take a magnifying glass and inspect the installation, if the tracks are intact on the board, then well, if not, then you will have to restore them. It is necessary to find all the ends of the torn off paths and carefully clean them with a scalpel (clean the varnish), then tin with a soldering iron. After that, we take the micro usb connector itself and solder the mounting tabs of the connector to the board, I advise you to pre-glue the connector to the board before soldering, this will reduce the likelihood of repeated breakage. There is little left, to solder the leads, if the tracks are intact, then it will not be difficult, but if not, we do the following: we take thin copper wires (one hair of a stranded thin wire) and solder between the leads of the tracks and the connector. If for some reason it was not possible to restore all the tracks (the track under the electronic part is cut off and there is no way to track its location). In this case, it will be possible to do only for charging the tablet, while we need to restore only two tracks, two extreme outputs to the micro usb connector, the only drawback is the inability to connect the tablet to a computer and external devices.
Popularity: 80,779 views
They brought a Chinese tablet with the words "does not charge."
Plugging the charger into the connector, I immediately realized that the connector was simply torn from the board. The most frequent breakdown. Well, let's start preparing our client. To do this, with a tenacious gaze, we peer around the perimeter of the plate and look for the screws that fasten it. Without thinking for a long time, we unscrew these screws
Voila!
I don't see any point in disassembling where the memory chip is located, percent and other various mikruhi, since basically repairing a tablet involves replacing the touchscreen, display and connectors.
And here is the micro-USB charging connector. We need to replace it.

Now we need to get the board. We unscrew all the bolts that hold it. We also remove all the cables that go to the board. To do this, lift the clasp with your finger up
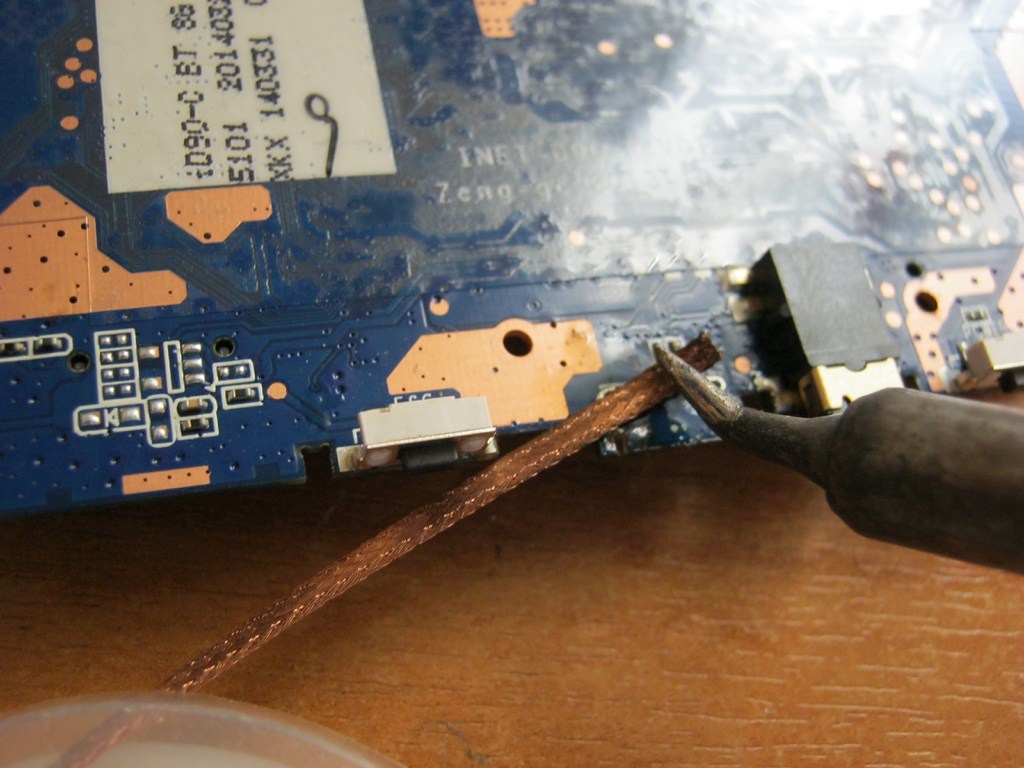
If the wires interfere, we also solder them. I only soldered the battery. Since our connector is torn out with meat and is broken, we immediately throw it away. We begin to clean the seat for the new connector. To remove the solder in the through holes, we need a low-melting Wood or Rose alloy. To begin with, we abundantly plaster the holes with this alloy, do not forget to also smear with gel flux. We heat the through hole together with the alloy using a soldering iron and then abruptly with the help of a desoldering pump pull all the solder out of the hole

I took the rubber tip for the desoldering pump from an old car radio. I don't know what they are doing there, but there are even two of them.
Now we remove all excess solder from the contact pads (patches) using copper braid and a heated soldering iron
After this procedure, on the signal contacts using a soldering iron, solder and gel flux, we need to leave a bump of solder on each contact pad. Although this photo is from a different repair, the example should look something like this:
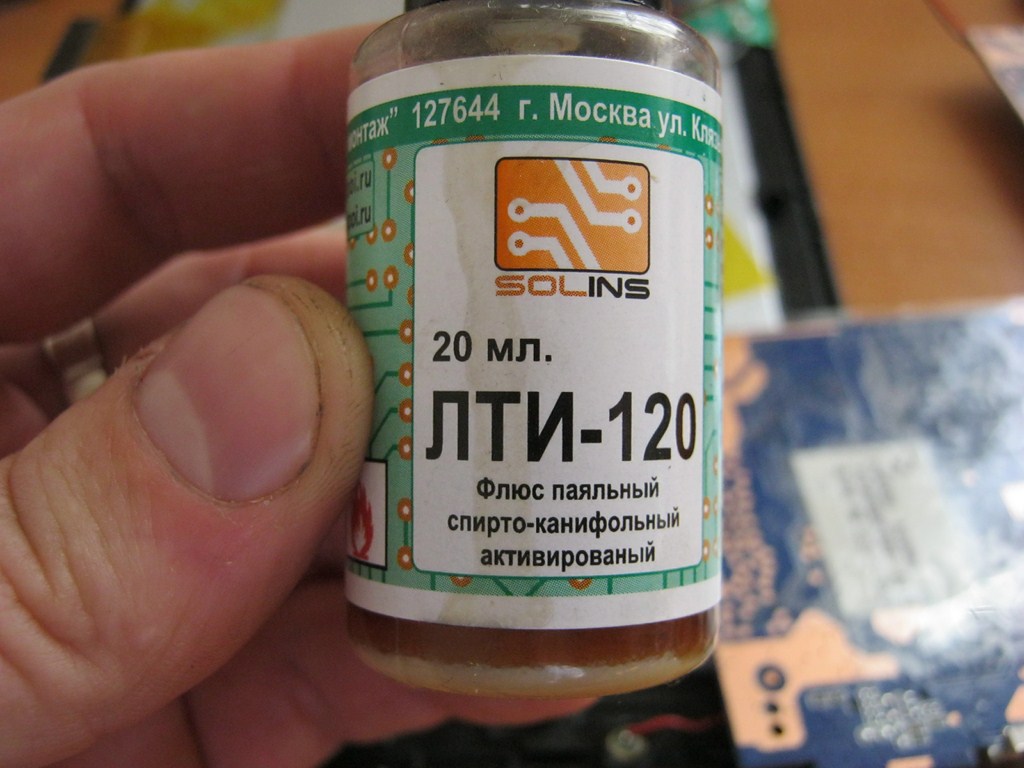
Now we take a new connector and smear its contacts with LTI-120 flux
A little about the connectors ... There are a lot of these micro USB connectors! Almost every manufacturer of tablets, phones and other bullshit uses their own micro USB connectors. But I still found a way out ;-). I went to Aliexpress and bought myself a whole set at once. Here link ... But now I have all kinds of connectors for chinese phones and tablets ;-)
As soon as the connector is anointed, we tin-coat its contacts with solder. The main thing here is not to overdo it, otherwise the connector will not fit into the through holes on the board.
The rest is simple. We insert the connector, solder the through contacts on the other side, and then liberally grease the signal contacts of the connector with gel flux and press down each contact with the tip of the sting. (Sorry, it's inconvenient to take a photo, since I only have two hands, and there was no one nearby)

and then we clean the connector from poop and carbon deposits
We do everything as it was and check the tablet:
Charging is in progress. We assemble the tablet completely and give it to the user.
You can also look at these articles about soldering the connectors on mobile phones: