The best editors for instagram. Famous bloggers and photographers on how to make your Instagram photos always look perfect
Then I installed six editors on my smartphone and began to master them. After some time, I realized that out of all this variety, I need two, well, three programs at most, and the process of shooting and processing has turned into a certain ritual. We can say that the days are gone when I used built-in Instagram filters and instantly posted photos. And noticing this behind me, I decided to write a post. Now all my shooting and processing on a smartphone is done like this:
And once we find a combination that we like, we can save it and add it to the presets already loaded. The quality you pay for, unfortunately: the app is only available in premium versions - this is also on the balance sheet, so the timing is right. Who is willing to sacrifice immediacy for greater versatility.
All filters can be edited, adjusted and tweaked with a dedicated set of options, and the most advanced can also apply edges, scratch and tear grunge masks, and more. We don't think it's worth it. Who is not looking for realism, trust at any cost.
1. SHOOTING. Standard Android application or Camera360 Ultimate... The latter is convenient in that you can quickly and easily set such shooting parameters as ISO, white balance, etc. It is useful in the case when the automation does not cope.
2. PRIMARY TREATMENT. Here the application turned out to be the leader Snapseed ... It turned out that in terms of the convenience of primary editing, a photo is better and not to be found. In one menu, all the necessary sliders: brightness, contrast, white balance, saturation ... In another, cropping. Yes, all these features are available in other applications, but in Snapseed, processing takes a minimum amount of time, which is important.
If we need to find the negative side, they are not realistic: too busy, too bright, but perfect for images with a strong personality. If you are ready to make some choices, you will love the selection of dynamic lights that are really fun and fun to use. Quality and beauty: they don't always go hand in hand.
It is easy to find the reasons for denigrating this type of application. Often it is the users themselves who provide them. And then it's a question of quality, because in the appeals, the apps we made with you just make the photos worse. Blurry, altered colors and implicit realities, unnecessary thumb shots and exaggerated contrasts. The point is that “realistic” is not always synonymous with “beautiful”. The filters we have suggested move images, make them interesting only because of their imperfection.


3. FILTERS. After processing, the photo either immediately goes to Instagram, or still requires the imposition of some kind of filter. The previous editor, like many others, has its own capabilities for this, but I settled on a very popular program VSCO Cam ... Yes, they have paid filter packages, but I personally did not mind spending at least 200 rubles on the main one. By the way, there are a dozen free ones, so you can try It is worth it, the filters in the program are very gorgeous, the colors are perfectly matched.
It's the rustle of vinyl in between the song, and the other is the drummer who hits the cymbal of late hair, the chorus that sings differently each time. And to the right extent it is required. This is the app that has earned celebrities like Zooey Deschanel and Katy Perry, Valentino Rossi and Darth Vader.
Vintage photography and social media: Pairing seems unstoppable. The Italian translation is great: almost complete and current in every part. 1: Very generous dimensions 2: Approvals and permits 3: Perfect translation into Italian. The design of the language is undeniable, from the style of buttons and toolbars to general customization. That's not necessarily a bad thing, really: we're sure the inherent simplicity and intuition contributed little to the app's success.
Like this. Thanks for attention. If you want to share some of your processing secrets - wellcome! And yes,
VSCOcam - perhaps the only application that I use regularly to process my photos, occasionally changing it from Snapseedto touch up the details.
As explained in this interesting mirror, each filter in the app consists of a combination of the chromatic characteristics of the camera and the film. The idea is already winning by itself thanks to interesting and expressive pictures; what really matters is the full functionality of social networks, both at the level of integration with existing ones, and as an internal exchange system. This "social" attitude appears from the very first moment. Using hashtags, we can also quickly find other themed photos or click on usernames to see their profile and their images.

So, in short, he is exploring the network; the difference between the tabs "Home" and "Explorer" is only at the starting point - friends in the first, they all look for the second. On the first screen, you don't need to take pictures, but see our friends' updates. The second, however, explores the entire network.
The third card, focused and highlighted in a different color, is actually dedicated to the creation of our masterpieces. No heavy weight, zoom control. Center button in blue: This is where you create new photos. Whatever the source, here we are on the post-processing screen, "where the magic happens," so to speak. Feature software is the disarming simplicity and speed of the creation process. Below we can select a filter, turn the corresponding frame on or off, insert a linear or radial blur, activate "super contrast" and rotate the image 90 degrees at a time.
In the process of selection desired filter I first of all pay attention to how it looks shine - it is important to align it and remove excessive yellowness. Don't overdo it with sharpness photos: too sharp pictures look, to put it mildly, strange and not very believable - the world around us is not as gloomy as it appears in many Instagram profiles.
Average time from start to finish: thirty seconds. In four taps, you go from click to finished product. More interesting than the original? It lists all the options for tags, geolocation and posting on the most popular social networking sites.
The fourth tab is a news channel dedicated to all the actions that users take. Finally, the last page on the right is a summary of our profile. We can look at statistics about who is following us and who we are following, see all the photos we have taken, and see our geotagged photo map. It is very pleasant to choose between two views, mosaics or details. The inevitable profile page, with followers, stats and all the photos.
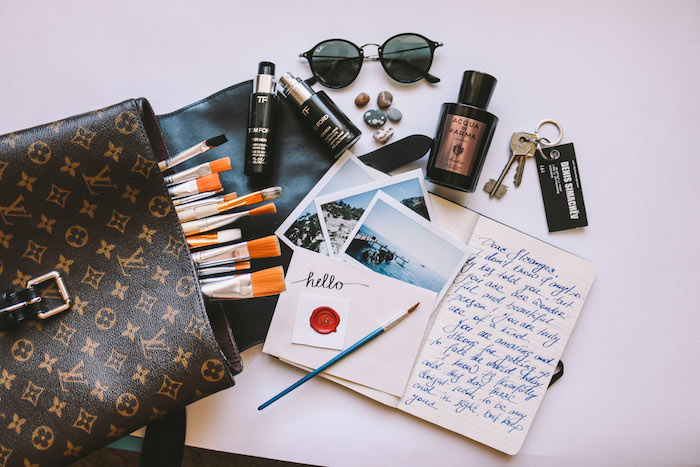
When laying out objects on the table, try to arrange them as harmoniously as possible, without overloading the picture. It is better to shoot such compositions from aboveholding the phone as much as possible horizontally to the surface. This also applies to food.

Also, the saved original pictures, like all the photos taken, are in the default album of the album. The original images are also saved. The settings menu can only be accessed with last page on the right, on the profile summary page. It is quite large and articulated, although usually not aesthetic or functional settings.
The menu is pretty big, but nothing technical. Find friends, notify and share settings, help, etc. The application itself is also very fast despite its large size; however, for the best user experience, we recommend at least one dual-core device. When it comes to photo quality, we noticed a significant parity between those taken with a proprietary "camera" and those taken with a system camera app.
I admit it honestly, I periodically shoot with a camera, because, in my opinion, only faces after inept use of the application can be worse than ugly and unappetizing food. Facetune... Most often, ardent adherents of Facetune in real life can be calculated in no time - it is they who visually look 20 kilograms more in real life than in the photo.
We note that with latest updates many users complain about crashes and freezing issues during use. We did some research and we found a tweet advising you to turn off high-quality photo processing. This is not a perfect solution, but at the moment it is better than nothing. We avoid making judgments about processing results that are subjective. However, we can feel that given the enormous value of the application, most users feel satisfied!
Let's say the app itself is amazing: ease of use, it lets you create interesting and expressive images in a matter of seconds in a matter of seconds. Completely free and free of ads. Ample dimensions We would have preferred to start in camera mode right away.
When shooting, try to align horizon Images. Personally, I try not to take too dark photos, as I have already noticed from the reaction of subscribers that they like it much more. bright frames. FROM contrast and color you should not overdo it either. Yes, we all love to embellish the color of the sunset, but it's better not to repeat these dangerous tricks with a face. There is nothing more beautiful than yours natural color of the skin.
Acquisition and processing of photographs. Let's see how to process a photo in a few easy steps. Press the "Photo" button to take a photo with the camera's camera or open a photo that was previously taken. At this point, we can open the camera to take a picture of the moment, or select a photo taken earlier from our smartphone gallery.
In this example, we have selected a photo taken earlier. As soon as we open it, we have to crop the photo intrusively into a square format. Four sliders allow us to choose the cut we like. We are now on the processing screen. Let's see the options that we have.

Effects, different effects are available to give different looks to our picture. Frames, activate or deactivate frames applied by some effects. Improves, automatically enhances the image. Very effective in some cases, counterproductive in others, should be checked from time to time.
Rotate, that's a little to say, just rotates the image. Once you find the combination that gives the image the desired appearance, we can press the forward button to go to the next screen to which you want to share the photo.
Often people are faced with the need for a friend who could take them off. But what to do when no one is around? Recently, a girl photographer told me about a bunch of smartphone gadgets: special remotes, selfie sticks, holders and other modern achievements. To be honest, in such situations it is easier for me to ask a passer-by. Use city \u200b\u200bbackground - Walls, graffiti, colored fences or passing taxis or falling shadows of buildings. Agree, photos on a white background are boring every day.
Below we will find keys for sharing photos in various in social networks... At this stage, we will find a copy of the photo we just edited and share it in the gallery. cell phones... It celebrates classic film aesthetics from ancient times. But before photographic filters, there is a lot of history where many of us don't realize that today's apps don't exist if they don't inspire analog photography.
So let's take a photo without modern technologies with our old cameras. First you need to choose a camera. Since these cameras are old, they are no longer in production. Each Holga is different, but you can expect your photo to be a mix of blur, dark fields, and light spots. Diana and Holga are known as toys. They have plastic lenses for creating dream photographs, and their fragile bodies are perfect for creating light leaks.
Concerning selfie , then even my mom knows that in the photo of the face taken from below, she will have an extra chin. And yes, stop blowing your lips.
This allows for incredibly sharp portraits. Next comes the film and their process. Here short review work of color film. If you want to experiment, you can create the film in the opposite chemical solution than it is intended. This results in dramatic changes in color and exposure. This is called cross-processing. Most professional photo labs allow you to cross-process if you ask for it.
Different films react differently to pass-throughs, and some films don't react at all. These are different films. Development takes place directly on film and the results can be seen in a minute or two. This lack of processing was made up for by Impossible Project, which produced a large number of films offering different colors and aesthetics.
Don't forget, your Instagram is your territory where you have the right to do whatever you want! But don't be surprised if someone suddenly gets tired of keeping an eye on your forks, spoons, cups, saucers, windows, feet, hands, nails, and so on.
 A PHOTO
Here are the movies and their processing processes that create colors that most closely resemble the original analog filters. Cross-processing shifts colors to blue and green. Polaroid 80 Chocolate Sepia is a film that produces in the familiar purple-brown tone.
When you cut through the colors are not overly painted, but the photos are brighter and more intense. This film has a slightly reddish purple color under normal processing. When you use pass-through, you'll be amazed! In the opposite direction, it offers warm reds.