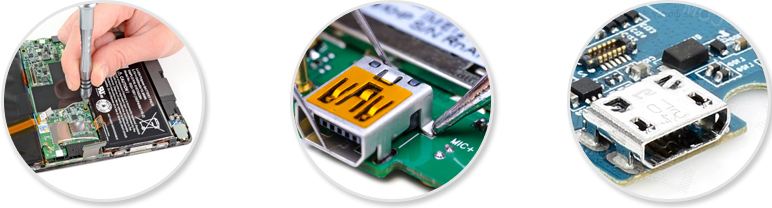
How to solder the connector on the phone. Remedy for poor contact of the USB connector of the tablet computer with peripheral devices. Micro usb connector has failed
The usual, most common microUSB connectors for soldering for repair.
In the store, they are sold at retail for 30-50 rubles, and in repair shops for 200-300 rubles.
Sent in a bag exactly 50 pieces 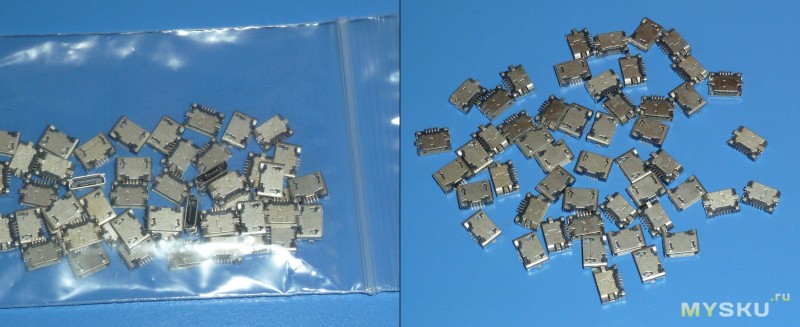
Their size is known to everyone, on the hand they look scanty 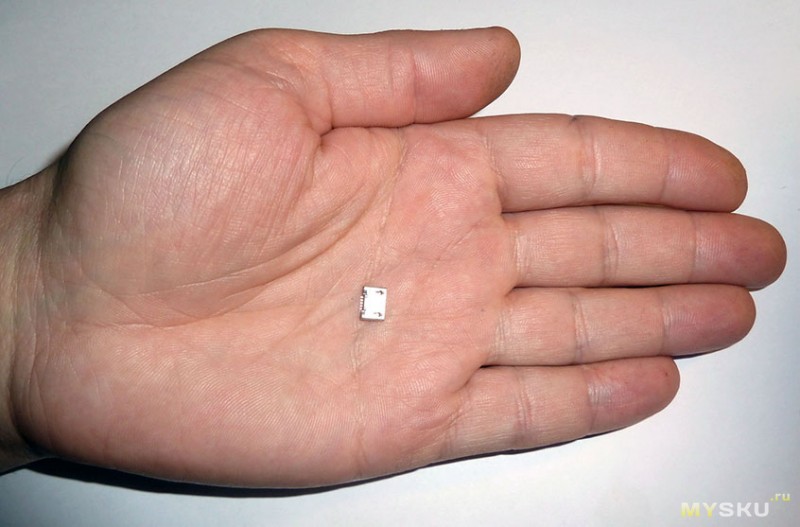
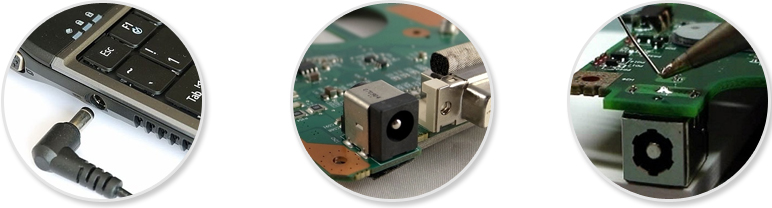
When to repair a power connector
So let's talk about them. The main advantages are physical size and user friendliness. And it also feels like two-way, so you don't have to think twice or try twice before connecting, when you get in, it will always be right.
Significantly increases the capabilities of the power connector. With a number of devices, this will also lead to shorter charging times, but this depends more on battery products than anything else. This way, in the future, all devices can have one connector, and you don't have to constantly deal with wiring: did you forget your cable?
B / W from all sides 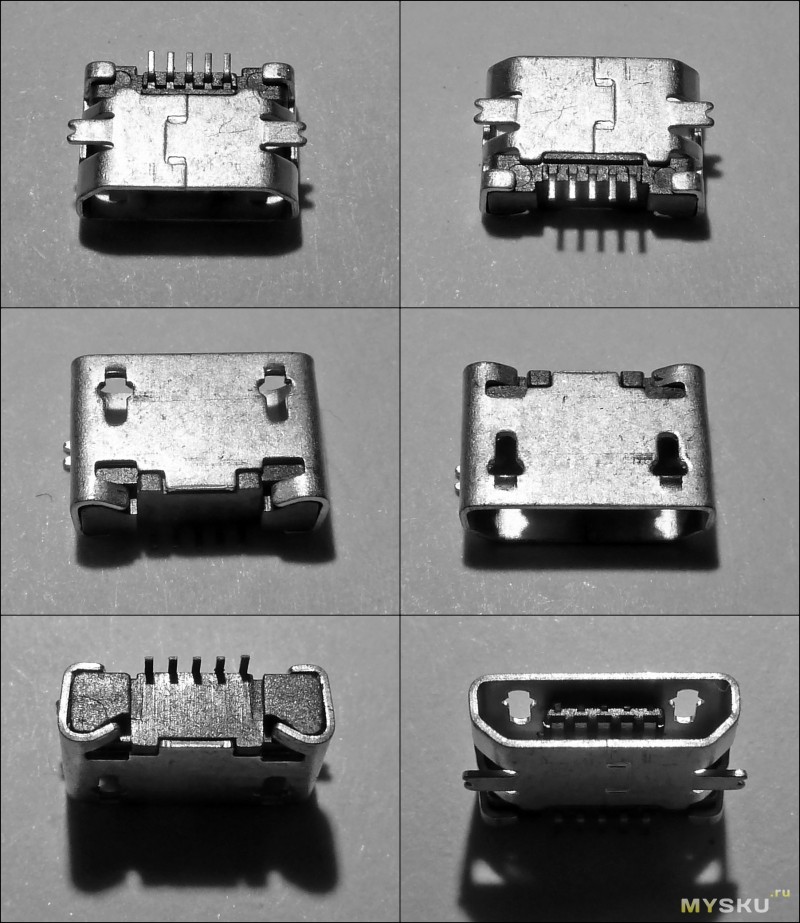
There is actually nothing to write about them, usually the reason for the failure is the careless insertion of the plug.
For illustrative example, I will show their real application.
A patient - lenovo tablet IdeaTab A7600 with a detached microUSB connector. In the workshop, they broke 2500r for repairs, after which he came to me :)
The process of disassembling the tablet was not photographed, but if someone is interested in this, write and I will describe the disassembly of the next piece of iron in more detail.
Seat after removing the remnants of the connector. 
It is noteworthy that they ripped it out "with meat" along with printed foil and connection paths. The sad result - there will be no more data transfer via USB - normal full recovery is too time consuming. If you have a good microscope and a steady hand, you can try to reconnect, otherwise the connector can only be used to charge the tablet.
At the Berlin exhibition, he talked a lot. New smart phones and tablets will get it in the blame. The tech world speaks unambiguously about wireless technologies. However, the cable will no longer be replaced. The low-power power supply is still only available for devices with less than 5 watts, among which ultrabooks or converters do not belong. Our goal is to eliminate cables completely.
This is sufficient for most laptops. The distribution of energy is also associated with another pleasant feature. In practice, the speed will be lower, still gigantic. A few weeks ago, my printer encountered a small but unfortunate failure consisting of. After about a dozen days, the socket disappeared for some time, and another attempt to solder it ended up completely closing the paths that were close to each other. Note. Changing the printer electronics will likely void the warranty on this item.
If the connector is soldered only by the ears, it will be pulled out after a maximum of a month of operation, so in this case it is necessary to strengthen the fastening.
Gluing the connector will not provide the necessary strength of the connection and, moreover, the glue may leak inside.
Another option is to make a clamp and press the connector to the board with it.
I chose the third option - solid side soldering of the connector, reinforced by the solder itself.
The technology is as follows:
- remove excess solder from the board 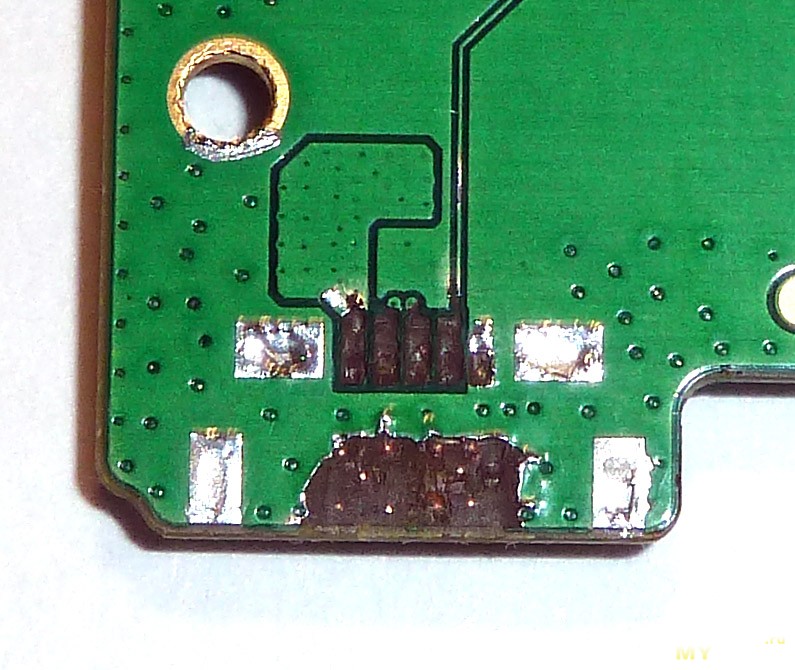
- we remove the mask with a scalpel in the right places 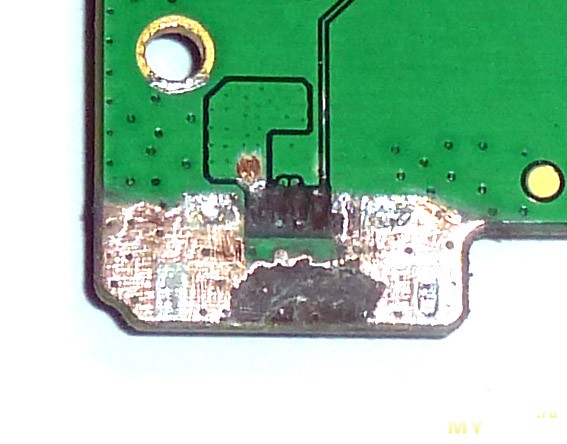
- wondering if this will be enough 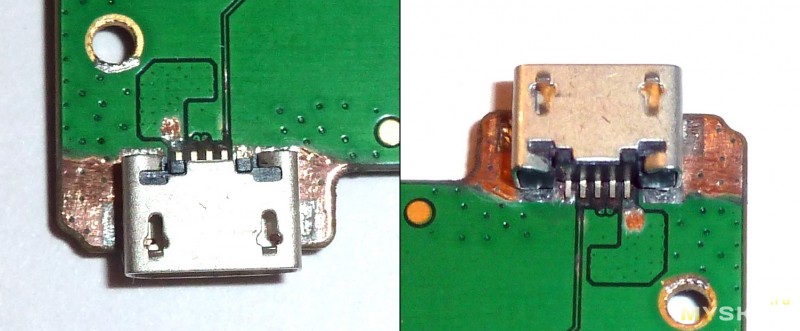
- tin foil, remove excess solder 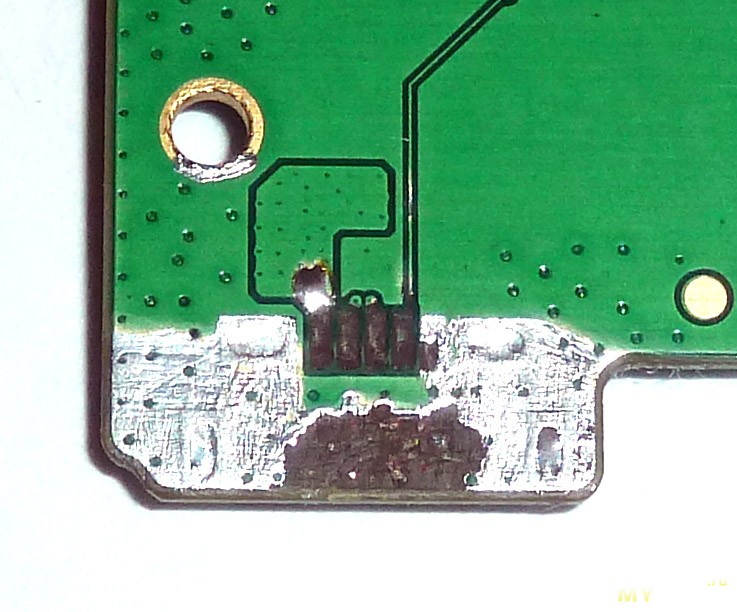
- we grab the connector in the area of \u200b\u200bthe ears 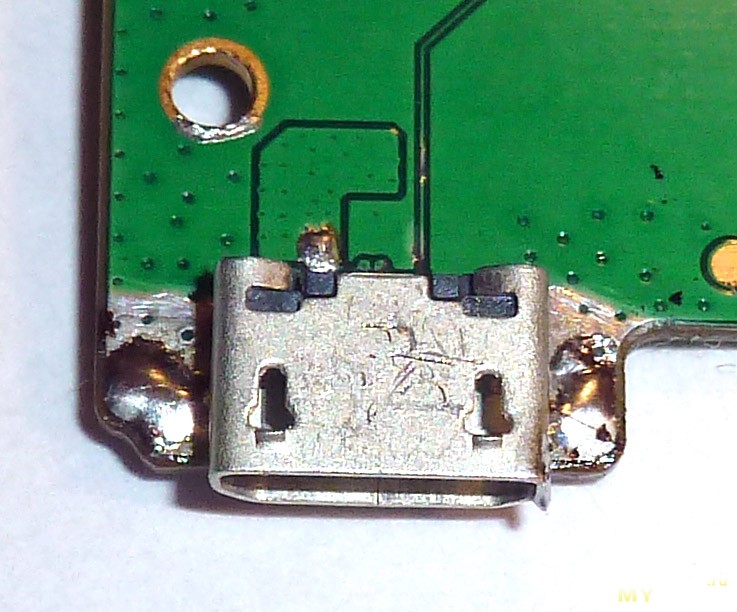
- insert an unnecessary microUSB plug into the connector 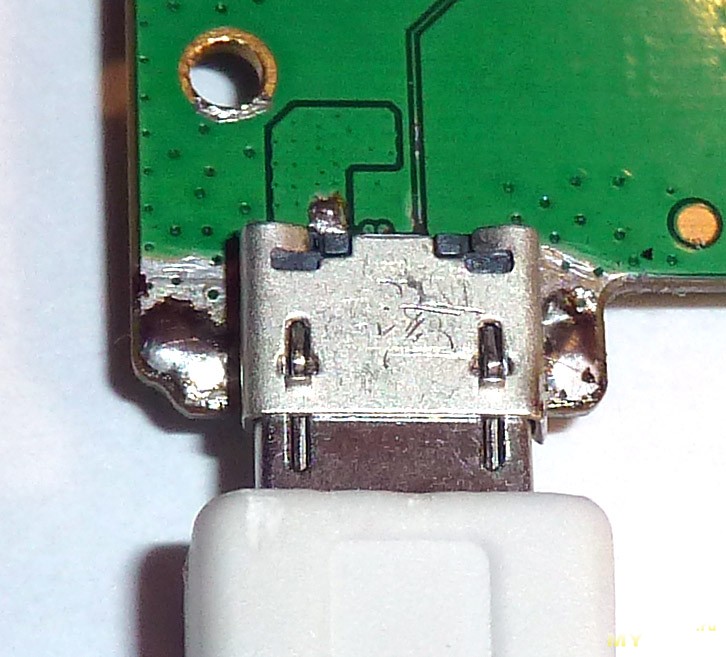
- tilt the board, solder the connector and completely fill the sides with solder.
- we solder the extreme power contacts 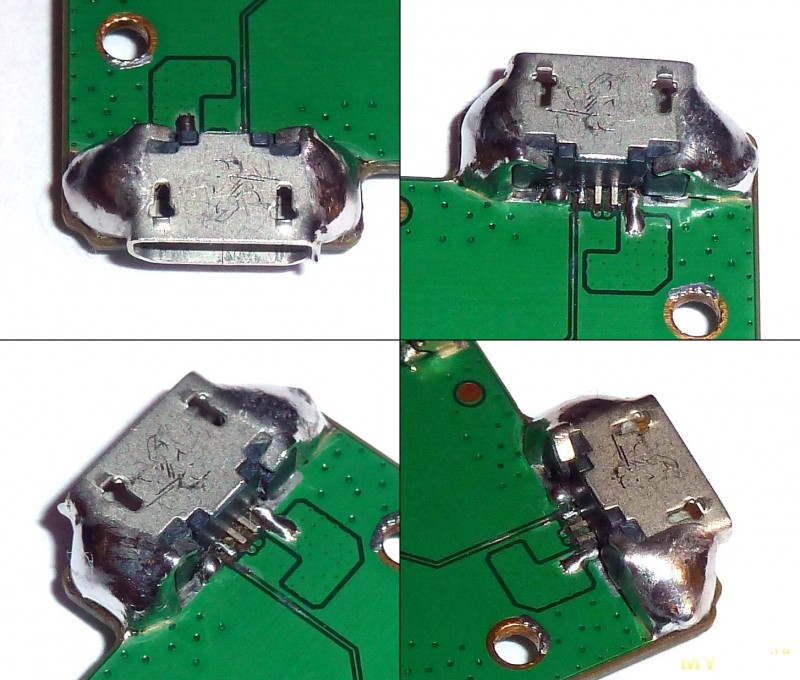
It is necessary to insert the plug for this. to reduce the likelihood of solder flowing into the socket (after which it will only have to be thrown out).
When soldering, do not use liquid flux, because it gets inside the connector and, moreover, facilitates the flow of solder there.
The result looks ugly, but reliable 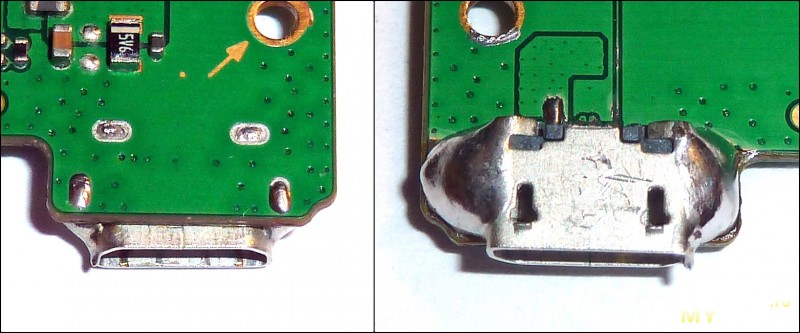
Surprisingly, they manage to tear out the connector soldered even in this way :)
Therefore, if your device is still under warranty, please contact the manufacturer first. The following solder procedures are not difficult and hazardous to damage all electronics, but it is possible. Of course, if someone is determined to sell the original socket, this will be the least invasive solution. Unfortunately, this is not limited to plugging in the wide pins on the sides of the port, but requires small sections to be dumped behind the connector.
Step 1: Fetching a Streaming Socket
It is important that the socket is lightly soldered, that is, the pins are aligned in 0.1 inch increments. The use of slots as shown below crashes in this case. This connector will be used by me in the next steps.
Step 2: Opening the electronic box
In older generation versions the electronic unit The printer consists of several polycarbonate plates that are attached one after the other.If everything is left as it is, the tablet will be charged with a current of no more than 0.5A. it does not define a jumper between DATA + and DATA- in the network adapter, so it is advisable to put the jumper on the board itself. To perform this operation, you need a microscope and a steady hand. There are no problems with hands yet, but there is no good microscope, so it was rather difficult to carry out this work.
It is necessary to remove the protective mask from the DATA + and DATA- dimes with a scalpel and solder them together with a drop of solder, the arrow showed this place. 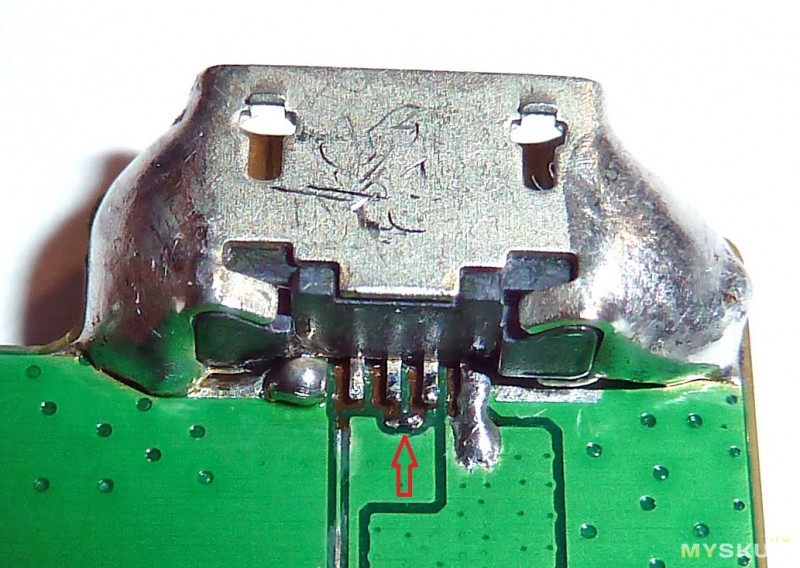
After the alteration, the tablet can be connected to a USB port for charging, which is capable of delivering the full charge current (in this case, 1.5A)
Step 3: remove the old connector
If the old, damaged connector is still sticking, it's worth getting rid of at this point. In addition to the soldering iron, a tin desiccator is also needed here.
Step 4: Prepare a new slot
After unpacking the set of plates and pins, one of them can be cut off from the pinch list.Step 5: soldering the pins to the plate
In my case, the green connector plate was too wide, so I had to cut it off and ground a little. You can help here with additional truncated output.
Step 6: Unscrew the electronics
I was lucky enough to unscrew the screws securing it, and after disconnecting a few cables, I lifted Rumba up. Step 7: Solder plate with connector. The four pins coming out of the board should be inserted into the holes in the Rumba and then cut and soldered.Now you need to file the case with a dremel or scalpel so that the solder rises do not interfere with putting the board in place. 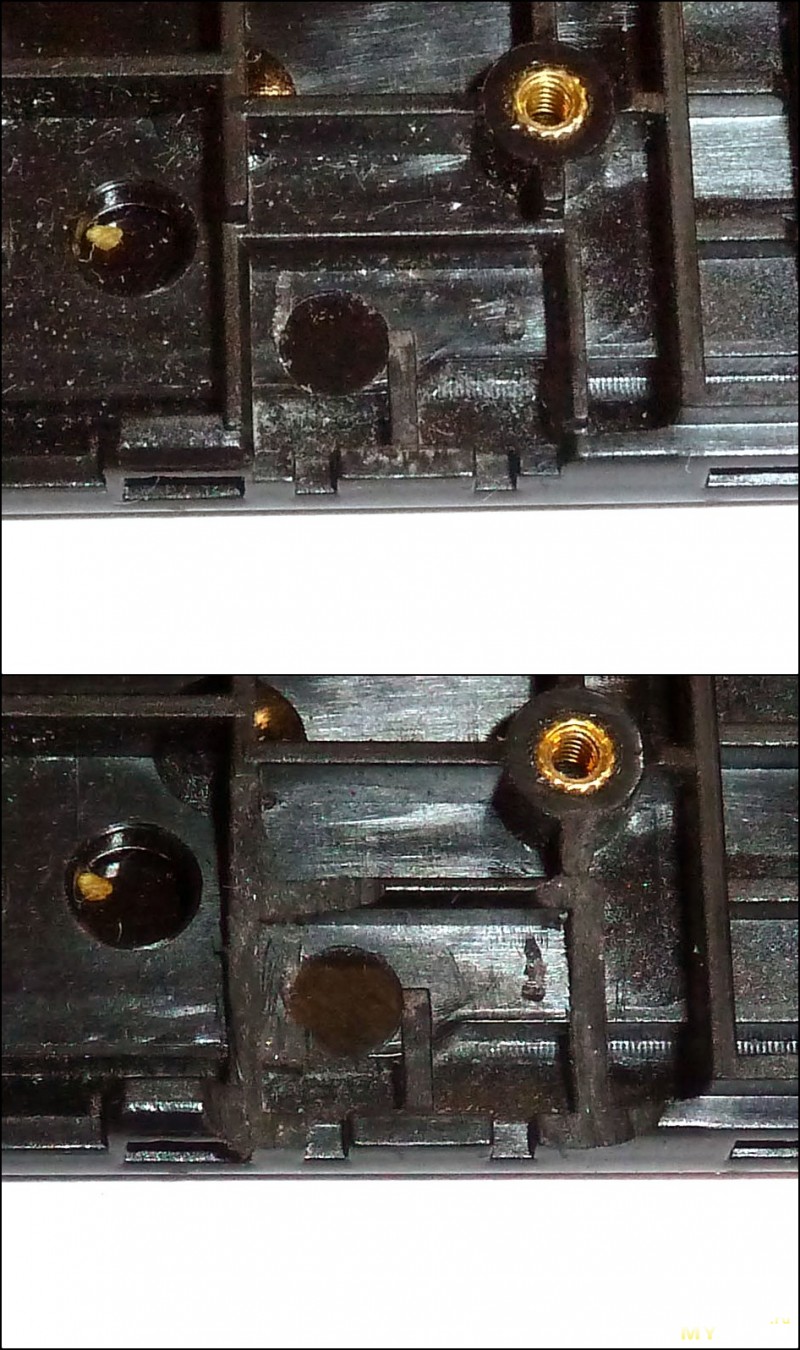
Installed fee 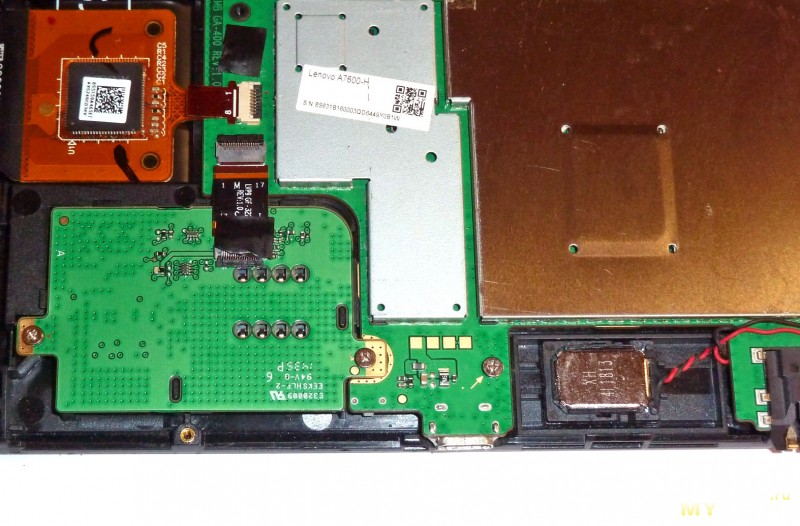
The tablet is assembled, the charge is current 1.45A 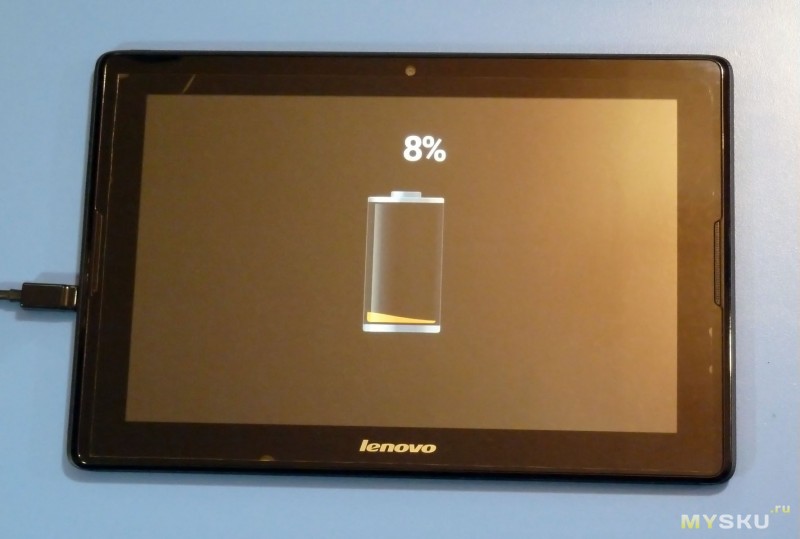
Conclusion: take care of yourself, time and gadgets :)
I plan to buy +77 Add to favorites Review liked +109 +216Phone, tablet, laptop not charging? We will replace the power connector with a guarantee!
Replacing the connector on the phone
- MicroUSB replacement period 1-2 hours
- Phone connector replacement cost 600 rubles
- Attention! The price is for collapsible phones with a removable battery
Replacing the connector on the tablet
- The time to replace USB on the tablet is 1-2 hours
- The cost of replacing the tablet charging socket 800 rubles
- Attention! The price is for connectors not on the ribbon
Replacing the laptop power socket
- The time to replace the laptop power connector is 1-4 hours
- Laptop charging connector replacement cost 1200 rubles
- Attention! The timing is specified taking into account the availability of spare parts
Replacing the USB connector, laptop port
- The term for replacing a laptop USB port is 2-3 hours
- The cost of the 1st connector is 1200 rubles
- The cost of the 2nd and subsequent connector is 500 rubles
When to repair a power connector
- The device does not charge, does not respond to charging
- Visible damage to the power connector
- The device charges only in a certain position
- The device shows a charge, but does not charge
Types of charger connectors:
- Micro usb (micro usb) connectors, its replacement.
As a rule, the micro usb charging connector is soldered into the motherboard, but in many Samsung models the charging connectors come with the entire bottom board (it also contains the microphone and the phone antenna) because of this feature of the phone, the repair price is higher than just changing the connector (Samsung is indicated as an example, this feature is found in all brands of phones).
- Charging connector mini usb and its replacement.
This type of connector is used much less often on older phones and chinese phones (more common on e-books and navigators). It is soldered into the motherboard, you need to carefully remove it with a soldering iron or hairdryer, and install a new one (do not try to install the old connector).
- Replacing the charging connector for the iphone Lightning (or 30-pin in older iphone models)
On iPhones, the charging connector changes more easily, without the participation of a soldering station, just parsing and installing the lower cable (also on it a microphone) both on old iPhones and new ones.
- There are also other connectors, as on old phones Nokia, Sony Ericsson, and on new Samsung models, they are less common, the principle of operation and replacement is the same, just the appearance is different.